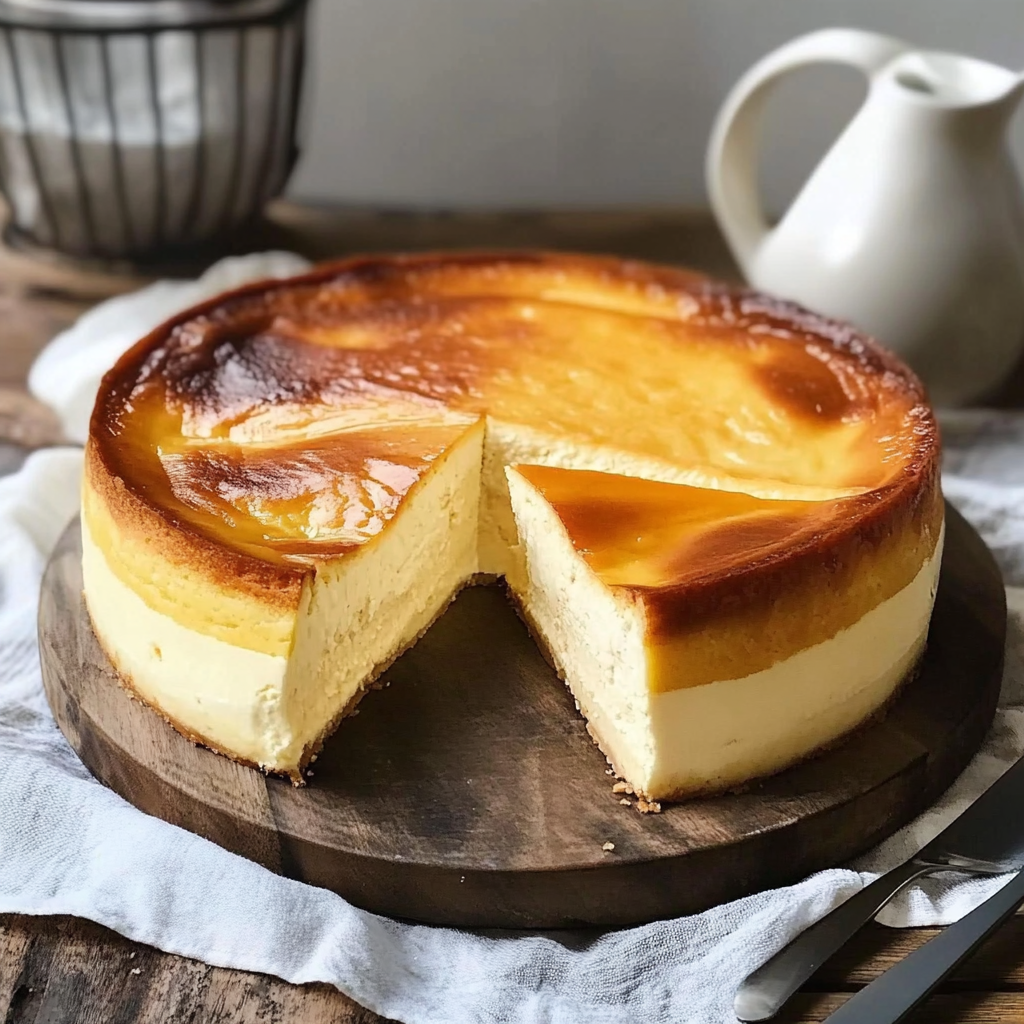
Your New Go-To Dessert: Basque Cheesecake
Hey there, cheesecake lover! If you’re like me, you have a soft spot for desserts that are both creamy and indulgent. Today, I’m thrilled to share with you my all-time favorite dessert—an Authentic Basque Cheesecake. What’s so special about this cheesecake, you ask? Well, it’s got a beautifully burnt top and a creamy center that’s just irresistible! Plus, it’s super simple to make, so you’ll want to whip this up for every occasion.
Nutritional Benefits of Basque Cheesecake
Now, I know what you might be thinking: cheesecake isn’t exactly a health food. But did you know that a serving of cheesecake can provide some important nutrients? The cream cheese is a good source of calcium, which is great for your bones. And while sugar and heavy cream are high in calories, using them in moderation means you can enjoy a sweet treat without completely derailing your diet. Pair it with some fresh berries on the side, and you’ll have a dessert that’s both decadent and slightly uplifting!
Fun Variations to Make
If you’re looking to switch things up a bit, here are some fun variations you can try:
- Citrus Zest: Add a tablespoon of lemon or orange zest to the batter for a refreshing twist!
- Chocolate Lover’s Delight: Mix in some melted chocolate or swirl chocolate ganache on top before serving for a rich chocolate flavor.
- Spiced Delight: Sprinkle in a little cinnamon or nutmeg to give it a warm, spiced flavor that’s perfect for fall.
How to Make Authentic Basque Cheesecake
Ingredients
- 2 (8 oz) packages of cream cheese, softened
- 1 cup granulated sugar
- 1 cup heavy cream
- 4 large eggs
- 1 teaspoon vanilla extract
- 1 tablespoon all-purpose flour
- 1/4 teaspoon salt
- 1 tablespoon unsalted butter (for greasing the pan)
Instructions
- Preheat your oven to 400°F (200°C). Grab a 9-inch springform pan and grease the bottom and sides with unsalted butter so that your cheesecake comes out nicely.
- In a large mixing bowl, use an electric mixer to beat together the softened cream cheese and granulated sugar until it’s smooth and creamy—no lumps allowed!
- Next, pour in the heavy cream and beat on low speed until everything is just combined. Remember, we’re going for creamy, not whipped!
- Crack the eggs into a separate bowl and give them a light whisk. Gradually add the eggs to the cream cheese mixture, mixing on low speed until everything is well incorporated.
- Add in the vanilla extract, all-purpose flour, and salt. Blend until just combined, being careful not to overmix. Your batter should be slightly thick but still smooth.
- Pour the delicious batter into your prepared springform pan, and use a spatula to smooth the top.
- Now it’s time to bake! Pop the cheesecake in the oven and let it bake for about 40-45 minutes. You’ll know it’s ready when the top is deeply golden brown and the center is just slightly jiggly.
- Once it’s done baking, turn off the oven and crack the oven door open about 1 inch, allowing the cheesecake to cool gradually inside for about an hour to avoid cracking.
- After cooling, take out the cheesecake and let it sit at room temperature for another hour.
- Finally, transfer it to the fridge for at least 4 hours, or overnight for better texture. When you’re ready to serve, carefully remove the cheesecake from the springform pan, slice it up, and enjoy!
Practical Tips
- To avoid cracks in your cheesecake, ensure that all ingredients are at room temperature before you start mixing.
- If you find the top is too dark for your liking, you can loosely cover it with aluminum foil for the last part of baking.
- This cheesecake can be made a day ahead of time! It tastes even better after chilling overnight.
- Keep any leftovers stored in an airtight container in the refrigerator—though I doubt there will be any!
Equipment Needed
Here’s what you’ll need to make your Basque cheesecake:
- A 9-inch springform pan
- A mixing bowl and an electric mixer (or a whisk if you’re feeling adventurous!)
- A spatula for smoothing the batter
- A whisk for the eggs
- A cooling rack (optional, but nice to have for even cooling)
Frequently Asked Questions
- Can I use low-fat cream cheese? Sure! Just keep in mind the texture might be a bit different, but it should still turn out tasty.
- What if I don’t have a springform pan? You can use a regular cake pan, but make sure to line it with parchment paper for easy removal.
- How long will leftovers last? They can last about 3-5 days in the fridge, stored in an airtight container.
- Can I freeze the cheesecake? Yes! Wrap it well in plastic wrap and foil, and it can be frozen for up to 3 months. Just thaw it in the fridge before serving!
- Is it necessary to use heavy cream? Yes, heavy cream contributes to the rich and creamy texture, but you can try using half-and-half for a lighter version.
Let’s Connect!
Are you ready to tackle this delicious Basque cheesecake? I really hope you’ll give it a try! I’d love to hear how surprisingly simple it is and how much you enjoy it. Don’t forget to pin this recipe to your Pinterest board so you can keep it handy for next time. Happy baking!
