Creating Delicious Banana Pudding Rice Krispie Treats
Hey there! If you’re looking for an easy, no-bake dessert that brings a unique twist to a classic favorite, you’ve come to the right place! Today, I’m excited to share my recipe for Banana Pudding Rice Krispie Treats. They’re sweet, chewy, and oh-so-delicious, plus they combine some of my favorite flavors: bananas and creamy pudding. Trust me, these treats will have you coming back for seconds!
Nutritional Benefits
While these delightful treats are certainly indulgent, they do have a couple of nutritional perks you might not expect! Bananas are a great source of potassium, which is essential for heart health and digestive function. Plus, they add natural sweetness that can help reduce the need for extra sugar in recipes. Using wholesome ingredients like unsalted butter and instant pudding mix can also help you control what goes into your treats. So, while they’re not a health food, they do have some redeeming qualities!
Fun Adaptable Variations
One of the best things about this treat is how easy it is to adapt! Here are a few ideas to customize these Rice Krispie treats to suit your tastes:
- Swap the Flavor: Instead of banana pudding, you can try chocolate or vanilla for a different twist!
- Add Nuts: Chopped walnuts or pecans can be added for a nice crunch that balances the sweetness.
- Dairy-Free Option: Use coconut whipped cream and dairy-free margarine to make this a dairy-free treat without compromising flavor!
- Extra Toppings: Top with mini chocolate chips or drizzle some melted chocolate over the top for a bit of decadence.
Easy No-Bake Recipe for Banana Pudding Rice Krispie Treats
Ingredients
- 6 cups Rice Krispies cereal
- 1 cup mini marshmallows
- 1/2 cup unsalted butter
- 1/2 teaspoon vanilla extract
- 1 cup banana pudding mix (instant)
- 2 cups whipped topping (like Cool Whip)
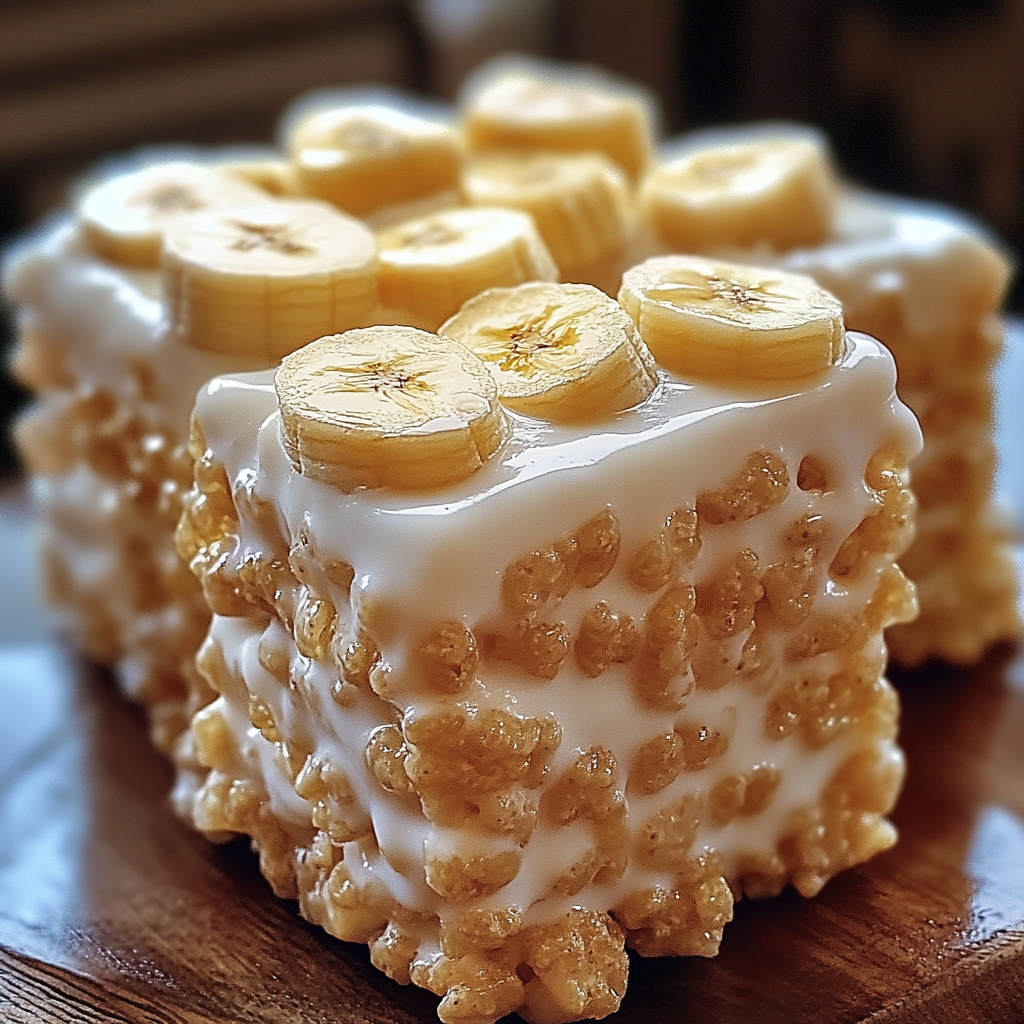
- 2 ripe bananas (sliced)
- Extra banana slices for topping
- Optional: additional mini marshmallows for garnish
Instructions
- Prepare the Pan: Line an 8×8-inch or 9×9-inch square baking pan with parchment paper or lightly grease it with cooking spray to make it easier to remove the treats later.
- Melt Butter and Marshmallows: In a large saucepan over low heat, melt the butter. Once it’s all melted, add the mini marshmallows. Keep stirring until they’re completely melted and smooth. Remove from heat once fully combined.
- Add Flavoring: Stir in the vanilla extract into the melted marshmallow mixture until everything is mixed in nicely.
- Combine with Cereal: Gradually fold in the Rice Krispies cereal, making sure every piece is coated in that gooey goodness!
- Prepare the Pudding Mixture: In a separate bowl, blend together the banana pudding mix with the whipped topping until silky smooth.
- Layer the Treats: Spread half of the Rice Krispies mixture into the prepared pan, pressing it down evenly to create a solid base.
- Add Pudding Layer: Gently spread the banana pudding over the first layer of Rice Krispies, making sure to cover it evenly.
- Add Bananas: Layer the sliced bananas on top of the pudding to give it that fresh, fruity flair!
- Top with Remaining Cereal: Press the rest of the Rice Krispies mixture over the banana layer to seal everything in.
- Finish and Chill: If you like, sprinkle some extra mini marshmallows on top for a fun decoration. Next, pop the whole thing in the refrigerator for at least an hour to set!
- Serve: Once set, cut these delightful treats into squares and add some additional banana slices on top before serving. Enjoy every bite!
Practical Tips for Making the Best Treats
- Use fresh bananas to ensure the best flavor and texture. Just slice them right before you’re ready to add them.
- To make cutting easier, let the treats chill in the refrigerator for a few hours; this helps them firm up nicely.
- These treats can be stored in an airtight container in the fridge for up to three days, but they’re best enjoyed fresh!
Equipment Needed
Here’s what you’ll need to make these delicious treats:
- Large saucepan for melting the marshmallows
- Wooden spoon or spatula for mixing
- 8×8-inch or 9×9-inch square baking pan
- Parchment paper or cooking spray
- Mixing bowls for the pudding and whipped topping
Frequently Asked Questions
- Can I use homemade whipped cream instead of Cool Whip? Absolutely! Just make sure to use about the same amount as the whipped topping called for.
- Are these treats gluten-free? Yes! Rice Krispies are typically gluten-free, but always check the packaging to confirm.
- How do I store leftovers? Store them in an airtight container in the fridge for up to three days.
- Can I freeze these Rice Krispie treats? While they can be frozen, it’s best to eat them fresh for optimal texture. If you do freeze them, wrap tightly in plastic wrap and then in foil.
- What’s the best way to cut them into squares? Use a sharp knife and lightly spray it with cooking spray to make cutting easier.
Now that you’ve got this simple and super delicious recipe in hand, it’s time for you to whip up a batch of these Banana Pudding Rice Krispie Treats! I’d love to know how they turn out for you! If you enjoyed this recipe, why not follow me on Pinterest for more sweet ideas? Let’s keep the conversation going in the comments or on social media! Happy baking!
