Introduction to Bundt Pan Nachos
Hello, fellow snack lovers! Today, I’m excited to share with you a fun twist on a party favorite—Bundt Pan Nachos! 🎉 You know those moments when you’re craving nachos but want to present them in a unique way? Well, I have your answer right here! This recipe is perfect for gatherings, movie nights, or just a cozy evening in. Believe me, once you try it, you’ll want to make it again and again!
Nutritional Benefits
Did you know that nachos can actually be a hearty and fun meal when made right? Sure, tortilla chips might be a little indulgent, but you’re also packing in some protein with the ground beef (or turkey, if you prefer). Plus, don’t forget about the fresh toppings like lettuce, tomatoes, and guacamole! These add vitamins and healthy fats that help balance out your snack. So, go ahead and enjoy every gooey, cheesy bite knowing you’ve got some goodness in there as well!
Adaptable Variations
- Switch the Meat: Feel free to swap out beef for ground turkey or even plant-based meat to make this recipe vegetarian-friendly.
- Layer it Up!: You can add refried beans or even layers of black beans in between to give an extra protein punch.
- Cheese Choices: Try different cheeses like pepper jack for spice or Monterey Jack for a creamy texture.
- Toppings Galore: Don’t have cilantro? No problem! Chopped green onions or even fresh jalapeños make great alternatives.
- Make it Spicy or Mild: Adjust your taco seasoning to a mild version if you’re cooking for kids, or go for a spicier mix if you love the heat!
Bundt Pan Nachos Recipe
Ingredients
- Tortilla chips
- Ground beef (or turkey)
- Taco seasoning
- Shredded cheddar cheese
- Shredded lettuce
- Diced tomatoes
- Sour cream
- Chopped fresh cilantro
- Guacamole
- Black olives (sliced)
- Jalapeños (sliced, optional)
- Green onions (sliced, optional)
- Olive oil (for cooking)
Instructions
- First things first, let’s preheat your oven to 350°F (175°C). This is an important step to ensure everything cooks evenly and quickly!
- Grab a skillet and heat a tablespoon of olive oil over medium heat. Then, add in the ground beef. Cook it until it’s all browned, making sure to break it apart with a spatula as it cooks.
- Once browned, drain any excess fat from the beef. Stir in your taco seasoning according to the package instructions—don’t forget to add a splash of water to help everything come together, and let it simmer for a few minutes!
- Now, let’s prepare our bundt pan! Lightly grease it with some cooking spray or a little olive oil to prevent the nachos from sticking.
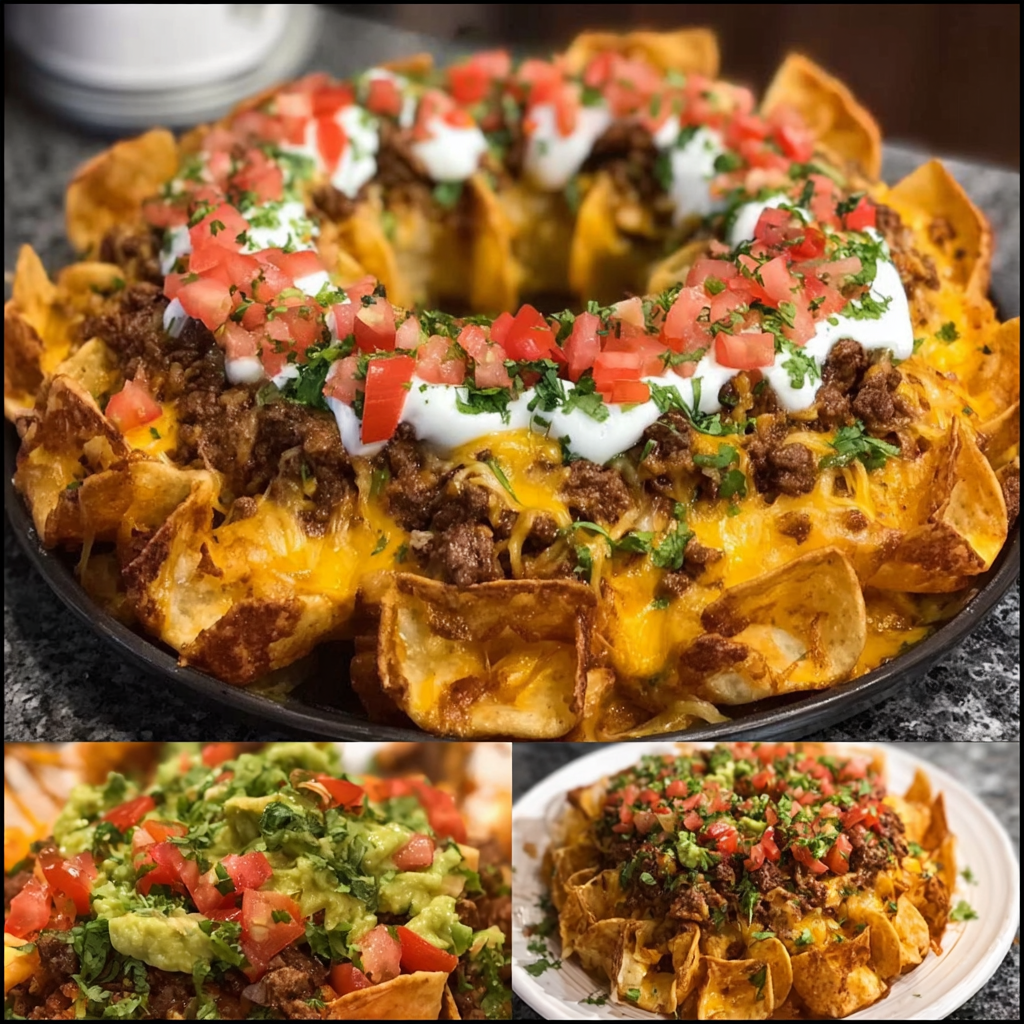
- Next, take your tortilla chips and layer them around the edge of the bundt pan, creating a circular ‘wreath’ shape. Leave the center empty; we’ll come back to that in a moment!
- Once you’ve got that first layer of chips done, sprinkle half of your shredded cheddar cheese over the top of the chips for that ooey-gooey goodness.
- Now it’s time to add a layer of the seasoned ground beef over the cheese. Follow it up with another layer of tortilla chips, and finish off with the remaining cheddar cheese on top.
- Pop that bundt pan into the oven and let it bake for about 10-15 minutes. We want the cheese melted and bubbly—trust me, you’ll love how good it smells!
- Once it’s done, carefully remove the bundt pan from the oven and let it cool down for a few minutes. It’s going to be pretty hot!
- To serve, gently flip the bundt pan onto a large serving platter. Give it a little tap on the bottom if you need to coax the nachos out. This reveal is always so satisfying!
- Fill the center with shredded lettuce, diced tomatoes, sour cream, and guacamole—yummy! You can even make it look extra nice by sprinkling some chopped cilantro on top.
- If you want, you can also add sliced black olives, jalapeños, and green onions for that finishing touch. It’s the perfect way to show off your delicious Bundt Pan Nachos!
- Dig in and enjoy your creation!
Practical Tips
- Make sure to use sturdy tortilla chips, so they hold up under all those toppings. You don’t want a soggy nacho experience!
- Feel free to make your nachos in advance by prepping the beef and cheese, then baking right before serving to keep them fresh.
- If you have leftovers (which is rare, but it can happen!), store them in an airtight container in the fridge. Just know the chips might get a bit soft, but they’re still delicious!
Equipment Needed
A few tools will make your cooking experience easier:
- A good skillet for browning the meat
- A spatula for breaking up the beef
- A bundt pan for that unique nacho shape
- Measuring cups and spoons for accurate ingredients
- A large serving platter for displaying your nachos once they’re ready
Frequently Asked Questions
- Can I use different types of meat? Absolutely! Ground turkey or even shredded chicken work well too.
- Can I make this vegetarian? Yes! Just leave out the meat and add beans or more veggies for substance.
- What if I don’t have a bundt pan? No worries! You can use a regular baking dish and layer the nachos in a ‘mountain’ style instead.
- How do I store leftovers? Store nachos in an airtight container in the fridge, but it’s best enjoyed fresh for the ultimate crunch!
- Can I get creative with toppings? Definitely! You can personalize your topping choices to suit your tastes or even use up whatever you have at home.
Did you whip up these Bundt Pan Nachos? I’d love to hear how they turned out! Snap a picture and share it on Pinterest or tag me to show off your impressive nacho creation. Happy snacking, friends!
