Welcome to the Sweetest Adventure: Burnt Basque Cheesecake!
Hey there, cheesecake lover! If you’re like me, you know that there’s just something magical about a cheesecake that’s creamy, rich, and just a little bit burnt on top. Yep, I’m talking about the fabulously delicious Burnt Basque Cheesecake! This treat is not only easy to whip up, but it’s also a showstopper that will leave your friends and family asking for seconds. Let’s dive into this fun and simple recipe together!
Why You’ll Love Burnt Basque Cheesecake
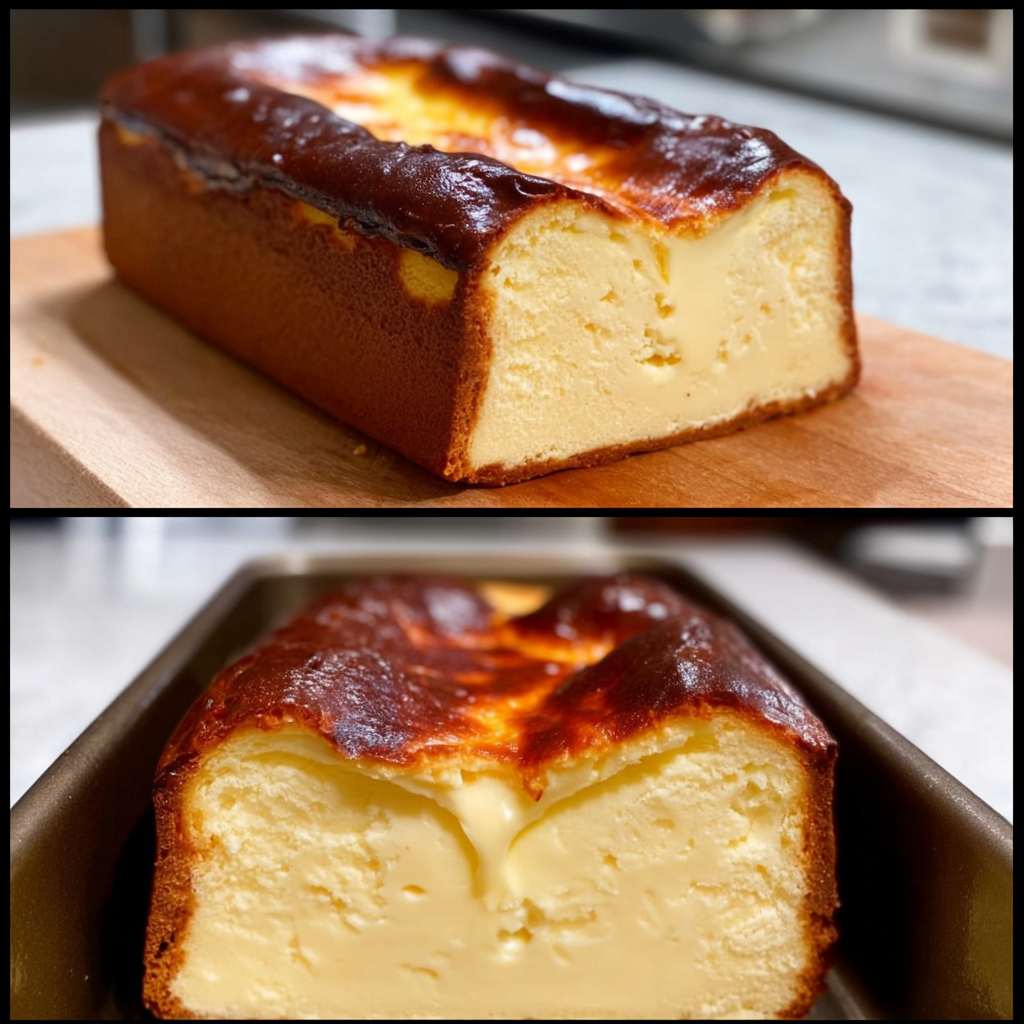
This cheesecake is a delightful blend of flavors and textures. It’s beautifully creamy inside with that signature dark, almost caramel-like crust on top. The burnt exterior adds just a hint of flavor while keeping the inside wonderfully smooth. Plus, it’s silly easy to make! I appreciate how simple ingredients come together to create something so divine.
Nutritional Benefits
Now, I know cheesecake isn’t exactly a health food, but there are a few perks! The cream cheese and heavy cream provide calcium, which is great for your bones. If you’re looking to indulge occasionally, this cheesecake is a smart choice. Plus, you can control how much sugar you add, which is a win in my book. You could even think about replacing some sugar with a sweetener if you want to lighten it up!
Adaptable Variations for Your Taste
- Flavor Add-Ins: If you’re feeling adventurous, try adding a tablespoon of lemon zest or orange zest for a refreshing citrus twist.
- Dairy Alternatives: You can swap the heavy cream for coconut cream or a dairy-free alternative to make this cheesecake dairy-free.
- Gluten-Free Option: Use gluten-free flour instead of all-purpose flour to make this cheesecake gluten-free too!
Easy Burnt Basque Cheesecake Recipe
Ingredients
- 1 pound (450g) cream cheese, softened
- 1 cup (200g) granulated sugar
- 1 teaspoon vanilla extract
- 4 large eggs
- 1 cup (240ml) heavy cream
- 1/4 cup (30g) all-purpose flour
- 1/4 teaspoon salt
- Butter or oil for greasing the loaf pan
Instructions
- First, let’s preheat that oven to 425°F (220°C). While that heats up, grab your loaf pan and grease it well with butter or oil. This ensures our cheesecake comes out without any drama later!
- In a big mixing bowl, let’s combine the softened cream cheese with the granulated sugar. Using an electric mixer, beat them together until it’s super smooth and creamy, around 2-3 minutes tops.
- Now, add in the vanilla extract and keep mixing until it’s all nicely incorporated.
- It’s egg time! Add the eggs one by one, making sure to mix well after each addition. You want everything to come together beautifully!
- Next, we’re going to gradually pour in the heavy cream while mixing on low speed, so we don’t splatter. Once it’s combined, we’re golden!
- Grab a sifter and sift the all-purpose flour and salt right into the mix. Gently fold it in with a spatula until just combined. Overmixing is a no-no here; we want to keep it light and airy!
- Now pour that luscious cheesecake batter into the prepared loaf pan and smooth the top with a spatula. It should look dreamy!
- Pop it in the oven and let it bake for about 50-60 minutes. Look for that lovely deep caramelized top with a bit of burnt color. The inside should still be jiggly—that’s the secret to a creamy cheesecake!
- Once baked, take it out and let it cool in the pan for about 15 minutes. The cheesecake will settle as it continues to cool.
- Carefully remove it from the pan and let it cool to room temperature. For the best flavor, toss it in the fridge for at least 4 hours, or better yet, overnight!
- When you’re ready to serve, slice it up and enjoy it chilled. You can also garnish it with some fresh fruits or a dusting of powdered sugar if you like!
Practical Tips for Success
- Keep an eye on your cheesecake while it’s baking! Ovens can vary, and you want that lovely burnt top without overdoing it.
- For the smoothest slices, use a knife dipped in hot water and wiped dry before cutting.
- This cheesecake can be stored in the refrigerator for up to 5 days. Just make sure it’s in an airtight container to keep it fresh!
Equipment Needed
Here’s what you’ll need to make this delicious cheesecake:
- A 9×5-inch loaf pan (don’t forget to grease it!)
- A large mixing bowl
- An electric mixer (a hand mixer works great too!)
- A spatula for folding in the flour
- A sifter for the dry ingredients
- A knife for slicing (and don’t forget that hot water trick!)
Frequently Asked Questions
- Can I use low-fat cream cheese? While low-fat cream cheese will work, it may not be as creamy. Full-fat gives you that rich texture that makes this cheesecake special!
- What can I serve with the cheesecake? Fresh berries, chocolate sauce, or a sprinkle of caramel are all excellent choices!
- Can this cheesecake be frozen? Yes, you can freeze it! Wrap it tightly in plastic wrap and it should last up to 3 months. Just thaw it in the fridge before serving.
- Is it normal for the cheesecake to crack? A few cracks are normal, especially with the caramelized top. It adds character!
- How can I make it more chocolatey? Add cocoa powder to the batter, or serve it alongside a rich chocolate sauce!
Your Turn to Bake!
Now that you have this easy recipe for Burnt Basque Cheesecake, it’s time to get baking! I can’t wait to hear how yours turns out! If you loved this recipe, share your creations on Pinterest or tag me in your posts. Let’s spread the cheesecake love together!
