Welcome to Cheesy Garlic Chicken Wrap Heaven!
Hello, lovely cooks! If you’re on the lookout for a deliciously easy dinner idea that’s bursting with flavor, you’re in the right spot! I absolutely adore these Cheesy Garlic Chicken Wraps. Not only are they super tasty, but they’re also simple to make and can be tailored to your taste. Plus, they’re great for lunch or a quick snack too!
Nutritional Benefits of Cheesy Garlic Chicken Wraps
Let’s chat about the health perks of this dish! Using boneless, skinless chicken breast means you’re getting a lean source of protein, which is great for muscle repair and keeping you feeling full. The fresh garlic isn’t just for flavor; it has tons of health benefits including boosting your immune system. And while cheese is creamy and delicious, it also provides calcium which is essential for healthy bones!
Fun Variations to Try
If you’re in the mood for some creativity or need to cater to specific dietary needs, here are a few great options to consider:
- Veggie Delight: Swap out the chicken for sautéed bell peppers, spinach, or mushrooms for a delightful vegetarian option.
- Spicy Twist: Add some sliced jalapeños or a dash of hot sauce to kick up the flavor if you like a little heat!
- Dairy-Free: Use dairy-free cheese and tortillas to create a dairy-free version that’s just as satisfying!
- Wrap It Right: Try stuffing these wraps with brown rice or quinoa for an added texture and a boost of whole grains!
Let’s Make Those Cheesy Garlic Chicken Wraps!
Ingredients
- Boneless, skinless chicken breast (diced)
- Shredded cheddar cheese
- Shredded mozzarella cheese
- Fresh garlic (minced)
- Olive oil
- Flour tortillas (medium or large)
- Dried oregano
- Salt and pepper to taste
- Optional: Sour cream or ranch dressing (for serving)
- Optional: Fresh chopped parsley (for garnish)
Easy Cooking Instructions
- First things first, let’s prepare our chicken. Dice the boneless, skinless chicken breast into small pieces and set them aside.
- In a large skillet, drizzle in some olive oil and heat it over medium heat. When it’s hot, add the minced garlic and sauté for about 30 seconds—trust me, it’s going to smell incredible!
- Add the diced chicken to the skillet, season it with salt, pepper, and oregano. Cook for about 5-7 minutes, stirring occasionally, until it’s nicely cooked with no pink left inside.
- Once your chicken looks good, take it off the heat and let it cool slightly while you get your wrap station ready. Preheat another pan or griddle over medium heat.
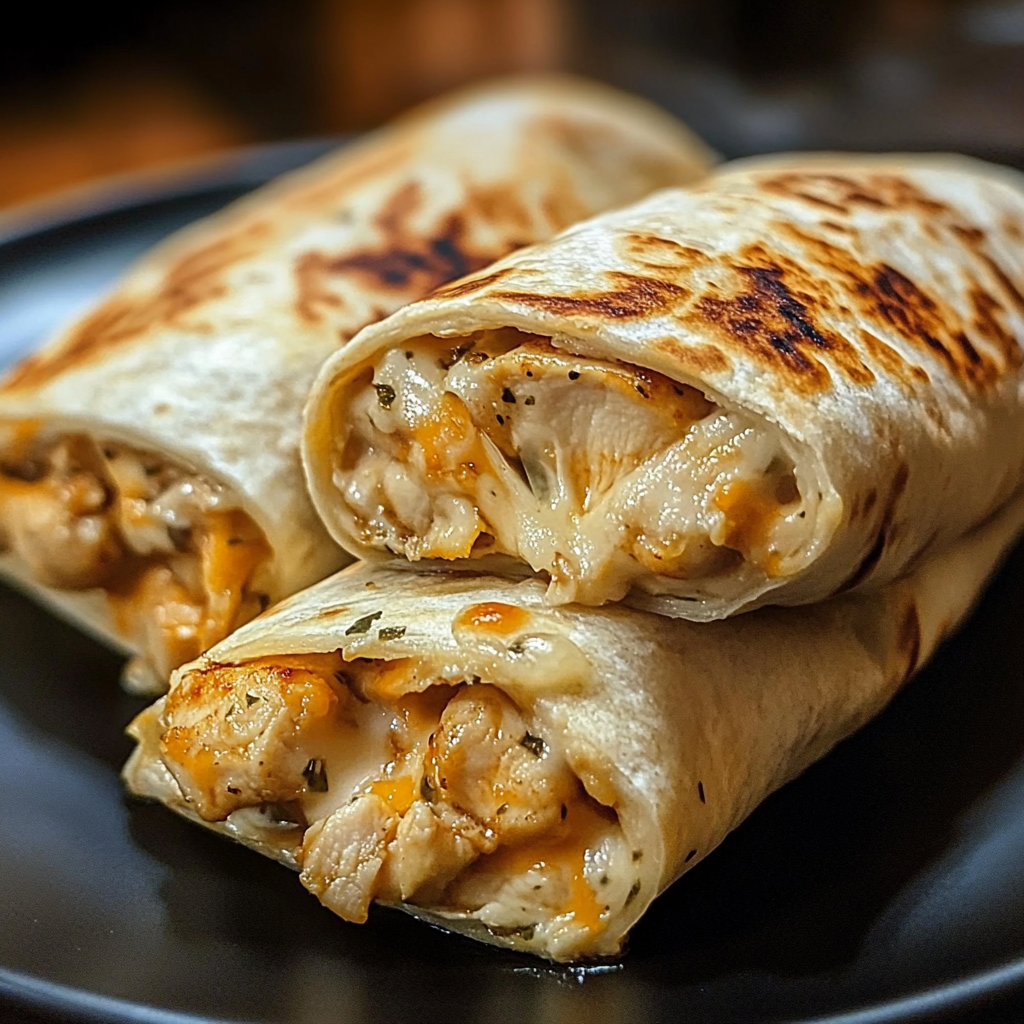
- Place a flour tortilla on a clean surface. In the center, add about 1/3 cup of the cooked chicken and sprinkle a generous amount of the cheddar and mozzarella cheese on top—cheese makes everything better!
- Now, fold the sides of the tortilla inwards, and roll it up from the bottom to enclose the yummy filling.
- In your preheated pan, carefully place the wraps seam side down. Cook them for about 2-3 minutes on each side until the tortillas turn golden brown and crispy, and the cheese melts beautifully inside.
- Once they’re cooked, take them off the pan and let them rest for a minute. Then slice them in half.
- For an extra touch, you can garnish with fresh parsley and serve with a dollop of sour cream or ranch dressing for dipping! Yum!
Pro Tips for the Perfect Wraps
- Use a good non-stick pan to avoid any sticking, and this will make flipping the wraps much easier!
- If you have leftover chicken, you can definitely use it to save time—just reheat it on the stovetop with the garlic before wrapping.
- Feel free to experiment with different kinds of tortillas such as whole grain or spinach for a unique twist!
- Store any leftovers in an airtight container in the fridge. They’ll stay fresh for about 2-3 days. Just pop them in the microwave for a quick reheating!
Equipment Needed
Here’s what you’ll need to make these delicious wraps:
- A large skillet (for cooking the chicken)
- A separate pan or griddle (for toasting the wraps)
- A sharp knife and cutting board (for dicing chicken and slicing the wraps)
- A spatula (for flipping the wraps, an essential tool!)
- A measuring cup (for portioning the chicken)
Frequently Asked Questions
- Can I make these wraps ahead of time? Absolutely! You can prepare the filling in advance and wrap them when you’re ready to cook. Just make sure to store everything separately to keep the tortillas fresh!
- What other toppings can I use? You can add sliced avocado, salsa, or even pickled jalapeños for a fun flavor boost!
- Can I freeze the wraps? Yes! Just wrap them in plastic wrap and store them in an airtight container. Thaw in the fridge and then reheat before serving.
- What if I don’t have dried oregano? No problem! You can substitute with Italian seasoning or even a little basil for a different flavor.
- Are these wraps kid-friendly? Definitely! Kids usually love cheesy meals, and you can invite them to help with rolling the wraps, making it a fun family activity.
Join the Fun!
So there you have it, my friend! Your very own cheesy, garlicky chicken wraps ready to be devoured. If you make these wraps, I’d love to hear how they turned out! Snap a pic and share it on Pinterest or social media! Let’s keep the deliciousness going!
