Say Hello to Your New Favorite Snack: Coconut Lime Chia Pudding Bars!
Hey there! If you’re on the lookout for a refreshing, healthy snack that’s super easy to whip up, you’ve landed in the right place! Today, I’m excited to share my recipe for Coconut Lime Chia Pudding Bars. These beauties are not only no-bake, but they also combine the zesty freshness of lime with the creamy goodness of coconut and the wonderful texture of chia seeds. Trust me, once you get these in your fridge, you’ll be reaching for them every time you crave a snack!
Nutritional Benefits of Coconut Lime Chia Pudding Bars
Let’s talk about why these bars should be a staple in your kitchen! First off, chia seeds are tiny powerhouses of nutrition. They’re packed with fiber, which can help keep your digestion smooth—and let’s be real, who doesn’t love that? They also provide a good source of protein and Omega-3 fatty acids, which are great for heart health.
The addition of coconut brings a satisfying creaminess to the bars, and it’s a good source of healthy fats that can help you feel full. Not to mention, lime juice gives these bars a zesty punch while adding vitamin C, which is essential for your immune system. So not only do they taste amazing, but they also play nice with your body!
Fun Variations and Adaptable Options
- Sweetener Swaps: Not a fan of honey? You can easily substitute it with maple syrup or agave nectar, which works beautifully!
- Going Nut-Free?: If you need to keep it nut-free, coconut oil is a great alternative. Just make sure that any sweeteners also don’t contain nuts.
- Add Some Greens: Want to get even more nutrients? Blend in a handful of spinach with the coconut milk and chia seeds for a green boost—trust me, you won’t taste it!
- Fruit Flavor Burst: Add some pureed fruit like mango or pineapple to the chia layer for an extra fruity twist.
Ready to Make Coconut Lime Chia Pudding Bars? Let’s Go!
Ingredients
- 1 cup rolled oats
- 1/2 cup unsweetened shredded coconut
- 1/4 cup honey or maple syrup
- 1/4 cup coconut oil, melted
- 1/2 teaspoon vanilla extract
- 2 cups coconut milk (canned or carton)
- 1/2 cup chia seeds
- 1/4 cup lime juice (freshly squeezed)
- Zest of 1 lime
- Pinch of salt
- Lime slices for garnish
- Optional: additional shredded coconut for topping
Cooking Instructions
- Start by mixing up that delicious crust! In a medium bowl, combine rolled oats, shredded coconut, honey (or maple syrup), melted coconut oil, and vanilla extract. Give it a good stir until everything is nice and crumbly.
- Now, press that mixture firmly into the bottom of a lined 8×8 inch baking dish. Use the back of a spoon—get in there and pack it down evenly!
- In another bowl, whisk together the coconut milk, chia seeds, lime juice, lime zest, and a pinch of salt. This is where the magic happens—mix until everything is well combined!
- Let that chia mixture sit for about 5 minutes to thicken up a little. Then give it another whisk to break up any clumps of chia seeds that might want to stick together.
- Pour the chia pudding over the pressed oat base, spreading it out evenly. This is going to taste amazing!
- Time to let it chill! Cover the dish with plastic wrap and pop it in the fridge for at least 4 hours, but if you can resist, overnight is even better for setting.
- Once it’s set, carefully lift the mixture out of the dish using the lining. Slice it into squares—get ready for the yumminess!
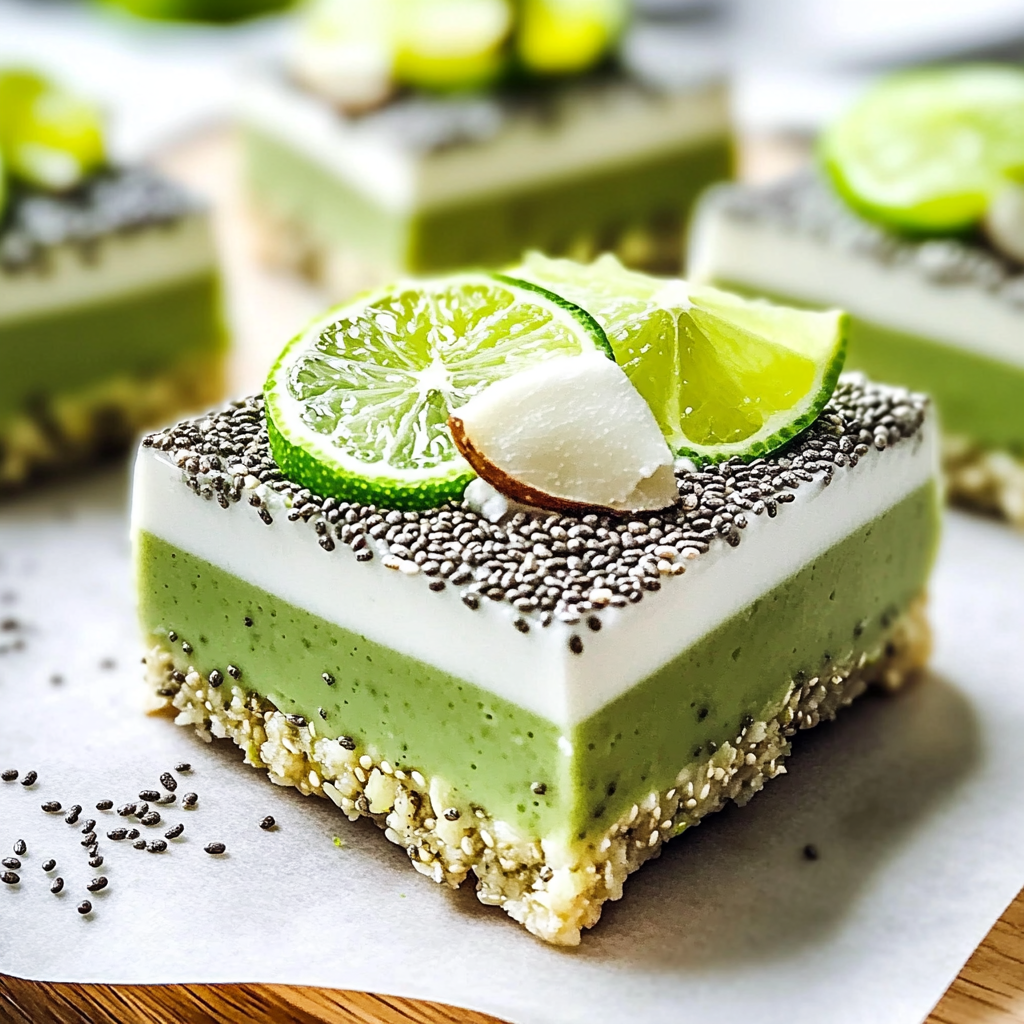
- Garnish each square with a slice of lime and sprinkle a bit more shredded coconut on top if you feel fancy.
- Serve these cooled bars to your friends & family, or just keep them all to yourself. Enjoy!
Practical Tips for Storage and Serving
- These bars can be kept in an airtight container in the fridge for about a week—great for meal prep!
- If you make a double batch, feel free to freeze some. Just make sure to wrap them tightly in plastic wrap to avoid freezer burn.
- For a fun twist, try serving them with a dollop of Greek yogurt on top—delicious!
Equipment Needed
Before diving in, here’s what you need:
- 8×8 inch baking dish
- Mixing bowls
- Whisk
- Spoon or spatula for pressing
- Plastic wrap for covering
Frequently Asked Questions
- How long do these bars last in the fridge? They will keep for about a week in an airtight container!
- Can I replace the coconut milk? Definitely! You can use almond milk or any other milk alternative, though the flavor will change a bit.
- Will they set well without refrigeration? Nope! Chia seeds need time to absorb moisture and set—so chilling is a must!
- Can I use different sweeteners? Yes! Feel free to use your favorite liquid sweetener—maple syrup works beautifully!
- What if I don’t have lime juice? Lemon juice is a great substitute, giving that citrus zing, too!
Wrap Up & Get Sharing!
And there you have it! Your Coconut Lime Chia Pudding Bars are all set to impress. I can’t wait for you to try this recipe—once you do, let me know how it goes! Did you add your own twist? Snap a pic and share it with me! Also, don’t forget to pin this recipe on Pinterest so you can easily find it again—happy snacking!
