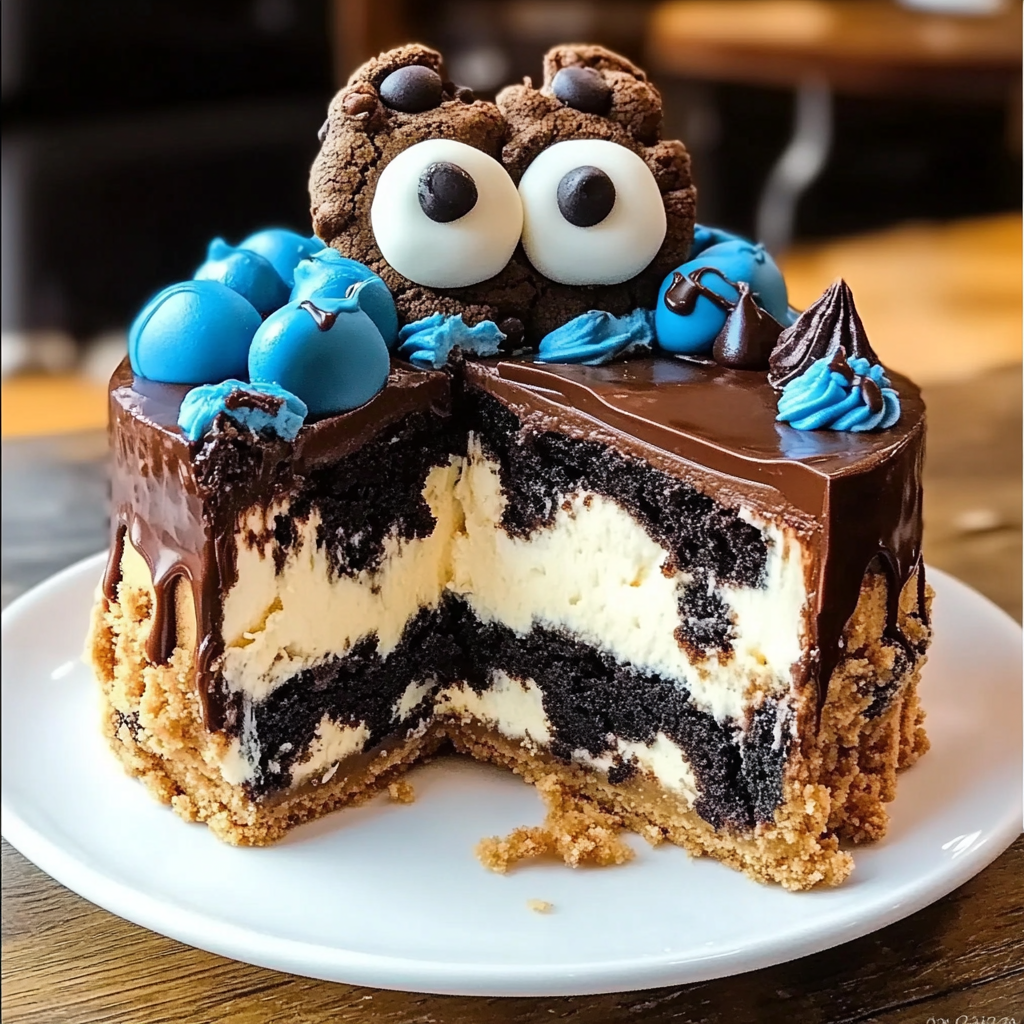
Fun & Colorful Cookie Monster Cheesecake!
Hey there, dessert lovers! Today, I’m super excited to share a whimsical treat that will light up your kitchen and satisfy your sweet tooth: Cookie Monster Cheesecake! This vibrant cake is perfect for birthdays, parties, or just when you want to indulge a little. It’s packed with cookies, a creamy cheesecake filling, and topped off with delicious chocolate ganache—trust me, it’s a crowd-pleaser!
Why You’ll Love This Cheesecake
This Cookie Monster Cheesecake isn’t just a feast for the eyes; it’s also a generous blend of flavors and textures that everyone will adore. The dark chocolate sandwich cookie crust balances beautifully with the creamy and tangy cheesecake, while the fun decorations bring out the playful side in all of us. Plus, it’s a fantastic way to get your kids involved in baking—who doesn’t want to make a dessert that looks like their favorite blue monster?
Nutritional Benefits
Now, I know what you’re thinking: “Can a cheesecake be healthy?” While this treat is definitely indulgent, there are a couple of perks! Cream cheese provides calcium and protein essential for strong bones and muscles. Plus, you can sneak some yogurt or cottage cheese into the filling instead of sour cream for a lighter option!
Adaptable Variations
- Gluten-Free Option: Swap out regular cookies for gluten-free sandwich cookies. This way, everyone can enjoy this tasty dessert!
- Lower Sugar Option: Consider using a sugar substitute or reduce the sugar in the cheesecake to make it a touch lighter.
- More Flavor: Add a little lemon zest or a few drops of almond extract in the cheesecake mixture for a unique twist!
The Ultimate Cookie Monster Cheesecake Recipe
Ingredients
- For the crust:
- 2 cups crushed chocolate sandwich cookies (like Oreos)
- 1/2 cup unsalted butter, melted
- For the cheesecake filling:
- 16 oz (450g) cream cheese, softened
- 1 cup granulated sugar
- 1 teaspoon vanilla extract
- 3 large eggs
- 1 cup sour cream
- For the chocolate layer:
- 1 cup semisweet chocolate chips
- 1/2 cup heavy cream
- For decoration:
- Blue buttercream frosting (just add blue food coloring to your favorite recipe)
- Chocolate chip cookies for topping
- Edible candy eyes
- Optional: extra chocolate chips and blue candies for garnish
Instructions
- Prepare the Crust: Preheat your oven to 325°F (160°C). In a mixing bowl, combine the crushed cookies with melted butter. Press this mixture firmly into the bottom of a 9-inch springform pan. It should be an even layer—this will give you a nice and crunchy crust!
- Make the Cheesecake Filling: In a large mixing bowl, whip the softened cream cheese until creamy, using an electric mixer. Gradually add the sugar, mixing until well incorporated. Add the vanilla and blend again. Next, add the eggs one at a time, mixing after each addition until smooth. Finally, gently fold in the sour cream—don’t over-mix, as you want a light texture.
- Layer and Bake: Pour half of the cheesecake batter over the crust. Crumble some chocolate cookies on top, then pour the remaining cheesecake batter over. Bake for about 55-65 minutes, or until the center is just set with a slight jiggle. Turn off the oven, crack the door a bit, and let it cool for about an hour to prevent cracking.
- Prepare the Chocolate Ganache: While your cheesecake cools, heat the heavy cream in a small saucepan until it simmers. Remove from heat and pour it over the chocolate chips—let it sit for a minute before stirring until smooth and shiny.
- Assemble the Cheesecake: Once the cheesecake has completely cooled, carefully remove it from the springform pan. Pour the chocolate ganache over the top and use a spatula to spread it evenly.
- Decorate: Grab your piping bag with blue frosting and pipe it around the top edge. Decorate with the chocolate chip cookies to form a “Cookie Monster” face, using candy eyes. Add additional chocolate chips and blue candies for extra fun if desired!
- Chill and Serve: Pop it in the fridge for at least 4 hours, or overnight for the best flavor. When you’re ready to dig in, slice it up and observe the many delicious layers—you’re sure to impress!
Practical Tips
- Letting the cheesecake cool in the oven helps prevent cracks, giving you a lovely presentation.
- For easy slicing, use a hot knife (dip it in hot water and wipe it dry) to cut through the cheesecake smoothly.
- Store any leftovers in the fridge, wrapped tightly, for up to a week—if it lasts that long!
Equipment Needed
- A 9-inch springform pan
- Mixing bowls
- Electric mixer
- Spatula
- Piping bag with star tip (for the frosting)
- Small saucepan for the ganache
Frequently Asked Questions
- Can I make this cheesecake ahead of time? Absolutely! This cheesecake actually tastes better the next day, so consider making it a day in advance.
- What can I substitute for sour cream? You can use plain yogurt for a healthier alternative!
- Can I freeze the cheesecake? Yes! Wrap it tightly in plastic wrap and place it in an airtight container to freeze. Thaw it in the fridge before serving.
- How can I prevent the cheesecake from cracking? Cooling it in the oven as mentioned helps significantly. Also, be sure not to overmix once you add the eggs.
- What’s the best way to store leftovers? Keep them in an airtight container in the fridge—they’ll last up to a week!
Wow, you made it to the end of this fun recipe! I’d love to see how your Cookie Monster Cheesecake turns out, so don’t forget to snap a pic and share it on Pinterest! It’s a joy to know that we’re baking together, one delicious dessert at a time. Happy baking!
