Deliciously Creamy Cherry Pistachio Cheesecake
Hello, fellow dessert lovers! If you’re anything like me, cheesecake holds a special place in your heart (and your stomach!). I mean, what’s not to love? Smooth, creamy, and so dreamy, especially when it’s topped with luscious cherries and crunchy pistachios. This Creamy Cherry Pistachio Cheesecake is one of my go-to recipes for gatherings, and trust me, it never fails to impress. Let’s dive right in, shall we?
The Magic of Cheesecake
Cheesecake isn’t just delicious; it’s also about the joy of sharing. Making this cheesecake allows you to put your personal touch on a classic dessert. You can cater it to your taste, and let me tell you, the flavors of rich cream cheese paired with the tartness of cherries and the nuttiness of pistachios create a symphony in your mouth!
Nutritional Benefits
Let’s talk about the good stuff! While we all know cheesecake is a treat, it does have its perks. Cherries are loaded with antioxidants and vitamin C, helping to boost your immune system, while pistachios are a great source of healthy fats, protein, and fiber. So, while you savor each slice, just remember that you’re also indulging in a few nutrients. Isn’t that a nice little bonus?
Fun Variations
If you’re feeling adventurous or need to cater to different dietary preferences, here are some fun variations to consider:
- Berry Bliss: Swap out cherries for strawberries or blueberries. They give amazing flavor and color too!
- Nut-Free Option: Leave out the pistachios for a nut-free version—still delicious!
- Gluten-Free Crust: Use almond flour or gluten-free cookie crumbs for those avoiding gluten.
Ingredients You’ll Need
- 1 ½ cups graham cracker crumbs
- ½ cup unsalted butter, melted
- 1 cup granulated sugar
- 24 oz cream cheese, softened
- 1 tsp vanilla extract
- 3 large eggs
- 1 cup sour cream
- 2 cups cherries (fresh or frozen, pitted)
- 1 tbsp cornstarch
- 1 tbsp lemon juice
- ½ cup chopped pistachios
- Whipped cream for topping
- Additional cherries for garnish
Step-by-Step Cooking Instructions
1. Preheat the Oven
Start by preheating your oven to 325°F (160°C). This is an important step to make sure your cheesecake cooks evenly.
2. Prepare the Crust
In a medium bowl, combine those graham cracker crumbs with the melted butter. Mix everything until it looks like wet sand. Press this firmly into the bottom of a 9-inch springform pan to form a nice, even crust. Pop it in the oven for 10 minutes, take it out, and let it cool.
3. Make the Cheesecake Filling
Grab a large mixing bowl and beat your softened cream cheese with an electric mixer until it’s super smooth and creamy. Gradually add in the sugar and vanilla extract, mixing really well to combine everything.
4. Incorporate the Eggs
Now, let’s add those eggs one at a time. Remember, mix on low speed after each egg until just combined. We don’t want to overmix; we want that perfect cheesecake texture!
5. Add Sour Cream
Stir in the sour cream until fully mixed in. This will make your cheesecake wonderfully creamy.
6. Bake the Cheesecake
Pour that delicious cream cheese mixture over your prepared crust. Bake it in the preheated oven for about 50-60 minutes. The edges should be firm, but the center can still have a slight jiggle. Once done, turn off the oven, crack the door open, and let it cool in there for about an hour.
7. Prepare the Cherry Topping
In a saucepan, combine the cherries, cornstarch, lemon juice, and a couple of tablespoons of water. Cook over medium heat until it thickens and the cherries are softened—about 5-7 minutes. Once it’s done, let it cool slightly.
8. Assemble the Cheesecake
Once your cheesecake is completely cooled, spread that lovely cherry mixture evenly on top. Now, it’s best to refrigerate for at least 4 hours or overnight if you can wait that long!
9. Decorate with Whipped Cream
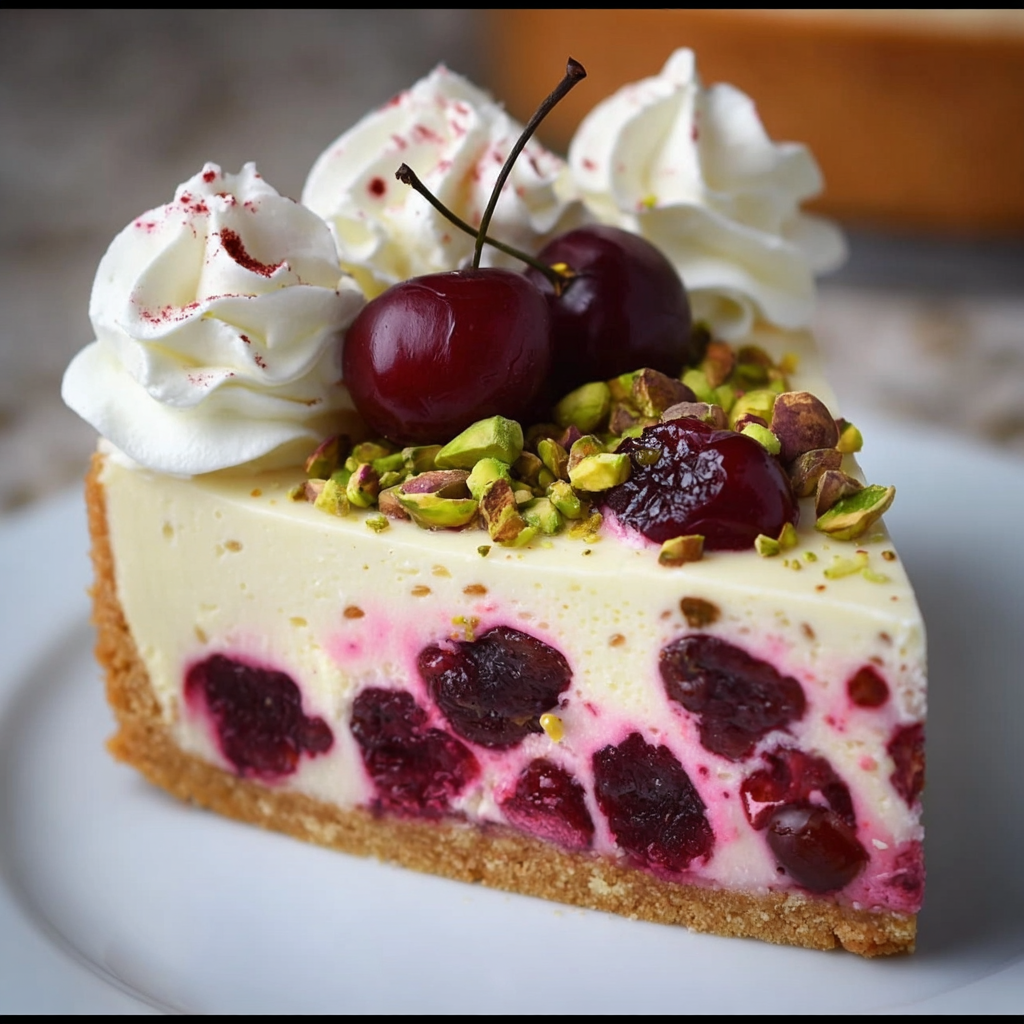
Before serving, pipe on some whipped cream around the edge, and add more cherries and those crunchy pistachios on top for that visual delight.
10. Serve!
Carefully remove the sides of your springform pan, slice it up, and serve chilled. Your friends and family will be begging for seconds!
Practical Tips
- For the smoothest cheesecake, ensure your cream cheese is well-softened before mixing.
- Let the cheesecake cool gradually to prevent cracks.
- Store leftovers in an airtight container in the fridge for about 5 days.
Equipment Needed
- 9-inch springform pan
- Mixing bowls
- Electric mixer (or whisk, if you’re feeling strong)
- Saucepan for the cherry topping
- Measuring cups and spoons
- Spatula for spreading the filling
Frequently Asked Questions
- Can I use other fruits for the topping? Absolutely! Feel free to swap the cherries for strawberries, blueberries, or even raspberries!
- Is there a way to make this cheesecake healthier? Definitely! You can use less sugar, or even a sugar substitute, and opt for low-fat cream cheese.
- Can this cheesecake be frozen? Yes! Just wrap it tightly in plastic wrap and store it in the freezer for up to 3 months. Let it thaw overnight in the refrigerator before serving.
- How do I prevent cracks in my cheesecake? Bake it in a water bath if possible, and cool it gradually in the oven.
- What should I do if my cheesecake is too runny? It may need more baking time, so check it after the suggested time.
Conclusion: Get Ready to Indulge!
This Creamy Cherry Pistachio Cheesecake is not just a treat; it’s a delightful experience! I can’t wait for you to try making it at home. Once you do, I’d love for you to share your culinary masterpiece with me! And hey, don’t forget to save and pin this recipe on Pinterest so you can always come back to it. Happy baking!
