Welcome to the World of Crispy Baked Cauliflower!
Hey there, snack lover! If you’re like me, you’re always on the lookout for that perfect crunch that doesn’t come with the guilt. Today, I’m super excited to share my recipe for Crispy Baked Cauliflower. Trust me, this wholesome treat is one you’ll want to make again and again! It’s crispy, flavor-packed, and totally addictive. Plus, it’s an easy way to sneak in some veggies while satisfying that craving for something crunchy!
Nutritional Benefits of Cauliflower
Let’s talk cauliflower for a moment. This versatile veggie isn’t just a great base for this recipe, but it also comes with fantastic health benefits! Cauliflower is low in calories and packed with nutrients like vitamins C, K, and B6. It’s also high in fiber, which is great for digestion, and can even help you feel full longer. Plus, it’s a fabulous low-carb alternative to traditional snacks. So, you can enjoy every crunchy bite without the guilt!
Fun Variations to Try
Now, what I love about this recipe is its flexibility! You can definitely make it your own. Here are a few variations you might want to try:
- Spicy Twist: Add a little cayenne powder or crushed red pepper flakes to your breadcrumb mixture if you like a kick of heat.
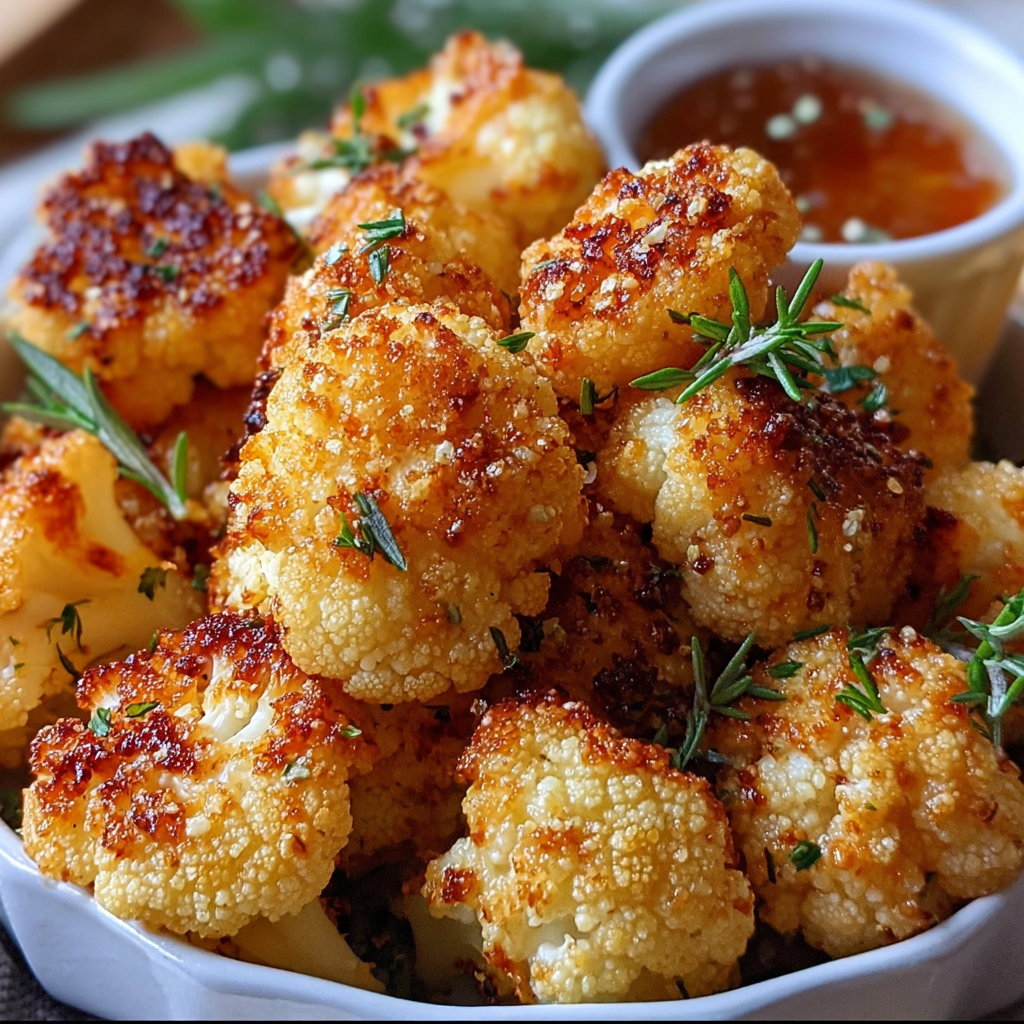
- Herb Infusion: Mix in some dried herbs like oregano, thyme, or rosemary to the flour coating for an extra flavor boost.
- Cheesy Goodness: If you’re a cheese lover, you could mix in some cheddar cheese with the breadcrumbs along with the Parmesan for an even cheesier delight!
- Vegan Option: To make this vegan, replace eggs with a flaxseed or chia seed substitute and use nutritional yeast instead of Parmesan.
Let’s Make Crispy Baked Cauliflower!
Ingredients
- 1 large head of cauliflower
- 1 cup of breadcrumbs (panko for extra crunch)
- 1/2 cup of grated Parmesan cheese (optional)
- 1/2 cup of all-purpose flour (or gluten-free flour)
- 2 large eggs
- 2 teaspoons of garlic powder
- 1 teaspoon of onion powder
- 1 teaspoon of paprika
- Salt and pepper to taste
- Fresh parsley, chopped (for garnish)
- Cooking spray or olive oil (for drizzling)
- Soy sauce (for dipping)
- Sesame seeds (for garnish)
Step-by-Step Instructions
- Start by preheating your oven to 425°F (220°C). Get your baking sheet ready by lining it with parchment paper; this helps with cleanup later!
- Next, cut your cauliflower into bite-sized florets and set them aside. Don’t worry about them being perfect; the different sizes will add to the crispy texture!
- In a bowl, mix together the flour, garlic powder, onion powder, paprika, and a pinch of salt and pepper.
- In another bowl, beat the two eggs and toss in another dash of salt and pepper.
- Then, in a third bowl, combine the breadcrumbs and Parmesan cheese (if you’re using it).
- Now for the fun part: Dip each cauliflower floret first in the flour mixture, shaking off any excess. We want them well-coated but not overwhelmed!
- Next, dip them into the beaten eggs, making sure they’re completely covered.
- Finally, roll each floret in the breadcrumb mixture, pressing gently to ensure that those lovely crumbs stick.
- Place the breaded florets on your prepared baking sheet in a single layer. It’s important they aren’t overcrowded; we want them to crisp up beautifully!
- Lightly spray them with cooking spray or drizzle with olive oil for extra crunchiness.
- Now, pop them in the oven and bake for 25-30 minutes. Make sure to turn them halfway through for even browning.
- While the cauliflower is baking, whip up a simple dipping sauce: mix some soy sauce with a sprinkle of sesame seeds in a bowl. Easy peasy!
- Once the cauliflower is golden brown and crispy, take them out of the oven, garnish with fresh parsley, and serve them up with your dipping sauce.
Practical Tips for Your Cauliflower Snack
- Want to make ahead? You can prep the cauliflower ahead of time, and bake just before you’re ready to serve—it’s a fantastic party snack!
- Store any leftovers in an airtight container in the fridge for up to 3 days. Just pop them back in the oven for a bit to re-crisp!
- If you’d like to skip the dipping sauce, these little beauties are delicious on their own!
Equipment Needed
You’ll need just a few simple tools to pull this off:
- A baking sheet lined with parchment paper
- Three mixing bowls (for flour, eggs, and breadcrumbs)
- A whisk or fork (for beating the eggs)
- A sharp knife for chopping the cauliflower
- A spatula or tongs for turning the cauliflower while cooking
Frequently Asked Questions
- Can I make this gluten-free? Yes! Just use gluten-free flour and gluten-free breadcrumbs.
- Do I have to use eggs? No, you can substitute with a flax or chia seed mixture for a vegan option.
- How do I know when they are done? They should be golden brown and crispy. You can poke them with a fork to check—they should feel tender and not hard!
- Can I use frozen cauliflower? Fresh is best, but if you must, make sure to thaw and dry them thoroughly for the crispiness!
- What else can I dip these in? Try ranch dressing, a yogurt dip, or even a spicy sriracha mayo for something different!
Let’s Connect!
Did you make the crispy baked cauliflower? I’d love to hear from you! Share your experience or any variations you try on this recipe. Don’t forget to follow me on Pinterest for more delicious recipes and personalized cooking tips. Happy snacking!
