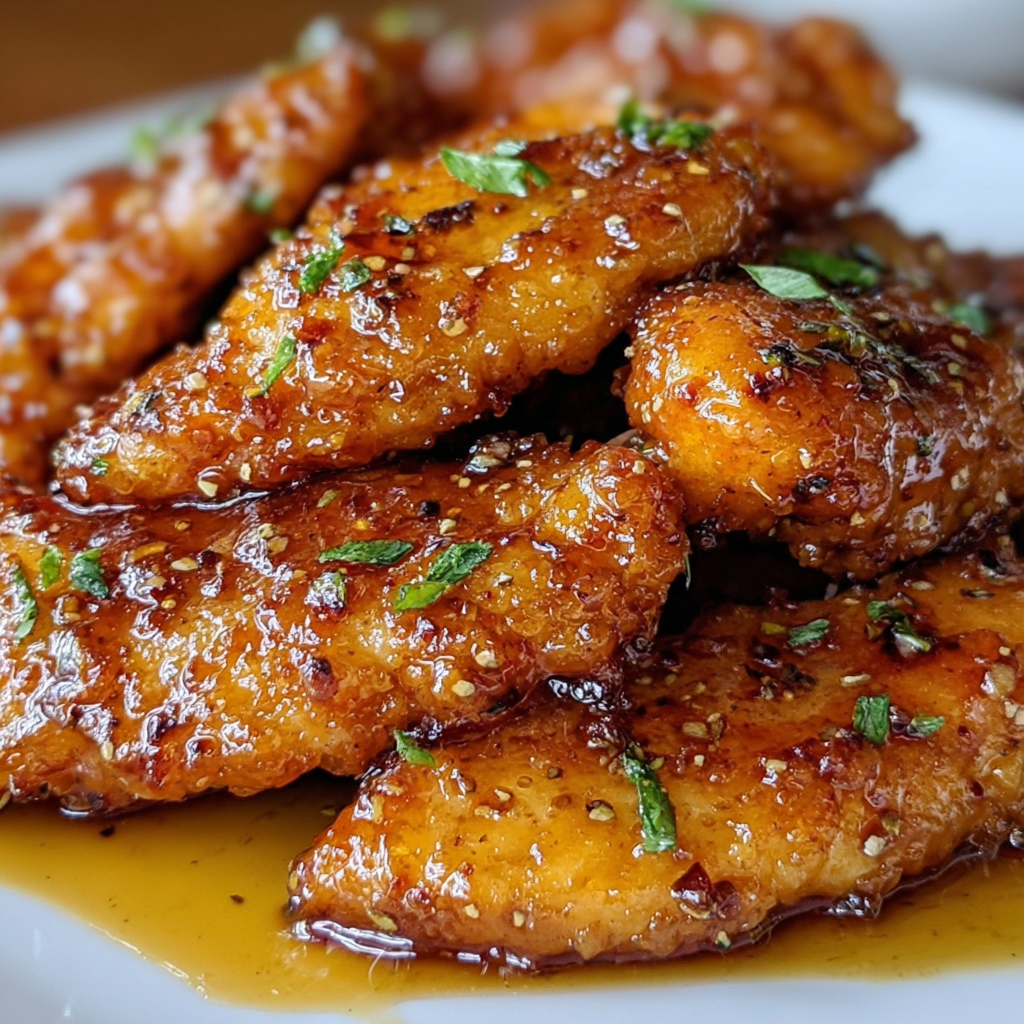
Crispy & Juicy Honey Butter Garlic Chicken Tenders — Irresistible Weeknight Dinner
Hey there, chicken lovers! If you’re looking for a simple yet delicious weeknight dinner that your whole family will adore, then you’ve landed in the right place! The crispy and juicy honey butter garlic chicken tenders are sure to become a favorite in your household, just as they did in mine. Seriously, I can’t count the number of times I’ve whipped up this recipe after a long day, and every single time, it feels like a little celebration of flavor. Let’s dive into this delightful dish!
The Benefits of Making Chicken Tenders at Home
What’s great about making chicken tenders at home is that you get to control everything! You can pick quality ingredients, adjust the seasoning, and even modify the recipe to fit your family’s tastes. Plus, homemade tenders are fresher and taste way better than the frozen ones you find at the store! Plus, the satisfaction you feel while frying those crispy tenders is unbeatable!
Fun Variations to Try
- Spicy Kick: If you’re like me and love a bit of heat, add some cayenne pepper or paprika to the flour mixture. That little kick brings your meal to the next level!
- Healthier Options: You can swap out panko breadcrumbs for whole wheat breadcrumbs or even crushed cornflakes for a healthier crunch.
- Honey Mustard Twist: Mix some mustard into your honey sauce for a sweet and tangy flavor. It’s a small change but makes a world of difference!
Easy Recipe for Crispy & Juicy Honey Butter Garlic Chicken Tenders
Ingredients
- 1 pound chicken tenders
- Salt
- Black pepper
- 1 teaspoon garlic powder
- 1 cup all-purpose flour
- 2 large eggs, beaten
- 1 cup panko breadcrumbs
- Vegetable oil (for frying)
- 1/2 cup unsalted butter
- 1/3 cup honey
- 3-4 cloves minced garlic
- Fresh parsley, chopped (for garnish)
Instructions
- Prep the Chicken Tenders: Start by seasoning your chicken tenders with salt, black pepper, and garlic powder. Let them marinate for about 15 minutes—this helps all those yummy flavors soak in!
- Set Up Breading Station: In three shallow bowls, set up your breading station: all-purpose flour in the first, beaten eggs in the second, and panko breadcrumbs in the third. You’re all set to get messy—let’s get started!
- Bread the Chicken Tenders:
- Dredge each chicken tender in flour, making sure to coat it evenly. Give it a little shake to remove excess flour.
- Next, dip it into the egg wash, letting any excess drip off.
- Finally, coat the chicken tender in panko breadcrumbs. Press gently to make sure they stick well. Repeat this for all the tenders.
- Heat the Oil: In a large skillet, heat vegetable oil over medium-high heat until it reaches around 350°F (175°C). You can tell it’s ready when a small piece of bread sizzles upon contact!
- Fry the Chicken Tenders: Carefully add the breaded chicken tenders to the hot oil—make sure not to overcrowd them! Fry for about 3-4 minutes on each side until they are golden brown and cooked through. Use a meat thermometer to check they reach an internal temperature of 165°F (75°C). Transfer them to a paper towel-lined plate to drain any excess oil.
- Make the Honey Butter Garlic Sauce:
- In a separate saucepan, melt the unsalted butter over medium heat.
- Add in the minced garlic and sauté for about a minute until it smells amazing!
- Stir in the honey and bring it to a gentle simmer, allowing it to thicken slightly for about 2-3 minutes.
- Coat the Chicken: Once your chicken tenders are ready, place them in a large bowl and pour the honey butter garlic sauce over them. Toss gently to coat and make sure they are all deliciously drizzled!
- Garnish and Serve: Transfer your mouthwatering chicken tenders to a serving platter and sprinkle some chopped fresh parsley on top for that lovely pop of color. And voilà! Serve immediately and get ready for compliments!
Tips for the Best Homemade Chicken Tenders
- For extra crunch, double dip your tenders by repeating the egg wash and panko coating after the first fry—they’ll be irresistible!
- After frying, let the tenders rest on a cooling rack instead of paper towels for super crispiness.
- Store any leftovers in an airtight container in the fridge for up to 3 days. Reheat in the oven to keep them crispy.
Equipment You’ll Need
- A large skillet for frying
- Three shallow bowls for breading
- A meat thermometer for cooking precision
- A slotted spoon or tongs to flip the chicken
- A paper towel-lined plate for draining excess oil
- A saucepan for making the honey butter garlic sauce
Frequently Asked Questions
- Can I use chicken breasts instead of tenders? Yes, you can! Just slice chicken breasts into strips.
- What’s the best way to store leftovers? Keep them in an airtight container in the fridge for about 3 days.
- Can I bake these instead of frying? Absolutely! Preheat your oven to 400°F (200°C) and bake for about 20-25 minutes, flipping halfway through.
- What dipping sauces go well with these tenders? Ranch, blue cheese, or even a spicy sriracha mayo are great options!
- Can I make these gluten-free? For sure! Use gluten-free breadcrumbs and flour for a delicious alternative.
Let’s Connect!
Alright, my friends, are you ready to try these honey butter garlic chicken tenders? I can’t wait to hear what you think! If you loved this recipe, follow me on Pinterest for more delightful dishes to make your weeknights warm and delicious. Happy cooking!
