Hey there! Let’s Make Crispy Fried Tortellini Together
If you’re anything like me, you love finding fun, new ways to enjoy your favorite pasta. Recently, I discovered this super tasty twist on tortellini: frying it to golden, crispy perfection! It’s like a little bite-sized flavor party that’s perfect as a snack, appetizer, or even a fun dinner treat. And the best part? It’s surprisingly easy to make. I can’t wait to share this with you!
Why I Love Fried Tortellini
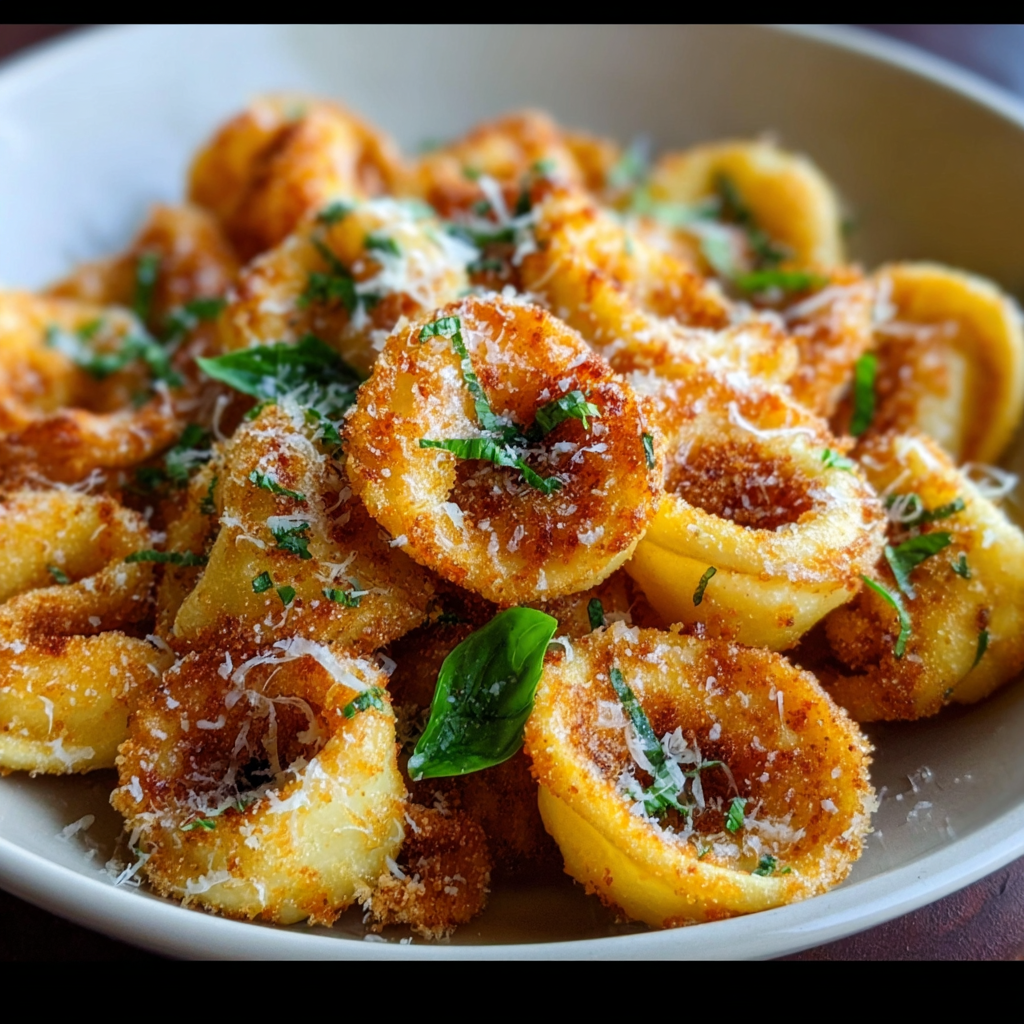
This recipe takes fresh cheese-filled tortellini and transforms it into crispy, cheesy little nuggets that are just irresistible. The outside gets beautifully crunchy thanks to the breadcrumb and Parmesan coating, while the inside stays creamy and cheesy — pure magic. I like serving mine sprinkled with extra Parmesan and fresh herbs to add a bright touch.
Nutritional Benefits of This Dish
While fried foods might sound indulgent, I’m here to tell you this can still fit into a balanced lifestyle. Tortellini made with cheese offer a good source of protein and calcium. Parmesan cheese adds more calcium and a nice boost of flavor, so a little goes a long way. Plus, frying in olive oil or vegetable oil means you’re using healthier fats, especially if you opt for olive oil. Paired with a fresh salad or veggies, this can be a balanced, delicious meal or appetizer!
Adaptable Variations Just for You
- Gluten-Free Option: Use gluten-free tortellini and substitute regular breadcrumbs with gluten-free ones.
- Herb Twist: Add some Italian seasoning or dried oregano to your breadcrumb mixture for extra flavor.
- Cheese Lovers’ Choice: Mix a little shredded mozzarella into the breadcrumb mixture for extra gooeyness inside.
- Air Fryer Swap: For a lighter version, try air frying instead of pan-frying. It keeps the crunch but with less oil.
Easy Crispy Fried Tortellini Recipe
Ingredients You’ll Need:
- 12 oz (340 g) cheese-filled tortellini (fresh or refrigerated)
- 1 cup grated Parmesan cheese (divided)
- 1 cup plain breadcrumbs
- 2 large eggs
- ½ cup all-purpose flour
- ½ tsp salt (plus extra to taste)
- ¼ tsp black pepper
- ½ cup vegetable oil or olive oil (for frying)
- Fresh basil or parsley (thinly sliced or chopped, for garnish)
Step-by-Step Instructions
- Cook the tortellini: Fill a large pot with water, add a good pinch of salt, and bring it to a boil. Drop in the tortellini and cook according to the package directions – usually about 2-3 minutes – until they’re just tender but still firm (al dente). Drain well and let them cool a bit so you can handle them without burning your fingers.
- Set up your coating stations: Grab three shallow bowls or plates. In the first, mix together the flour with salt and pepper. In the second, beat the eggs until smooth. In the third, combine breadcrumbs with ¾ cup of the Parmesan cheese.
- Coat the tortellini: Take each tortellini and gently roll it in the seasoned flour, shaking off the extra. Next, dip it in the beaten egg, making sure it’s nicely coated but letting excess drip off. Finally, press it into the breadcrumb and Parmesan mixture, ensuring an even, thick coating.
- Fry to crispy perfection: Heat the oil in a large skillet over medium-high heat. When hot (but not smoking), carefully add your breaded tortellini in batches, so you don’t crowd the pan. Fry each side for 2-3 minutes until golden brown and crispy.
- Drain and garnish: Use a slotted spoon or tongs to transfer the fried tortellini onto paper towels to soak up excess oil. Then, move them to a serving dish. Sprinkle with the remaining Parmesan and your fresh herbs like basil or parsley.
- Dive in! Serve immediately while they’re crunchy and warm. Trust me, they don’t last long once on the table!
Helpful Tips for the Best Results
- If you want extra crunchy tortellini, rinse them briefly with cold water after boiling and let them dry completely before coating.
- Don’t skip pressing the breadcrumbs firmly on the tortellini; this helps your crispy coating stick well during frying.
- Use a thermometer or test the oil with a small breadcrumb to know when it’s ready for frying – it should sizzle immediately but not smoke.
- Once cooked, place fried tortellini on a wire rack instead of just paper towels to keep them crisp and not soggy.
- If you’d like to save time, you can coat the tortellini ahead of time and refrigerate for up to an hour before frying — but fry them straight from the fridge for best crunch.
- Leftovers? Pop them in the oven at 350°F (175°C) for 5-8 minutes to re-crisp — yum!
Equipment You’ll Find Handy
- Large pot for boiling pasta
- Three shallow bowls or plates for dredging
- Large skillet or frying pan
- Slotted spoon or tongs for handling fried tortellini
- Paper towels or wire rack for draining excess oil
- Grater for fresh Parmesan cheese
Frequently Asked Questions (FAQs)
- Can I use frozen tortellini for this recipe?
Absolutely! Just make sure to thaw them and pat dry before starting the coating process to avoid extra moisture. - What dipping sauces go well with fried tortellini?
I love pairing these with marinara sauce, garlic aioli, or even a spicy sriracha mayo for a kick. - Can I bake instead of frying?
You can! Spray the coated tortellini with oil and bake at 400°F (200°C) for about 15-20 minutes, turning halfway through for even crispiness. - How do I store leftover fried tortellini?
Keep them in an airtight container in the fridge for up to 2 days. Reheat in the oven or air fryer to maintain crispiness. - Can I make this vegan?
You can! Use vegan cheese tortellini, substitute eggs with a flax egg or plant-based milk mixture, and choose vegan-friendly breadcrumbs and cheese alternatives.
Let’s Keep Cooking and Sharing!
I hope you enjoy this crispy fried tortellini recipe as much as I do! It’s such a fun way to reinvent pasta night or wow friends at your next gathering. If you try it out, please share your photos and how you like to serve it on Pinterest — I’d love to see your creations and hear your tweaks to the recipe.
Happy cooking, and see you in the kitchen soon!
