Deliciously Easy 4-Ingredient S’mores Bars!
Hi there, fellow dessert lover! If you’re like me, the thought of gooey s’mores brings back memories of summer campfires and midnight snack runs. Imagine taking that bliss and transforming it into a bar that you can enjoy any time! Today, I’m so excited to share my recipe for Easy 4-Ingredient S’mores Bars. Trust me, you’re going to love how simple and satisfying these are!
Nutritional Benefits of S’mores Bars
Now, I know “s’mores” might not sound like the healthiest option, but we can find some redeeming qualities here! The graham cracker crust provides whole grains, and using dark chocolate chips adds antioxidants. Plus, if you choose to add a nut butter to the crust instead of butter, you’re not only adding healthy fats but a unique flavor twist as well. Remember, moderation is key—these bars are a treat, and we should absolutely enjoy them!
Fun Variations to Try
- Nutty Delight: Add a handful of chopped nuts like walnuts or almonds to the crust for a crunchy texture.
- Peanut Butter Twist: Spread a layer of peanut butter on top of the chocolate chips before adding the marshmallows.
- Seasonal Flavors: Try adding some peppermint extract during the holiday season for a fun twist!
- Fruitful Addition: Consider layering thin slices of strawberries or bananas on top of the chocolate before adding the marshmallows for an added burst of flavor.
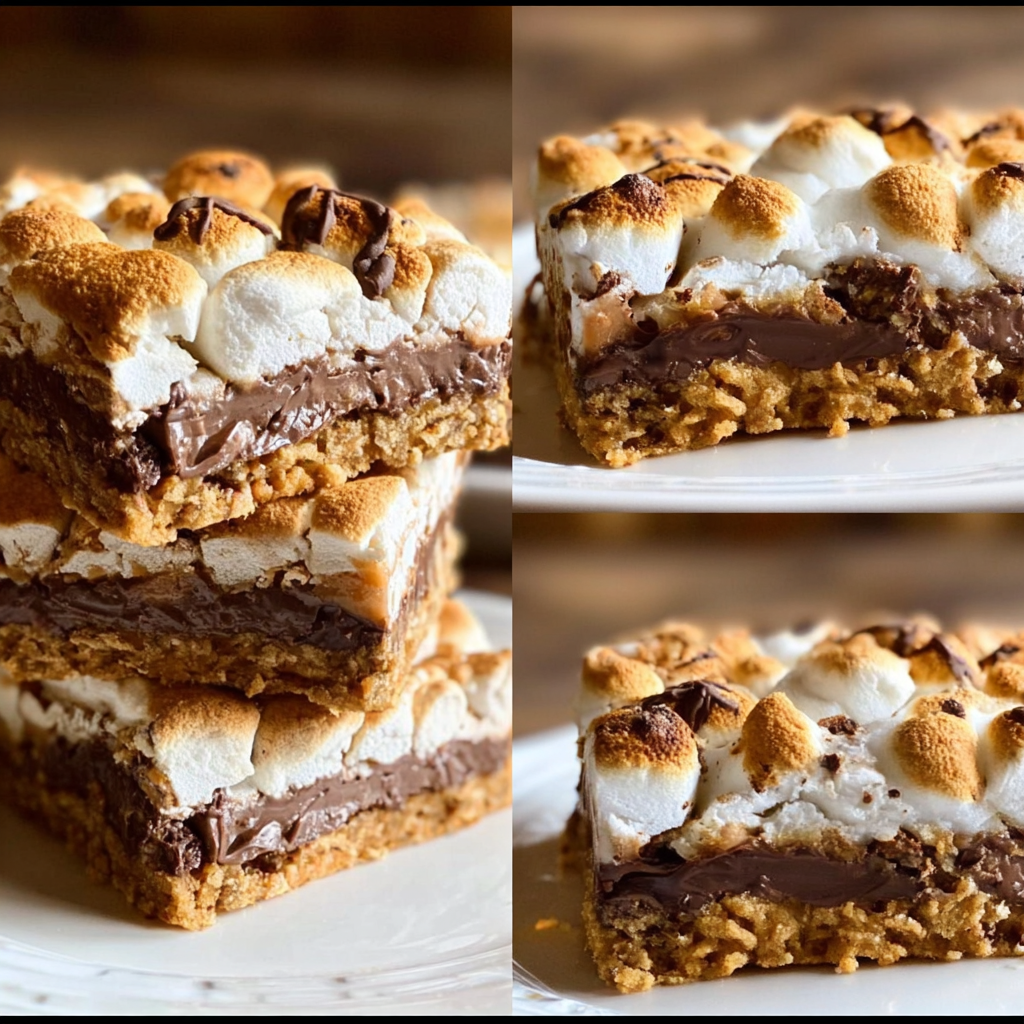
Your Easy S’mores Bars Recipe
Ingredients
- 1 ½ cups graham cracker crumbs
- ½ cup unsalted butter, melted
- 1 ½ cups chocolate chips (you can use semi-sweet or milk chocolate based on your preference!)
- 2 cups mini marshmallows
Cooking Instructions
- First things first, let’s get your oven preheated to 350°F (175°C).
- In a mixing bowl, combine the graham cracker crumbs and melted unsalted butter. Stir until it all blends together and looks like wet sand.
- Now, you’ll want to press this delicious mixture firmly into the bottom of a greased 9×13-inch baking dish. Make it nice and even!
- Pop the crust into the oven for about 10 minutes or until it’s lightly golden. Then, take it out and let it cool for a few minutes.
- Next, sprinkle the chocolate chips evenly over your baked graham cracker crust. Yum!
- Now comes the fun part! Top those chocolate chips with mini marshmallows, spreading them out to cover everything nicely.
- Put the baking dish back in the oven, but this time, set it to broil. Keep a close eye and broil for about 2-3 minutes until the marshmallows are beautifully golden brown—don’t let them burn!
- After they’re toasted, remove them from the oven and allow the bars to cool completely in the pan on a wire rack.
- Once cooled, cut them into squares, serve, and watch everyone devour them!
Practical & Valuable Tips
- Make sure your crust is pressed down well—it’ll hold up much better when you slice it.
- If you love super gooey chocolate, you can melt the chocolate chips slightly before adding the marshmallows on top for an even creamier texture.
- Storing leftovers? Keep them in an airtight container at room temperature for up to a week (if they last that long!).
- As an alternative to mini marshmallows, you can also use large marshmallows, just cut them in half if they’re too big.
Equipment Needed
Before you dive in, here’s a quick list of what you’ll need to whip these up:
- A 9×13-inch baking dish (make sure it’s greased or lined with parchment paper for easy removal!)
- A mixing bowl
- A large spoon or spatula for mixing
- An oven (of course!) for baking and broiling
- A wire rack for cooling (optional but very helpful!)
Frequently Asked Questions
- Can I use a different type of chocolate? Absolutely! Feel free to try dark chocolate, milk chocolate, or even white chocolate for a unique taste.
- Can I substitute the butter? Yes! You can use coconut oil or a nut butter if you’re looking for a dairy-free option.
- How do I know when the bars are ready to take out of the oven? Watch for the marshmallows to be perfectly toasted and golden brown—they’re the star of the show!
- Can I add more chocolate? Of course! If you love chocolate, drizzle some melted chocolate on top after letting them cool for added indulgence.
- Can I make these bars ahead of time? Yes! You can make these bars a day or two ahead of your event and store them in an airtight container.
Have fun making these S’mores bars! I can’t wait to hear how they turn out for you. Snap a picture and share it with me on Pinterest! Let’s spread the joy of these gooey treats together!
