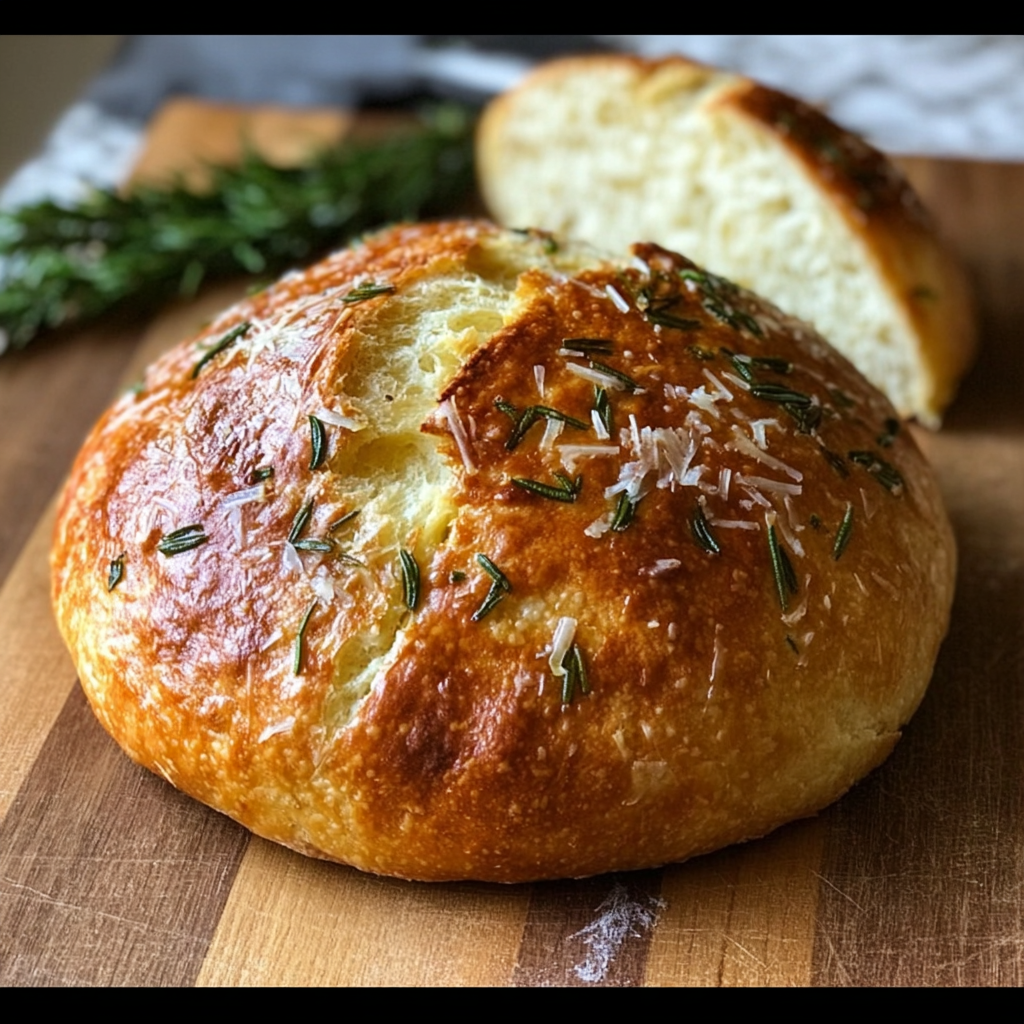
Welcome to the World of Homemade Bread!
Hey there! Have you ever thought about baking your own bread, but felt a little intimidated? I totally get it! The good news is, you don’t have to be a professional baker to achieve that beautiful, fluffy loaf. Today, I want to share my go-to recipe for Fluffy No Knead Bread with Parmesan and Rosemary. It’s super clever, so you can whip it up with minimal effort, and the flavors will blow you away!
Nutritional Benefits of This Bread
Let’s chat a bit about why this bread is a great choice! First of all, making your own bread means you get to skip out on preservatives found in store-bought options. Plus, with the addition of rosemary, you’re adding a sprinkle of antioxidants to your diet, which can help boost your immune system. That sprinkle of Parmesan brings in calcium and protein, so not only does it taste great, but it can also be a healthful addition to your meal. How awesome is that?
Fun Ways to Mix It Up!
Feel free to get creative with this recipe! Here are some adaptable variations:
- Herb Explosion: Use different herbs such as thyme or basil instead of rosemary, or a mix of all of them!
- Cheese Lovers Unite: Swap out Parmesan for another cheese like feta or cheddar for a different flavor.
- Seeds and Grains: Add sunflower seeds or flaxseeds to the dough for added crunch and a boost of nutrients.
Your Easy Fluffy No Knead Bread Recipe
Ingredients
- 3 cups all-purpose flour
- 1 ½ teaspoons salt
- ½ teaspoon yeast
- 1 ¼ cups warm water (think baby bottle warm)
- ½ cup grated Parmesan cheese
- 1 tablespoon fresh rosemary, chopped (or 1 teaspoon dried)
Instructions
- In a large mixing bowl, whisk together the flour, salt, and yeast.
- Add the warm water, Parmesan cheese, and rosemary into the dry ingredients. Mix with a spoon until it forms a shaggy dough—it won’t look perfect, and that’s just fine!
- Cover your bowl with plastic wrap or a clean kitchen towel, and let it rest at room temperature for 12-18 hours. This is where the magic happens!
- Once it looks bubbly and has risen nicely, flour your countertop and gently scrape the dough out onto the surface. Don’t worry if it looks a bit sticky!
- With floured hands, form the dough into a rough ball. You don’t need to knead it. Then, place it on a floured piece of parchment paper.
- Cover it with the towel again and let it rest for another 1-2 hours. In the last half hour, preheat your oven to 450°F (230°C) with a Dutch oven inside to heat up.
- Carefully remove the hot Dutch oven from the oven and lift the parchment paper with the dough into the pot (be careful, it’s hot!). Put the lid on and bake for 30 minutes.
- After 30 minutes, remove the lid and let it bake for an additional 15-20 minutes until it’s golden brown and crusty.
- Once done, take it out and let it cool on a wire rack. Try to resist cutting it too soon—it smells divine!
Practical Tips for Your Bread Making
- If you can’t finish the bread in one go, it keeps well for a couple of days at room temperature in a breadbox or wrapped in a towel.
- Freeze leftovers in slices; just wrap them tightly in plastic wrap and then foil for up to 3 months. Toast them straight from the freezer, and they’ll be just as tasty!
- Feel free to double the recipe if you’re expecting company; bread seems to vanish fast!
Equipment You’ll Need
Here’s a quick rundown of what you’ll need:
- A large mixing bowl
- A wooden spoon or spatula
- Plastic wrap or a kitchen towel for covering
- Parchment paper
- A Dutch oven (or another oven-safe pot with a lid)
- A wire rack for cooling
Frequently Asked Questions
- Can I use whole wheat flour? Absolutely! Just note that the texture might be a bit denser.
- What if I don’t have a Dutch oven? You can bake it on a baking sheet—but placing a pan of water in the oven will help create steam for a crustier loaf.
- Can I mix this dough in a stand mixer? Yes! Just use the dough hook and mix until combined.
- What if I forget to bake it within the time frame? No worries; it will still be fine. Just bake when you’re ready!
- How can I tell if my bread is fully baked? It should sound hollow when tapped on the bottom. Trust your nose, too; if it smells delicious, it’s likely ready!
Join the Bread Baking Fun!
Did you give this Fluffy No Knead Bread a try? I would love to hear how it turned out for you! Don’t forget to share your delicious creation on Pinterest, and let’s spread the joy of homemade bread together!
