Get Ready for a Fun Fruity Adventure!
Hey there, sushi lovers and adventurous eaters! Today, I’m super excited to share a unique twist on sushi that will wow your taste buds and brighten your day—no fish involved—just rainbow colors and a whole lot of fun! We’re making Fruity Pebbles sushi. Yes, you heard that right! It’s a sweet, vibrant treat perfect for parties, snacks, or a family dessert night.
Nutritional Benefits of Fruity Pebbles Sushi
While we all know this sushi is more about fun than health, it’s important to highlight the little positives! Sushi rice is gluten-free, and when you use less sugar, you can enjoy a sweet treat that’s very shareable. Plus, you get a bit of energy from the rice and the gummy candies, perfect for a midday pick-me-up. Mixing in something creative like Fruity Pebbles also adds a pop of color that can lighten up your mood—just looking at it makes you smile!
Adaptable Variations to Consider
I love how this recipe is flexible! Here are some cool ideas to switch things up based on your preferences or dietary restrictions:
- Diet-Friendly Alternative: If you want a healthier take, try using a whole grain sushi rice or quinoa instead of white sushi rice.
- Swap Out the Candies: You can use dried fruits like mango or apple slices for a more natural sweetness instead of gummy candies.
- For Chocolate Lovers: Consider adding chocolate sprinkles or even mini chocolate chips with your Fruity Pebbles for an extra chocolatey treat!
- Coconut Lovers Unite: If you’re fan of tropical flavors, sprinkle in some crushed pineapple or use coconut cream instead of regular sugar for a unique twist.
Easy Fruity Pebbles Sushi Recipe
Ingredients
- 2 cups of sushi rice
- 2 1/2 cups of water
- 1/4 cup of sugar
- 1/4 cup of rice vinegar
- 1 teaspoon of vanilla extract
- 1/2 cup of Fruity Pebbles cereal
- 1/2 cup of gummy candies (like sour belts, gummy worms, or anything fun)
- 4 sheets of nori (seaweed)
- Rainbow sprinkles (optional)
- Coconut flakes (optional, for garnish)
Instructions
- First things first, rinse the sushi rice under cold water until the water runs clear. This step is crucial as it removes excess starch—trust me, your sushi will thank you!
- In a medium pot, combine the rinsed sushi rice and water. Bring it to a boil over high heat. The anticipation is real!
- Once it starts boiling, reduce the heat to low, cover it up, and let it simmer for about 18-20 minutes, or until all that water is absorbed.
- After cooking, remove the pot from heat but let it sit covered for another 10 minutes. This steaming is where the magic happens, making your rice fluffy.
- While the rice cools, mix up your sweetener! In a small bowl, stir together the sugar, rice vinegar, and vanilla extract until the sugar dissolves. This will take your sushi to a whole new level of delicious.
- Transfer that beautiful, warm rice into a large mixing bowl and gently fold in the vinegar mixture. Allow this to cool completely to room temperature.
- Now, lay a sheet of nori on your bamboo sushi mat (or a flat surface) with the shiny side facing down.
- With wet hands, spread about 1 cup of sushi rice evenly over the nori. Leave a small border at the top edge—this helps in rolling.
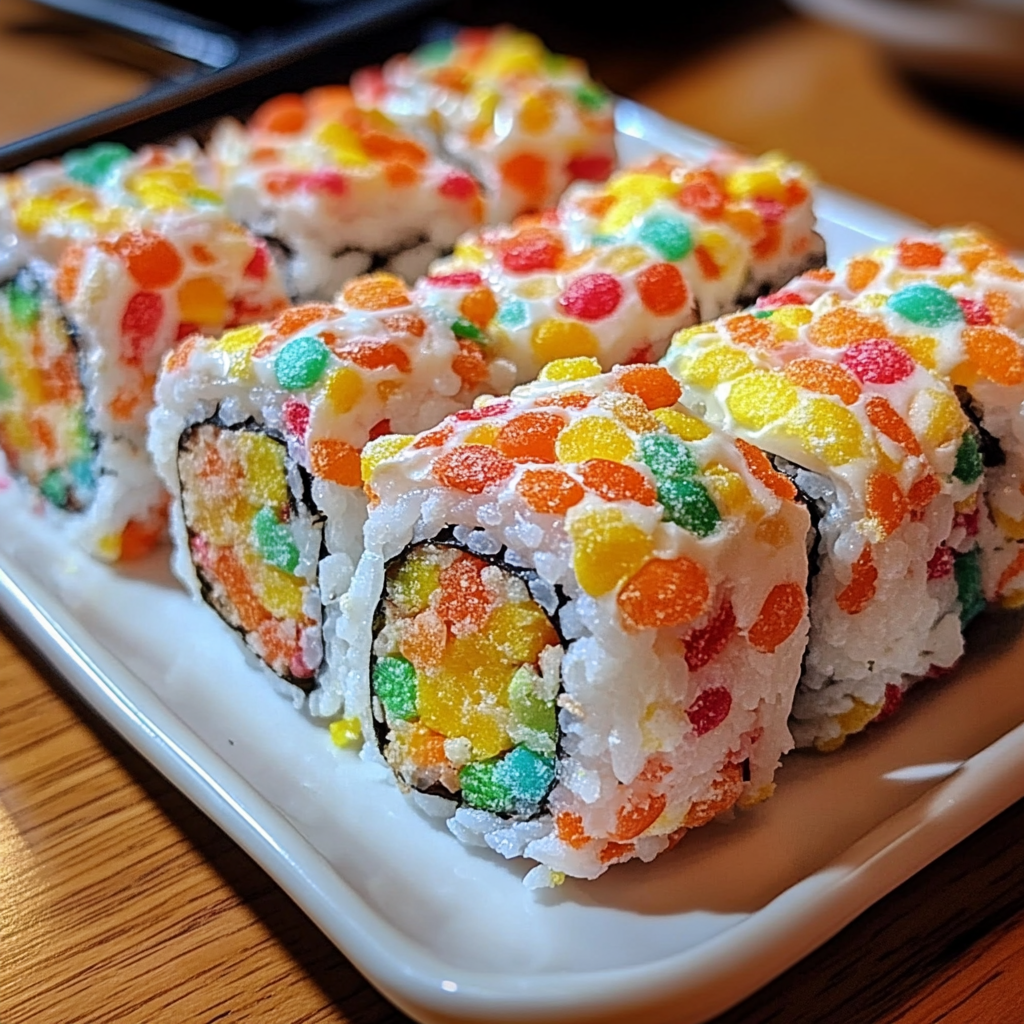
- Ready for the fun part? Sprinkle those delightful Fruity Pebbles all over the rice!
- Now line your gummy candies in a strip along the bottom edge of the rice-covered nori. Don’t hold back!
- Lift the edge of your bamboo mat or the bottom edge of the nori and start rolling tightly. Tuck in that filling as you go until you reach the top edge.
- Seal the roll with a splash of water by wetting the edge to ensure it sticks. You’ve got this!
- Now, with a sharp, wet knife, slice your roll into bite-sized pieces—about an inch thick works perfectly.
- If you’re feeling extra festive, roll your sushi pieces in rainbow sprinkles or top them with coconut flakes for that delightful flair!
- Serve your colorful creation on a plate and get ready to impress everyone!
Practical & Valuable Tips
- For clean slices, make sure your knife is wet before cutting the sushi rolls.
- If your sushi rice is sticky, wet your hands before handling it to keep it from sticking to your fingers.
- Store any leftover sushi in an airtight container in the refrigerator for up to 2 days, although it’s best enjoyed fresh.
Equipment Needed
Here’s a quick rundown of the tools that will make your sushi-making process a breeze:
- A medium pot to cook the rice
- A large mixing bowl for combining ingredients
- A bamboo sushi mat or a flat surface to roll the sushi
- A sharp knife for cutting the rolls
- A small bowl for mixing the sweet vinegar
Frequently Asked Questions
- Can I use regular rice instead of sushi rice? It’s best to use sushi rice for the right texture, but short-grain rice can also work in a pinch!
- How do I keep the rice from sticking too much? Wet your hands when handling the rice, and this will help a lot!
- Can I make this ahead of time? You can prepare the sushi rice and toppings beforehand, but assemble it close to serving time for the best experience!
- What if I don’t like gummy candies? Feel free to omit them and stick to Fruity Pebbles, or go for dried fruits for a healthier kick.
- How can I add even more flavor? You can try a subtle sprinkle of sea salt over the rice before rolling for some added savory flavor.
Join the Fun!
Did you dive into this colorful creation? I’d love to see your Fruity Pebbles sushi rolls! Share your versions and tag me on Pinterest! Let’s spread the fun and maybe add even more ideas together for our sweet adventures in cooking!
