Welcome to the World of Halloumi!
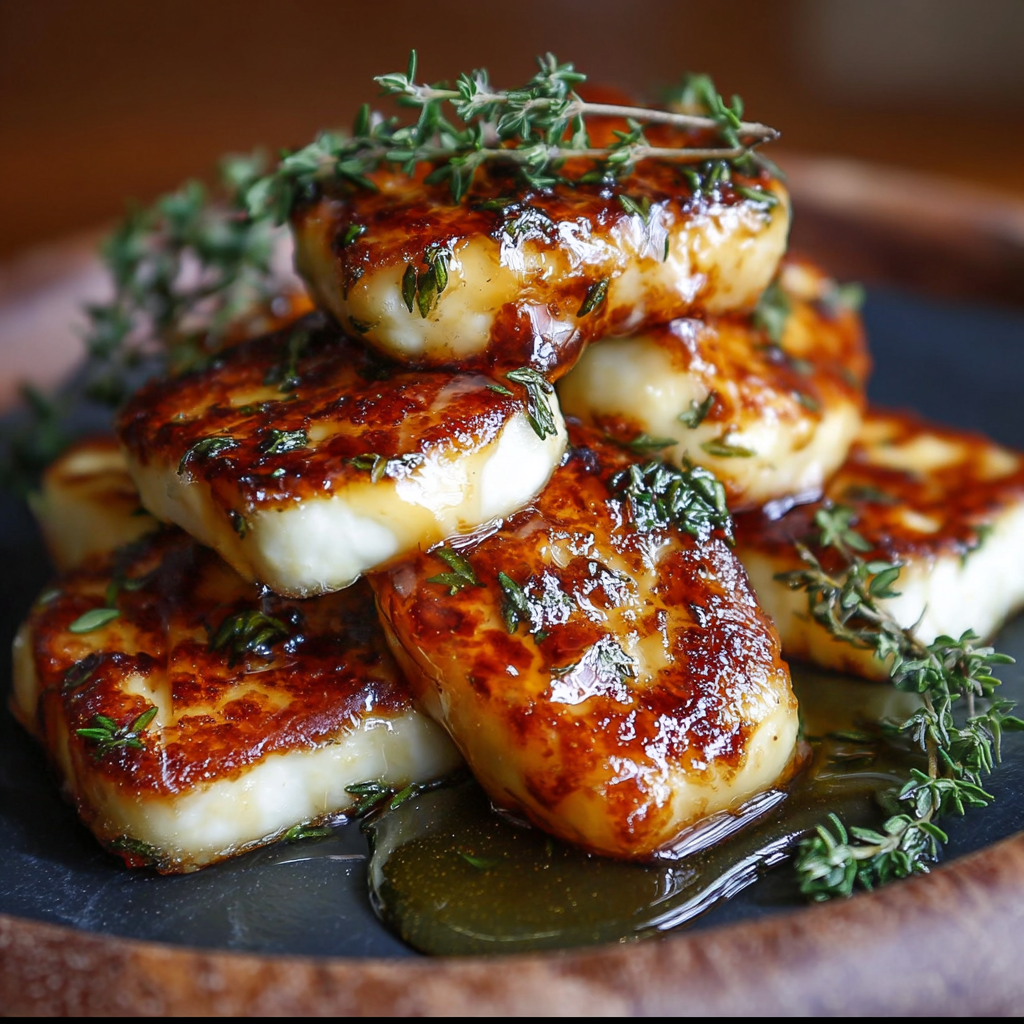
Hey there, cheese lover! If you’re looking for a dish that’s sweet, savory, and oh-so-delicious, then let me introduce you to my favorite little treat: Halloumi with Honey and Thyme! Trust me; you’re going to want to make this again and again. It’s simple, requires just a few ingredients, and tastes like magic. I mean, who can resist that caramelized cheese topped with warm honey? Yum!
Nutritional Benefits of Halloumi
Now, before we dive into cooking, let’s talk about the nutritional perks of halloumi. This semi-hard cheese is packed with protein, which makes it a great snack or appetizer that can keep you feeling full longer. It’s also a good source of calcium, which is fantastic for our bones! What’s more, it offers a lower fat option compared to many other cheeses, especially when you use it in moderation. Plus, adding thyme not only enhances the flavor but also brings a host of antioxidant properties to the table. So feel free to enjoy this dish, knowing it’s not just tasty but also has some nutritional value!
Adaptable Variations
If you want to mix things up a bit with this recipe, here are a few ideas to inspire you:
- Add Some Spice: If you’re a fan of heat, consider adding some crushed red pepper flakes on top before serving. The hint of spice pairs wonderfully with the sweet honey!
- Go Vegan: Try using a vegan halloumi cheese alternative if you want a plant-based version. There are some great airy varieties that melt lovely when cooked!
- Swap Out Honey: Instead of honey, you can use maple syrup for a more unique twist. It will give you a different sweetness that complements the thyme beautifully.
- Make it a Salad: Serve this halloumi over a bed of fresh greens, cherry tomatoes, and slices of avocado for a nutritious meal!
How to Make Halloumi with Honey and Thyme
Ingredients
- Halloumi cheese, sliced into pieces
- Fresh thyme leaves (plus extra for garnish)
- Honey
- Olive oil
- Black pepper (to taste)
- Sea salt (to taste)
Instructions
- Start by slicing the halloumi cheese into about ½-inch thick slices. This will allow the cheese to caramelize nicely and achieve that golden color we all love.
- In a large non-stick skillet, heat 1-2 tablespoons of olive oil over medium heat. Make sure the oil is hot before adding the cheese – it helps in achieving that crispy exterior!
- Carefully place the halloumi slices into the skillet in a single layer, ensuring they do not overlap. Cook each side for about 2-3 minutes until they’re golden brown.
- Flip the halloumi with a spatula and continue to cook for another 2-3 minutes on the opposite side until crispy and golden.
- Once the halloumi is evenly browned, lower the heat and sprinkle the fresh thyme leaves over the cheese. This step allows those aromatic thyme flavors to infuse.
- Drizzle honey over the crispy halloumi slices, letting it warm up slightly—it’s the cherry on top of this dish!
- Season the dish with a sprinkle of sea salt and freshly cracked black pepper to taste. Getting the seasoning just right can elevate the dish!
- Remove the skillet from heat and gently transfer the halloumi to a serving platter.
- Garnish with extra fresh thyme leaves for a lovely presentation.
- Serve warm as a delightful appetizer or alongside a fresh salad to enjoy! Dive in and savor the goodness!
Practical Tips
- If you want to keep the halloumi from sticking to the pan, don’t rush on the oil; it needs to be adequately heated.
- To keep things quick, have all your ingredients prepped and ready to go. Cooking halloumi is fast, so you’ll want everything close at hand!
- Leftovers? If you ever have any (which is rare!), store them in an airtight container in the fridge for a day or two. Reheat in a skillet to restore some of that great texture.
Equipment You’ll Need
Here’s what you’ll need to whip up this delicious plate of crispy halloumi:
- A large non-stick skillet or frying pan
- A sharp knife for slicing the cheese
- A spatula for flipping the halloumi
- A cutting board for prep work
- A serving platter for the finished dish
Frequently Asked Questions
- Can I substitute the halloumi? While halloumi is unique, you can try other firm cheeses like paneer or queso blanco, although they won’t have the same salty flavor.
- Is this dish gluten-free? Yes! This halloumi dish is naturally gluten-free, making it a great choice for anyone with dietary restrictions.
- How can I store leftovers? Store any leftovers in an airtight container in the fridge for up to 2 days. Reheat in a skillet for the best texture.
- Can I make it ahead of time? You can prepare the halloumi ahead, but it’s best enjoyed fresh from the skillet for that crispy texture.
- What can I serve with this? It pairs wonderfully with salads, roasted veggies, or even on a cheese board with fruits and nuts!
Let’s Connect!
I hope you’re as excited as I am to make this delicious halloumi dish! If you try it out, I’d love to hear your thoughts. Feel free to share your creations on Pinterest; it’s a fantastic way to show off your culinary adventures. Happy cooking, and let’s spread the love for halloumi together!
