Welcome to Your New Favorite Snack!
Hey there! If you’re anything like me, you’re always on the lookout for tasty snacks that are super easy to whip up. Well, today’s recipe is a total winner—ham and cheese sticks! They’re gooey, melty, and oh-so-satisfying. Not to mention, perfect for movie nights or a quick bite between meals. So, grab your apron, and let’s dive into this deliciousness!
Nutritional Benefits of Ham and Cheese Sticks
Now, let’s chat about the nutritional perks of this snack. First off, ham is a great source of protein, which is fantastic for keeping our energy levels up. Pair that with cheese, and you’re adding calcium and healthy fats into the mix. Just remember to enjoy these sticks in moderation, as they can be a bit rich—especially with all that gooey cheese!
Fun Variations to Try
What’s better than a recipe you can easily modify? Here are some fun twists to consider:
- Swap the Ham: Try turkey or chicken slices for a lighter option.
- Cheese Choices: Experiment with gouda, provolone, or even a spicy pepper jack for a kick!
- Herb Blend: Mix in dried herbs such as oregano or basil into the shredded cheese for an aromatic touch.
- Wrap It Up!: For a little extra crunch, you could wrap these sticks in a pastry dough before baking. Yum!
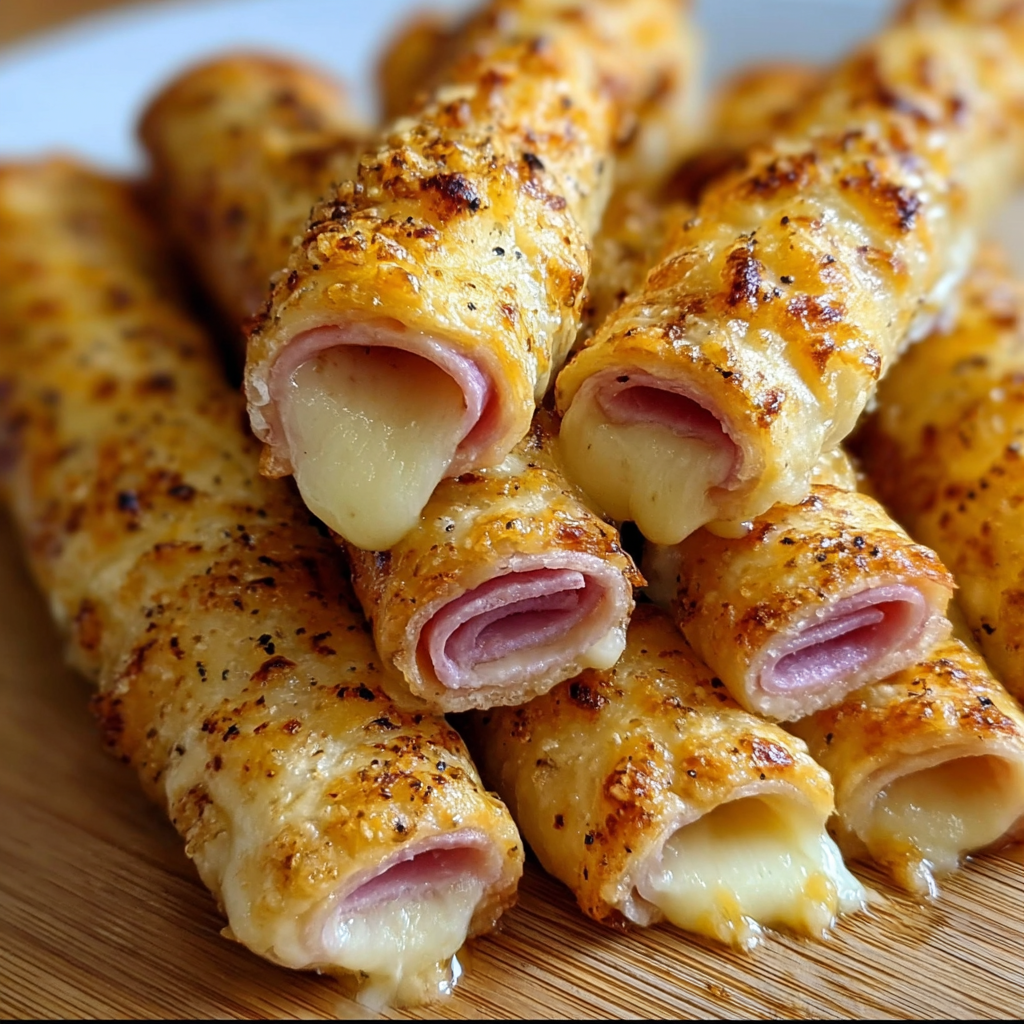
Easy Ham and Cheese Sticks Recipe
Ingredients
- 8-12 slices of thinly sliced ham
- 8-12 slices of melting cheese (mozzarella, cheddar, or a cheese blend)
- 1 cup of shredded cheddar or parmesan cheese (for coating)
- 1-2 tablespoons of butter or oil (for greasing or brushing)
- Optional: a pinch of garlic powder or black pepper (for extra flavor)
- Optional dipping sauce (like barbecue sauce, honey mustard, or soy sauce)
Step-by-Step Instructions
- Preheat your oven to 400°F (200°C). While it heats up, lightly grease a baking sheet with butter or oil.
- Lay one slice of ham flat on a clean surface—think of it as your little ham canvas!
- Place a slice of your favorite melting cheese on top of the ham.
- Carefully roll the ham and cheese slice into a tight stick shape. Imagine creating a delicious little burrito!
- On a plate or shallow bowl, spread out the shredded cheddar or parmesan cheese. This is what will give your sticks that yummy cheesy crust.
- Roll each ham and cheese stick in the shredded cheese, pressing gently so it sticks well.
- Place the coated sticks on your greased baking sheet, spaced out nicely.
- Want to kick it up a notch? Sprinkle a dash of garlic powder or black pepper on top for that extra flair.
- Bake in the oven for about 10-12 minutes or until the cheese coating is melted, bubbly, and golden brown.
- Once baked, remove the sticks from the oven and allow them to cool slightly before serving. Trust me, you don’t want to burn your mouth on molten cheese!
- Serve warm with your favorite dipping sauce, whether it’s barbecue sauce, honey mustard, or soy sauce. The choices are endless!
Practical Tips for Success
- Feeling adventurous? Try adding some finely chopped jalapeños inside for a spicy kick!
- For a kid-friendly version, let your little ones help with rolling the sticks up—kids love hands-on cooking!
- Leftover sticks? Store them in an airtight container in the fridge for up to 3 days. Just reheat them briefly for that melty goodness again.
Equipment Needed
You won’t need too much fancy gear for this recipe! Here’s what you’ll need:
- A baking sheet (with a bit of grease for easy cleanup)
- A cutting board to slice and roll your ham and cheese
- A plate or shallow bowl for the shredded cheese
- A spatula for transferring the sticks to the baking sheet
Frequently Asked Questions
- Can I use other meats? Absolutely! Turkey, or even salami, will work wonderfully too.
- Can I make these ahead of time? Yes! You can prep them a few hours ahead and bake them right before serving.
- What dipping sauces work best? Barbecue sauce and honey mustard are favorites, but ranch dressing works great too!
- Can I air fry these instead? Yes! Air fry at 375°F (190°C) for about 8-10 minutes for a quicker option!
- What if I don’t have shredded cheese? You can use cheese slices instead—just cut them into smaller pieces to coat the sticks.
Join the Snack Game!
I hope you enjoy making and munching on these ham and cheese sticks as much as I do! They’re seriously easy and delicious. If you try them out, please come back and let me know how they turned out—I’d love to hear your feedback! Also, don’t forget to pin this recipe on Pinterest so you can come back to it anytime. Happy snacking!
