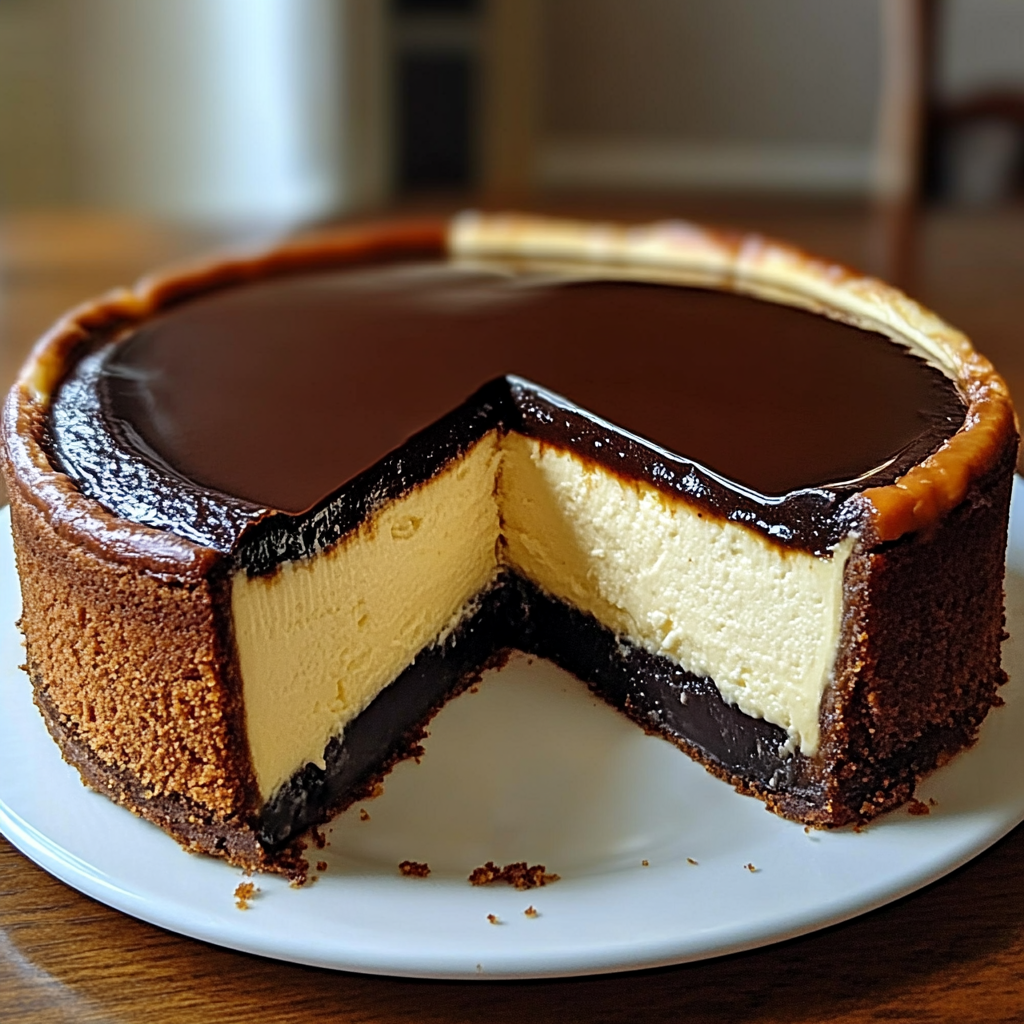
Boston Cream Pie Cheesecake Cake – Decadent, Creamy & Irresistible!
Hello, my fellow dessert enthusiasts! Are you ready to experience a slice of pure bliss? I’m talking about a Heavenly Boston Cream Pie Cheesecake Cake! This is the kind of dessert that brings smiles and happy vibes to any gathering. I absolutely love making this cake because it’s like a celebration in every layer. You get the creamy, dreamy cheesecake goodness paired with the classic flavors of Boston cream pie, all nestled between fluffy cake layers. Trust me; it will impress everyone you share it with, including yourself!
Nutritional Benefits
Okay, let’s talk about some of the nutritional aspects—after all, it’s good to enjoy your treats guilt-free! While this cheesecake cake is definitely more indulgent, it’s loaded with some fun benefits. First, the cream cheese in the cheesecake layer provides calcium and protein. The cake itself can be made with whole grain flour if you’re feeling adventurous, giving you a little fiber boost. Plus, you can opt for a less sugary pudding mixture or less sugar in the cake to make it a bit healthier. Remember, moderation is key!
Adaptable Variations to Try
- Gluten-Free Option: You can swap out regular flour for a gluten-free blend and ensure the pudding is also gluten-free for a crowd-friendly alternative.
- Flavor Twists: Feel free to add a splash of vanilla extract or almond extract to amp up the flavor in the cake. You could even switch out the vanilla pudding for chocolate pudding for an even richer treat!
- Reduce Fat: Using low-fat cream cheese and Greek yogurt can help cut down on some of that richness while still keeping the creaminess intact!
Heavenly Boston Cream Pie Cheesecake Cake Recipe
Ingredients
- 1 ½ cups all-purpose flour
- 1 cup granulated sugar
- ½ cup unsalted butter, softened
- 2 eggs
- 1 teaspoon vanilla extract
- 1 ½ teaspoons baking powder
- ½ teaspoon salt
- 1 package (8 oz) cream cheese, softened
- 1/2 cup powdered sugar
- 1 package (3.4 oz) vanilla pudding mix
- 2 cups whole milk
- 1 cup heavy whipping cream
- 1 cup semi-sweet chocolate chips
Instructions
- Preheat your oven to 350°F (175°C) and grease two 9-inch round cake pans.
- In a large bowl, cream together the softened butter and sugar until light and fluffy. Add the eggs one at a time, mixing well after each addition. Stir in the vanilla extract.
- In a separate bowl, mix the flour, baking powder, and salt. Gradually add this to the butter mixture, alternating with milk, until just combined. Do not overmix!
- Divide the batter evenly between the two prepared pans. Bake for 25-30 minutes, or until a toothpick inserted comes out clean. Let them cool completely on a wire rack.
- For the cheesecake layer, beat the softened cream cheese and powdered sugar in a bowl until smooth and creamy.
- Prepare the vanilla pudding according to package instructions, using the 2 cups of milk. Once it’s thickened, fold it into the cream cheese mixture until combined. You will have a delightful cheesecake filling!
- Once the cake layers are cool, place one layer on a serving plate. Spread a generous layer of the cheesecake filling on top.
- Add the second cake layer on top and refrigerate while you prepare the chocolate ganache.
- For the ganache, melt the chocolate chips with 1 cup of heavy cream in a microwave-safe bowl, heating in 30-second intervals and stirring until smooth.
- Once smooth, let it cool slightly before pouring it over the top of the chilled cake. Allow it to drip down the sides!
- Chill the cake for at least 30 minutes before slicing. Enjoy every heavenly bite!
Valuable Tips
- Be sure to let your cake layers cool completely before stacking. This will help prevent any melting in your beautiful layers!
- Using a serrated knife, gently trim the tops of the cake layers for a level base if needed. This makes stacking easier!
- Store any leftover cake in the fridge, but be sure to cover it well to maintain that lovely moisture and flavor.
Equipment Needed
Here’s what you’ll need for this delightful baking adventure:
- Two 9-inch round cake pans
- A mixing bowl and a hand or stand mixer
- A spatula for spreading that luscious filling
- A whisk for the pudding mix
- A cooling rack for cooling your cakes evenly
- A microwave-safe bowl for making the chocolate ganache
Frequently Asked Questions
- Can I use cake mix instead of making the batter from scratch? Of course! A box of vanilla cake mix can save some time and still taste delicious.
- Can I make this cake ahead of time? Absolutely! You can bake the cake layers and prepare the cheesecake filling a day in advance and assemble them when you’re ready to serve.
- How long does this cake stay fresh? In the fridge, it should last about 3-4 days when well-covered.
- Can I freeze this cheesecake cake? Yes! Just be sure to wrap it tightly with plastic wrap, then foil. Thaw it in the fridge when you’re ready to enjoy it again.
- Is there a substitute for vanilla pudding? You can try using instant French vanilla pudding for a different flavor or even chocolate pudding if you’re feeling chocolatey!
Did you whip up this Heavenly Boston Cream Pie Cheesecake Cake? I can’t wait to hear how yours turned out! Snap a photo and share it on Pinterest, and let’s spread the joy of baking together!
