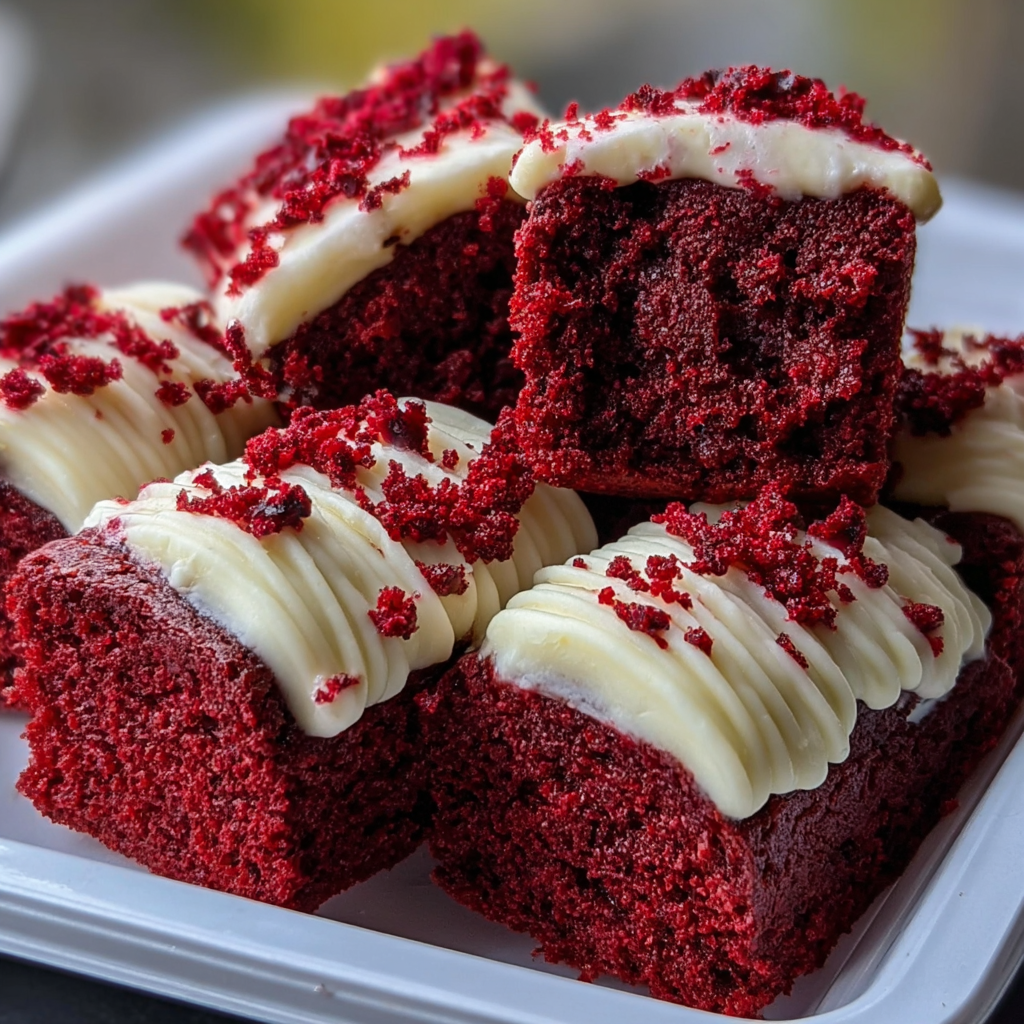
Let’s Dive into Deliciousness: Homemade Red Velvet Brownie Dippers
Hey there, fellow dessert lover! If you’re anything like me, you’re always on the lookout for sweet treats that not only taste amazing but are fun to make too. Well, get ready for a new favorite: homemade red velvet brownie dippers! These are rich, fudgy brownies with a delightful cream cheese filling, and honestly, they’re just as fun to eat as they are to make. Whether it’s for a gathering or just a cozy night in, these brownies are the perfect dessert to satisfy your sweet tooth!
Nutritional Benefits of Red Velvet Brownies
Now, let’s talk a little about nutrition. While brownies are definitely a treat, there are ways to enjoy them and still make them a bit better for you! Using unsweetened cocoa powder gives you the rich chocolate flavor but also offers some antioxidants. Moreover, the cream cheese filling adds some protein and calcium to the dish, especially if you go for a low-fat version. Pairing these brownies with some fresh fruit or nuts can further enhance their nutritional profile. Balance is key!
Adaptable Variations to Try
- For a Healthier Twist: Substitute half the sugar with a natural sweetener like coconut sugar or maple syrup. You could also experiment with whole wheat flour for added fiber!
- Making it Vegan?: You can replace eggs with flax eggs (1 tablespoon ground flaxseed mixed with 2.5 tablespoons water for each egg). Use a non-dairy butter and vegan cream cheese too!
- Add Flavor: Consider adding a teaspoon of almond extract or a pinch of cinnamon to the batter for some extra flavor that pairs beautifully with chocolate.
Easy-to-Follow Recipe for Red Velvet Brownie Dippers
Ingredients
- 1 cup unsalted butter, melted
- 2 cups granulated sugar
- 4 large eggs
- 2 teaspoons vanilla extract
- 1 tablespoon red food coloring
- 2 cups all-purpose flour
- 1/2 cup unsweetened cocoa powder
- 1 teaspoon baking powder
- 1/2 teaspoon salt
- 1 cup chocolate chips (white or semi-sweet)
- 1 cup cream cheese, softened
- 1/2 cup powdered sugar
- 1 teaspoon vanilla extract (for frosting)
Step-by-Step Instructions
- Preheat your oven to 350°F (175°C) and grease a 9×13 inch baking pan with cooking spray or line it with parchment paper for easy removal.
- In a large mixing bowl, combine the melted butter and granulated sugar until well blended. This is where the magic begins!
- Add the eggs one at a time, mixing thoroughly after each addition. It helps add that moisture and richness.
- Next, stir in the vanilla extract and red food coloring until your mixture is smooth and perfectly vibrant. Remember, we’re making red velvet here!
- In another bowl, whisk together the all-purpose flour, cocoa powder, baking powder, and salt. This will be your dry mix, and whisking helps to aerate it.
- Gradually add the dry ingredients to the wet mixture. Stir until just combined—don’t overmix; we want those brownies to be fudgy!
- Fold in the chocolate chips gently, ensuring they’re evenly distributed throughout the batter.
- Pour half of the brownie batter into your prepared baking pan, spreading it evenly to cover the bottom.
- In a separate bowl, whisk together the softened cream cheese, powdered sugar, and a teaspoon of vanilla extract until smooth and creamy. This is going to be your delightful filling!
- Spread the cream cheese mixture over the first layer of brownie batter, ensuring it covers the surface.
- Pour the remaining brownie batter over the cream cheese layer and spread it evenly. Then, it’s time to bake!
- Bake in the preheated oven for 30-35 minutes, or until a toothpick inserted in the center comes out with a few moist crumbs (but not wet batter). Perfectly baked brownies!
- Allow the brownies to cool in the pan on a wire rack for 15-20 minutes before transferring to the refrigerator to cool completely.
- Once cooled, cut the brownies into rectangular dippers and serve them with a dollop of frosting or extra cream cheese frosting on the side for dipping.
- Enjoy your homemade red velvet brownie dippers as a delightful dessert!
Helpful Cooking Tips
- For a more intense red color, feel free to add a little extra red food coloring; just be careful not to overdo it!
- If you want to save some time, feel free to make the brownie batter ahead of time and refrigerate until you’re ready to bake.
- These brownies can be stored in an airtight container at room temperature for up to 3 days—if they last that long!
Equipment Needed
To whip up these scrumptious brownies, you’ll need some basic kitchen tools:
- A mixing bowl (large enough to hold all your ingredients)
- A whisk for mixing
- A spatula for folding in those delicious chocolate chips
- A 9×13 inch baking pan (greased or lined with parchment paper)
- A toothpick for testing the doneness
- A wire rack for cooling your brownies
Frequently Asked Questions
- Can I replace the butter with oil? Yes, you can! If you’re looking for a slightly different texture, using vegetable oil works, too.
- What if I don’t have red food coloring? You can use beet juice as a natural alternative, but keep in mind it might alter the flavor slightly.
- Can I freeze the brownies for later? Absolutely! Just wrap them tightly in plastic wrap and store them in an airtight container. They can last for up to three months!
- How do I know when my brownies are done? Insert a toothpick into the center—if it comes out with a few moist crumbs, they’re perfect!
- What should I serve with these brownies? Besides the cream cheese frosting, they pair great with ice cream, fresh fruit, or a dusting of powdered sugar!
Let’s Connect!
I hope you enjoy making and eating your homemade red velvet brownie dippers as much as I do! If you take a picture or try a new twist on the recipe, share it with me! You can find more delightful recipes on my Pinterest page. Let’s inspire each other in the kitchen!
