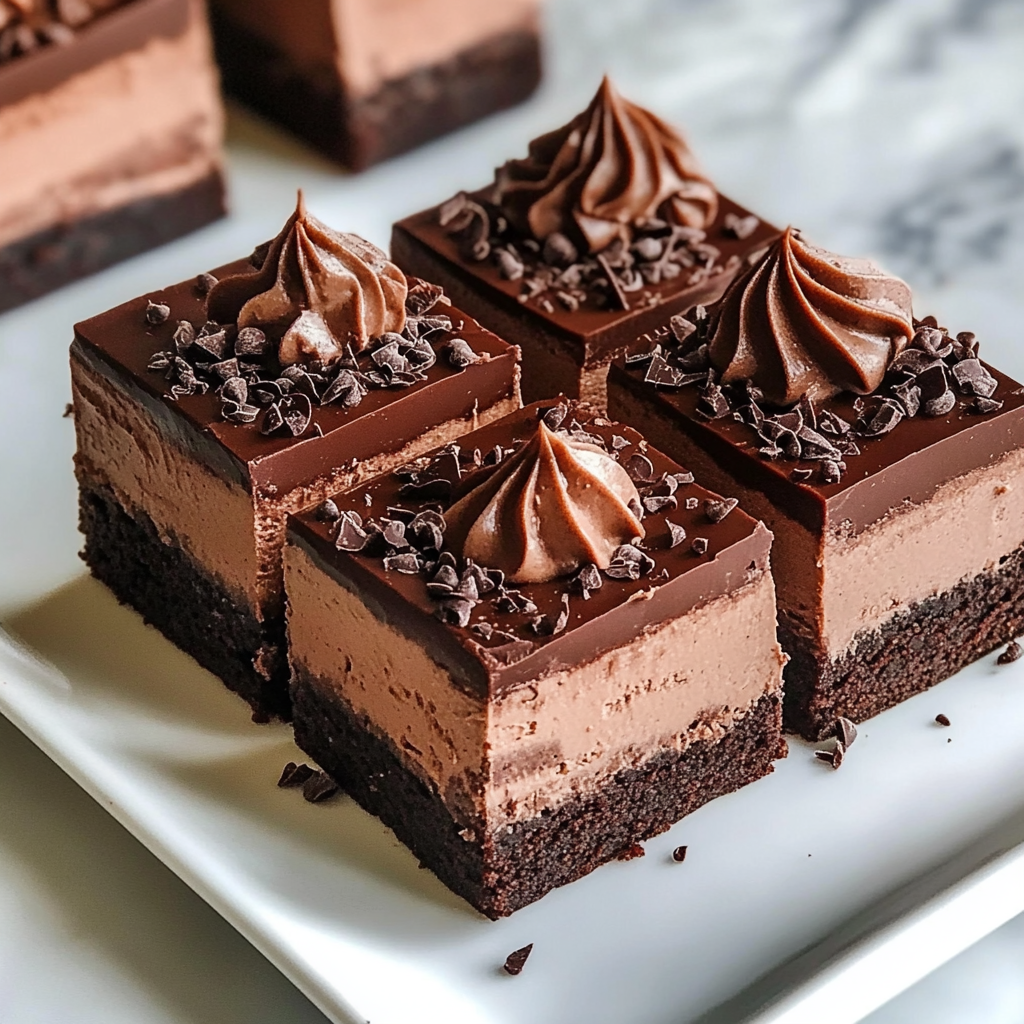
Layered Chocolate Mousse Brownies
Hey there, chocolate lover! Are you ready to impress your sweetheart this Valentine’s Day? I can’t think of a better way than with these Layered Chocolate Mousse Brownies! They’re rich, indulgent, and absolutely drool-worthy. Whether it’s a special dinner or just a little surprise treat, these brownies will surely make hearts flutter. They might look fancy, but I promise, they’re surprisingly easy to make! Let’s get started!
Nutritional Benefits of Layered Chocolate Mousse Brownies
You might be surprised to learn that while these brownies are a decadent treat, they can have some nutritional perks too! Dark chocolate, which you’ll want to use for the mousse layer, is known for being rich in antioxidants – think of it as a little guilt-free indulgence. Plus, if you incorporate a quality cocoa powder and some eggs, we can bring in a modest dose of protein. Just remember, moderation is key when it comes to sweets!
Fun Adaptable Variations
- Gluten-Free Option: Swap out regular flour for gluten-free flour or almond flour for a gluten-free version of these brownies.
- Less Sugar: If you’re looking to cut back, use a sugar substitute like stevia, or simply use less sugar in the brownie base and mousse layer.
- Nutty Goodness: If you love nuts, consider adding crushed walnuts or pecans to the brownie base for an extra crunch!
- Flavor Twists: Want to change things up? Add a splash of orange liqueur or peppermint extract into the mousse for a fun flavor twist!
Delicious Layered Chocolate Mousse Brownies Recipe
Ingredients
- For the Brownies:
- 1 cup butter (2 sticks)
- 2 cups granulated sugar
- 4 large eggs
- 1 tablespoon vanilla extract
- 1 cup cocoa powder
- 1 cup all-purpose flour
- 1/2 teaspoon salt
- For the Chocolate Mousse Layer:
- 1 cup heavy whipping cream
- 1 cup dark chocolate, chopped
- 2 tablespoons sugar (optional)
- 1 teaspoon vanilla extract
Instructions
- Preheat your oven to 350°F (175°C). Grease a 9×13 inch baking pan with butter or line it with parchment paper for easier removal.
- In a medium saucepan, melt the butter over low heat. Once melted, remove from the heat and stir in the sugar. Add the eggs, one at a time, mixing well. Then add the vanilla extract.
- In a separate bowl, combine cocoa powder, flour, and salt. Gradually fold this dry mixture into the egg mixture until well blended, but be careful not to overmix!
- Pour the brownie batter into the prepared pan and spread it evenly. Bake for about 25-30 minutes. You want a toothpick to come out with a few moist crumbs, not wet batter.
- While the brownies are baking, prepare the chocolate mousse layer. In a heatproof bowl, melt the dark chocolate over a double boiler or in the microwave (stirring frequently). Let it cool slightly.
- In another bowl, whip the heavy cream until soft peaks form. If you like it sweet, add the optional sugar as you whip. Gently fold the melted chocolate into the whipped cream, and then add the vanilla extract. Be gentle to keep that light fluffiness!
- Once the brownies are baked and cooled completely, spread the chocolate mousse layer evenly over the top of the brownies.
- Refrigerate for at least 2 hours so the mousse can set. Once ready, cut into squares and serve chilled.
Practical Tips for a Perfect Dessert
- Make sure to let the brownies cool down completely before adding the mousse to avoid melting it.
- Store any leftovers in an airtight container in the fridge; they will stay fresh for up to 4 days.
- If you want to make these ahead of time, they can be made a day in advance; the mousse will taste even better after chilling overnight.
- Serve with a dollop of whipped cream on top and maybe an extra berry or two for decoration!
Equipment Needed
Here’s what you’ll need to whip these up:
- 9×13 inch baking pan
- Medium saucepan to melt the butter and mix brownies
- A mixing bowl for dry ingredients
- Whisk or electric mixer for whipping the cream
- Heatproof bowl for melting chocolate
- Spatula for folding and spreading the mousse
- Knife for cutting the brownies after they cool
Frequently Asked Questions
- Can I use milk chocolate instead of dark chocolate for the mousse? Yes, you can! Just keep in mind that it will make the mousse sweeter.
- How can I tell when the brownies are perfectly baked? Use the toothpick test: look for moist crumbs but no wet batter!
- Can I freeze the brownies once they’re made? Absolutely! Just wrap them tightly and store them in the freezer for up to 3 months. Thaw in the fridge before serving.
- What if I don’t have heavy cream for the mousse? You can substitute with whipped topping, but the texture will be different.
- Can I add fruit to the mousse layer? Yes! Adding berries or even sliced bananas can give the mousse a delightful twist.
Have you decided to give these Layered Chocolate Mousse Brownies a try? I’d love to hear how they turn out or any fun variations you tried! Let’s keep this chocolate love going! Share your creations on Pinterest and tag me so I can see your beautiful desserts!
