Colorful Dinner Adventure!
Hey there! Are you ready to whip up something that’s equal parts fun, delicious, and colorful? I can’t wait to share this recipe for stuffed bell peppers with you! It’s a fantastic choice whether you’re cooking for your family or having friends over for dinner. Plus, the colors of the peppers brighten up any table! And the best part? You can customize this recipe according to your taste preferences. So let’s get cooking!
Nutritional Benefits of Stuffed Bell Peppers
These stuffed bell peppers are not only hearty but also packed with health benefits! Bell peppers are loaded with vitamins A and C, and they’re a great source of antioxidants. If you’re looking to get more veggies into your family’s diet, this recipe is a winning choice. By adding protein, whether it’s ground beef, turkey, or a meat substitute, along with rice and cheese, you’re making a balanced meal that’s full of flavor. What’s not to love?
Fun Variations to Try
- Go Vegetarian! Swap out the meat for extra beans, lentils, or your favorite plant-based protein. It’s just as delicious!
- Spicy Twist: Add some chopped jalapeños or crushed red pepper flakes to give it a spicy kick.
- Cheesy Goodness: Experiment with different cheeses! Cheddar, feta, or even goat cheese can give a fun twist to these stuffed peppers.
- Additional Veggies: Don’t stop at zucchini or carrots—throw in some chopped spinach or corn for even more nutrition!
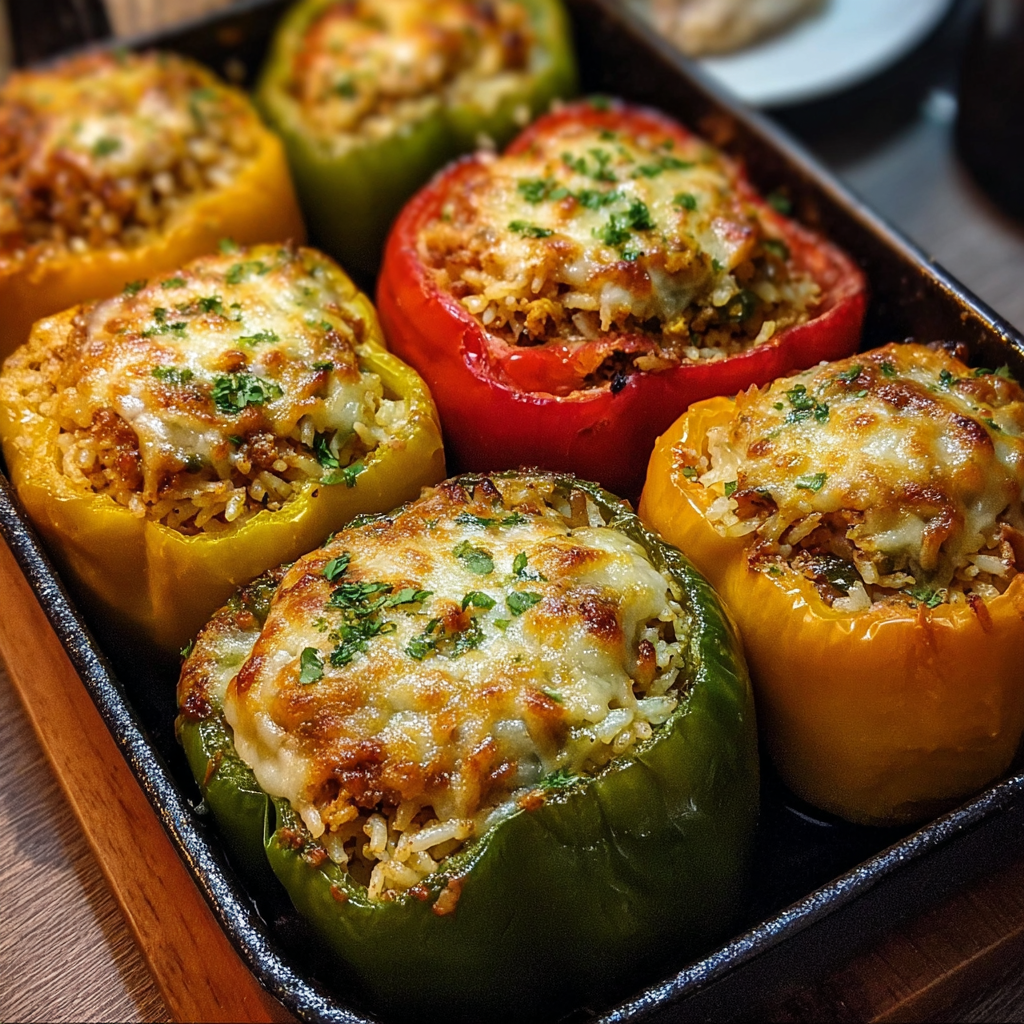
Delicious Stuffed Bell Peppers Recipe
Ingredients
- 4 large bell peppers (any colors you like)
- 1 cup cooked long grain rice
- 1/2 to 3/4 lb ground beef, turkey, or plant-based meat substitute (optional)
- 1 small onion, finely chopped
- 2 cloves garlic, minced
- 1 cup diced tomatoes (fresh or canned)
- 1/2 cup tomato sauce or paste
- 1 small carrot or zucchini, finely diced (optional)
- 1 cup shredded mozzarella or mild melting cheese
- 2 tablespoons olive oil
- Salt and black pepper to taste
- 1 teaspoon dried oregano
- 1 teaspoon dried basil
- 1/2 teaspoon paprika (optional)
- Fresh parsley or cilantro, chopped (for garnish)
Cooking Instructions
- Preheat your oven to 375°F (190°C).
- Let’s prepare those bell peppers! Slice off the tops and remove the seeds and membranes. Set them aside—you’ll fill these beauties in no time!
- Cook your rice following the package instructions, then set it aside.
- In a large skillet over medium heat, warm the olive oil. Sauté the chopped onion and garlic until they’re translucent and fragrant. Ah, that smell is wonderful!
- If you’re using ground meat or a plant-based protein, add it to the skillet and cook until it’s browned and fully cooked through. Drain any excess fat if needed.
- Next, stir in the diced tomatoes and tomato sauce, along with your finely diced carrot or zucchini if you opted for them. Season this mixture with salt, pepper, oregano, basil, and paprika. Let it all simmer for about 5 minutes to let those flavors meld together.
- Mix the rice into the skillet with the sautéed mixture. Stir it all up! Taste and adjust the seasoning as you like.
- Now comes the fun part! Spoon the rice mixture into the hollow bell peppers, pressing gently to make sure they’re filled completely.
- Place the stuffed peppers upright in a baking dish, and if you have any remaining filling, you can spoon it around the peppers.
- Generously sprinkle shredded cheese on top of each stuffed pepper. Because who doesn’t love more cheese?
- Cover the baking dish with foil, if you want softer peppers, and bake for 30 minutes. After that, remove the foil and bake for an additional 10 to 15 minutes, until the cheese is bubbly and golden brown and the peppers are tender.
- Once done, let them cool for a few minutes, then garnish with fresh parsley or cilantro before serving.
Practical Tips for Success
- If you want your peppers to stay upright while baking, you can trim a slight bit off the bottom to create a flat base—just be careful not to slice through!
- These stuffed peppers can be a great make-ahead meal. Keep them in the fridge unbaked for up to 24 hours before popping them in the oven!
- If you have leftovers, store them in an airtight container in the fridge for up to 4 days or freeze them for a longer shelf life.
Equipment Needed
Here’s what you’ll need to make this delicious dish:
- A baking dish (something deep enough to hold your peppers upright)
- A large skillet for sautéing
- A mixing bowl for combining the filling
- Knives and cutting board for prepping the veggies
- A spoon for stuffing the peppers
- Aluminum foil (if you want to cover while baking)
Frequently Asked Questions
- Can I use frozen bell peppers? Yes! Just thaw them completely before stuffing, and they might need a short extra baking time.
- Can I skip the meat entirely? Of course! These peppers are just as delicious with just the rice and veggies.
- What if I don’t have tomato sauce? No problem! You can use diced tomatoes or even a jar of pasta sauce instead.
- How do I know when the peppers are done? They should be tender enough to pierce with a fork but still have a bit of structure. You’ll see the cheese is bubbly and golden too!
- Can I make this recipe in advance? Yes! You can stuff the peppers ahead of time and bake them just before serving. They reheat beautifully!
Let’s Chat!
Did you give these stuffed bell peppers a try? I’d love to know how they turned out for you! Feel free to share your creations and variations. Don’t forget to follow me on Pinterest for more tasty recipes and cooking inspiration! Happy cooking!
