Welcome to the Sweet World of White Velvet Layer Cake!
Hey there, cake lover! 🌟 If you’re searching for a dessert that will impress your friends and family while making any celebration sparkle, then you’ve come to the right place. I can’t help but smile every time I make this White Velvet Layer Cake—it’s fluffy, elegant, and oh-so-delicious! Plus, it’s surprisingly easy to whip up, and you can tailor it to fit any special occasion. Let’s dive in, shall we?
Why You’ll Love This Cake
This White Velvet Layer Cake isn’t just a feast for the eyes—it also has some incredible attributes that you might find fascinating! Let’s explore a bit about its nutritional benefits.
Nutritional Benefits
While cake may not be the first thing that comes to mind when thinking of a “healthy” dessert, making it at home gives you some control over the ingredients. Using whole milk instead of cream adds a bit of calcium, while the butter provides some healthy fats. Plus, by making your own cake, you can limit the sugar to suit your taste and even add wholesome ingredients like almond flour or fruit puree instead of some of the sugar for a little less guilt when indulging!
Fun Variations to Make
If you want to mix things up a bit, here are some fun adaptations to try:
- Chocolate Velvet Version: Swap half a cup of all-purpose flour for cocoa powder for a decadent chocolate twist!
- Fruit-Filled Layers: Add a layer of fresh berries or jam between the cake layers for a fruity surprise!
- Gluten-Free Option: Use a 1:1 gluten-free flour blend in place of regular flour for a delicious gluten-free cake!
- Citrus Zing: Add the zest of a lemon or an orange into the batter for a burst of fresh flavor!
Get Ready to Bake: White Velvet Layer Cake Recipe
Ingredients
Here’s what you’ll need to create this delightful cake:
- For the Cake:
– 2 ½ cups all-purpose flour
– 2 ½ tsp baking powder
– ½ tsp salt
– ½ cup unsalted butter, softened
– 1 ½ cups granulated sugar
– 1 cup whole milk
– 3 large egg whites
– 2 tsp vanilla extract
– 1 tbsp white vinegar - For the Frosting:
– 1 cup unsalted butter, softened
– 4 cups powdered sugar
– 2 tsp vanilla extract
– 2-3 tbsp heavy cream or whole milk (as needed for consistency)
– Yellow food coloring (optional)
Instructions
- Preheat the Oven: Preheat your oven to 350°F (175°C) and grease and flour three 8-inch round cake pans.
- Prepare the Dry Ingredients: In a large bowl, whisk together the all-purpose flour, baking powder, and salt. Set aside.
- Cream the Butter and Sugar: In a separate bowl, beat the softened butter using an electric mixer on medium speed until creamy. Gradually add the granulated sugar and continue to beat until light and fluffy (about 3-4 minutes).
- Add Wet Ingredients: Add the egg whites, vanilla extract, and white vinegar to the butter mixture. Beat until well combined.
- Combine Ingredients: Gradually add the dry ingredients to the wet mixture, alternating with the whole milk, starting and ending with the flour mixture. Mix until just combined; do not overmix.
- Bake the Cake: Divide the batter evenly among the prepared cake pans. Bake in the preheated oven for 25-30 minutes or until a toothpick inserted in the center comes out clean.
- Cool the Cakes: Once baked, let the cakes cool in the pans for 10 minutes before transferring to wire racks to cool completely.
- Prepare the Frosting: In a large bowl, beat the softened butter until creamy. Gradually add the powdered sugar and mix well. Add the vanilla extract and enough heavy cream or milk to achieve a smooth, spreadable consistency. If desired, add a few drops of yellow food coloring to tint the frosting.
- Assemble the Cake: Once the cakes are completely cool, place one layer on a cake stand or serving plate. Spread an even layer of frosting on top. Repeat with the second layer and apply frosting on top of the second layer as well.
- Top with the Final Layer: Place the third cake layer on top and cover the entire cake with a thin crumb coat of frosting. Chill the cake for about 30 minutes.
- Final Frosting: After chilling, apply a final layer of frosting to the top and sides of the cake. Use a spatula or cake scraper to create a smooth finish.
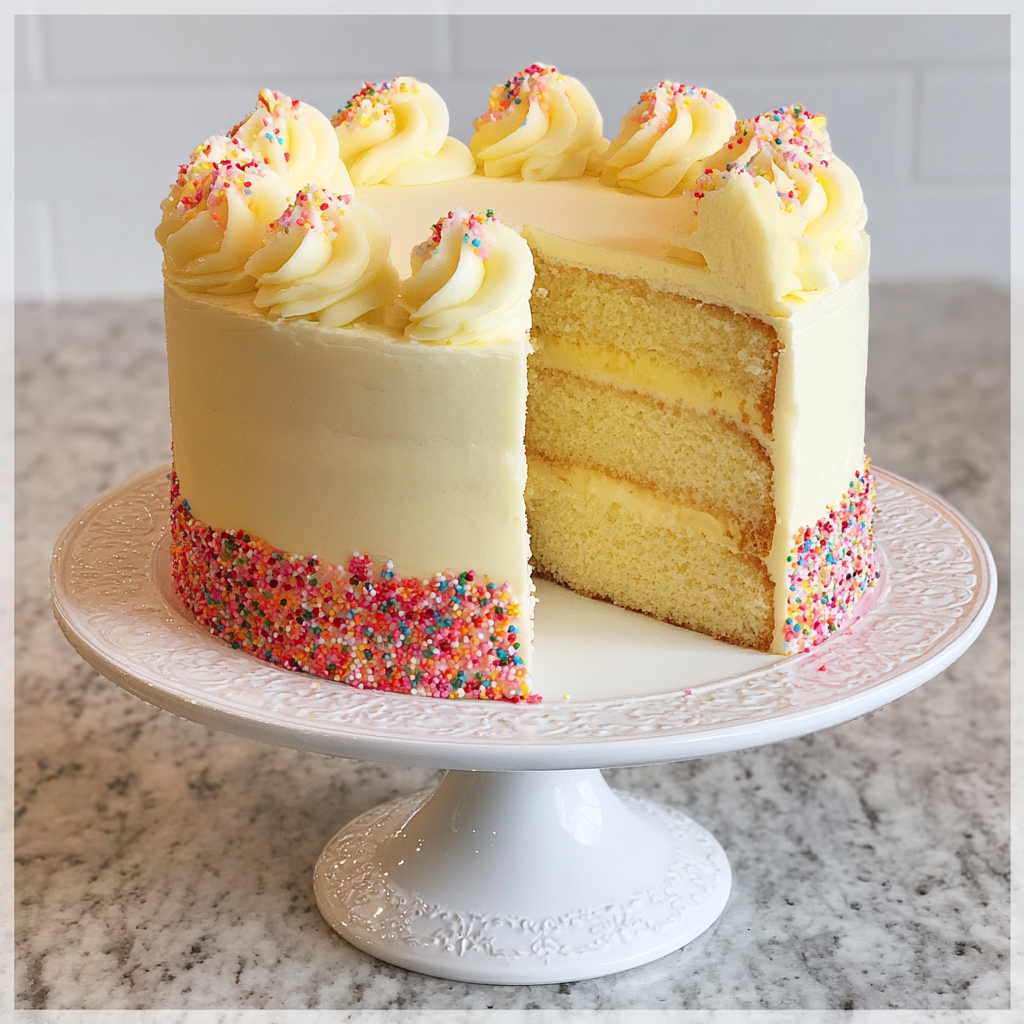
- Decorate with Sprinkles: Press sprinkles onto the bottom edge of the cake and pipe decorative swirls on top using additional frosting.
- Serve: Slice the cake and enjoy your beautiful white velvet layer cake, perfect for any celebration!
Practical Tips
- Store any leftover cake in an airtight container at room temperature for up to 3 days, or in the fridge if you prefer it chilled.
- If you want to prepare in advance, you can freeze the cake layers (without frosting) wrapped tightly in plastic wrap for up to 3 months. Just thaw before frosting!
- If you’re worried about your cake sticking, add a little baking spray or line the bottoms of your pans with parchment paper before pouring in the batter.
Frequently Asked Questions
- Can I use different cake pans? Definitely! You can use three 9-inch pans or even two 9-inch pans if you’d like a shorter cake.
- Can I make this without eggs? You can substitute the egg whites with whipped aquafaba (the liquid from canned chickpeas) or a store-bought egg replacer.
- Can I use a different frosting? Absolutely! Cream cheese frosting or whipped cream could be delicious alternatives.
- Does the frosting need to be refrigerated? If you have leftovers, yes! Store the frosted cake in the fridge for better preservation.
- How can I make this cake more colorful? Use food coloring to tint your frosting or add colored sprinkles for a fun touch!
Time to Share the Sweetness!
I can’t wait for you to try this recipe for yourself! It’s such a joyful treat to bake and share, and I’d absolutely love to hear how your White Velvet Layer Cake turns out. If you’re looking for more delightful recipes, follow me on Pinterest where I share even more sweet inspirations. Happy baking! 🎂✨
