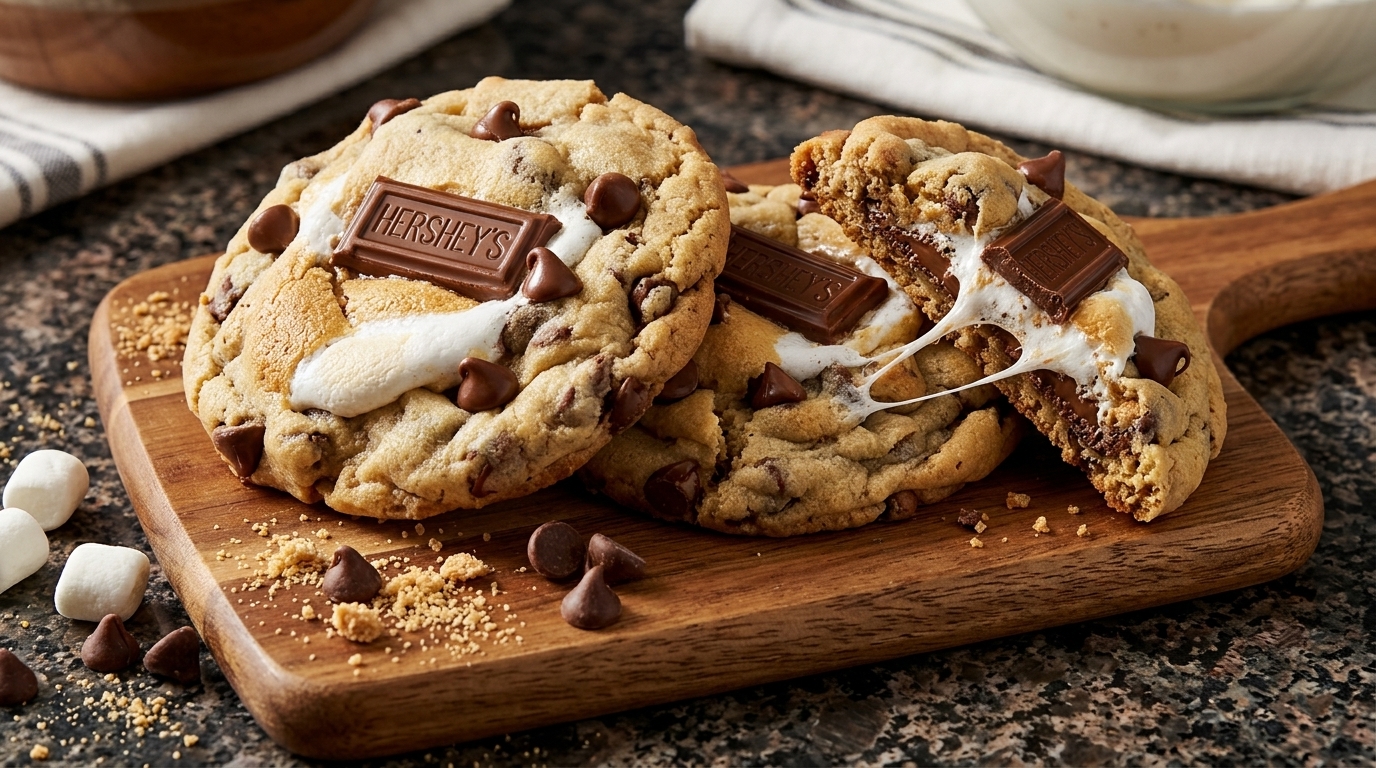
If you’ve been searching for baking ideas that feel nostalgic, fun, and completely irresistible, these smores cookies are exactly what you need. I’m talking about soft, thick cookies loaded with chocolate chips, graham cracker pieces, melty marshmallow, and classic milk chocolate bars tucked right into the top. They have all the cozy campfire flavor you love, but you can make them right in your own kitchen any time the craving hits.
One of my favorite things about these cookies is how dramatic and bakery-style they look once they come out of the oven. The golden cookie edges, gooey marshmallow stretch, and melty chocolate pieces make them almost impossible to resist. If you saw a tray of these on the counter, I promise you’d grab one before they even had time to cool completely.
These s’mores cookies are perfect for summer parties, weekend baking, holiday dessert trays, or honestly just a random Tuesday when you want something extra special. I’ve made them for kids, adults, cookie swaps, and movie nights, and every single time they disappear fast. If you want a cookie recipe that feels playful and impressive without being hard to make, this one is for you.
Quick Recipe Info Card
Prep Time: 20 minutes
Cook Time: 12 minutes
Total Time: 32 minutes, plus 30 minutes chill time
Servings: 12 large cookies
Difficulty: Easy
Why You’ll Love It
- It gives you all the flavor of a classic campfire s’more in a thick, soft cookie.
- The texture is incredible: crisp edges, chewy centers, gooey marshmallow, and melty chocolate.
- These smores cookies look bakery-worthy but use simple, familiar ingredients.
- They’re perfect for parties, potlucks, bake sales, and holiday dessert platters.
- You can make the dough ahead, which is so helpful for busy weeks or entertaining.
- The recipe is easy to customize with different chocolates, crackers, or marshmallow styles.
- They photograph beautifully, making them ideal for Pinterest-worthy baking ideas.
Nutritional Benefits and Adaptable Variations
- Each cookie offers a satisfying dessert portion, so a little goes a long way.
- Milk chocolate and semisweet chocolate provide a small amount of iron and a rich flavor that helps satisfy sweet cravings.
- Using real graham crackers adds that classic honey-cinnamon note without needing extra flavorings.
- You can swap in dark chocolate for a deeper flavor and a slightly less sweet finish.
- For a gluten-free version, use a quality 1:1 gluten-free flour blend and gluten-free graham-style crackers.
- You can make them extra decadent with chopped chocolate chunks instead of standard chips.
- Mini marshmallows work best, but marshmallow bits or halved large marshmallows can also be used.
- For a nutty twist, add chopped pecans or walnuts for crunch and balance.
Ingredients
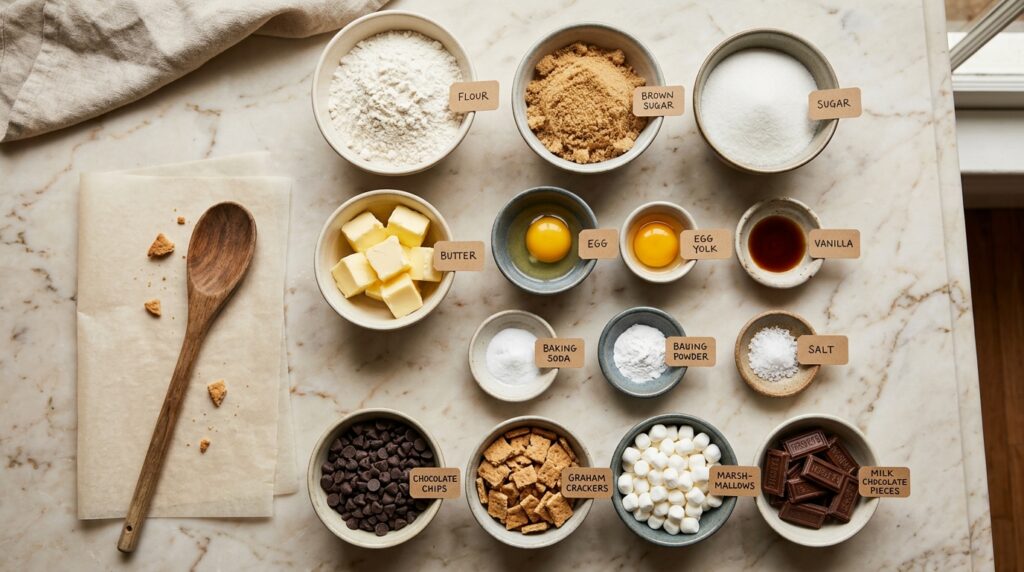
Dry Ingredients
- 2 1/4 cups all-purpose flour
- 1 teaspoon baking soda
- 1/2 teaspoon baking powder
- 1/2 teaspoon fine sea salt
Wet Ingredients
- 3/4 cup unsalted butter, softened
- 3/4 cup packed light brown sugar
- 1/2 cup granulated sugar
- 1 large egg
- 1 large egg yolk
- 2 teaspoons vanilla extract
Mix-Ins
- 1 cup semisweet chocolate chips
- 1 cup mini marshmallows
- 3/4 cup chopped graham crackers
- 2 standard milk chocolate bars, chopped into chunks
For Topping
- Extra mini marshmallows
- Extra chocolate chips
- Extra milk chocolate bar pieces
- A few extra graham cracker crumbs for garnish, optional
Step-by-Step Instructions
- Preheat and prepare the pans. Preheat your oven to 350°F. Line two baking sheets with parchment paper. This helps prevent sticking and makes cleanup easier too.
- Whisk the dry ingredients. In a medium bowl, whisk together the flour, baking soda, baking powder, and salt. Set the bowl aside.
- Cream the butter and sugars. In a large mixing bowl, beat the softened butter, brown sugar, and granulated sugar until the mixture looks light and fluffy, about 2 to 3 minutes. This step helps create that soft, thick cookie texture.
- Add the egg, yolk, and vanilla. Mix in the egg, egg yolk, and vanilla extract until fully combined. Scrape down the bowl so everything blends evenly.
- Combine wet and dry. Add the dry ingredients to the wet ingredients and mix just until no streaks of flour remain. Don’t overmix here or the cookies can turn out dense instead of soft.
- Fold in the good stuff. Gently stir in the chocolate chips, chopped graham crackers, and most of the chopped milk chocolate. Add about 3/4 cup of the mini marshmallows to the dough, saving the rest for topping. The dough will be thick, and that’s exactly what you want.
- Chill the dough. Cover the bowl and chill the dough for 30 minutes. I really recommend not skipping this step because it helps the smores cookies stay thick and keeps the marshmallow from spreading too much.
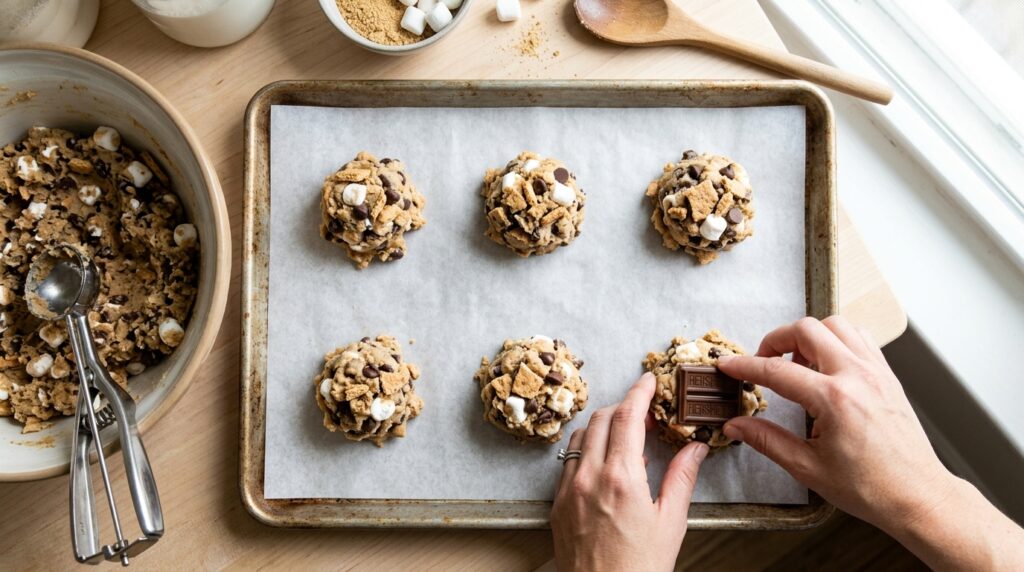
- Scoop and shape. Scoop large portions of dough, about 3 tablespoons each, onto the prepared baking sheets. Leave plenty of space between each cookie. Press a few extra chocolate chips, marshmallows, and milk chocolate chunks onto the tops for that bakery-style look.
- Bake until just golden. Bake for 11 to 13 minutes, or until the edges are lightly golden and the centers still look slightly underdone. That soft center is what gives you the best chewy texture once the cookies cool.
- Finish while warm. As soon as the cookies come out of the oven, gently press an extra piece of milk chocolate onto the tops if you want that dramatic melted finish. Let the cookies cool on the pan for 10 minutes before moving them to a wire rack. If any marshmallow spills over the edge, you can use a spoon to nudge it back into shape while it’s still warm.
- Serve and enjoy. These are best served slightly warm when the chocolate is melty and the marshmallow is soft and stretchy. If you want the full s’mores effect, pair one with a cold glass of milk or a hot coffee.
Tips, Serving Suggestions & Substitutions
- Use room temperature butter: It creams more smoothly with the sugar and gives you better texture.
- Chill the dough: This is one of my best cookie tips for thick smores cookies that don’t overspread.
- Save mix-ins for the top: Pressing a few chocolate chunks and marshmallows onto each dough ball makes the finished cookies look extra beautiful.
- Watch the bake time closely: Slightly underbaked centers are ideal because the cookies continue setting on the pan.
- Use chopped chocolate bars: They melt differently than chips and give you those gorgeous chocolate pools.
- Serving idea: Turn these into ice cream sandwiches with vanilla ice cream for an over-the-top summer dessert.
- For smaller cookies: Scoop 1 1/2 tablespoon portions and reduce the bake time to 9 to 10 minutes.
- Substitute dark chocolate: Great if you prefer a richer, less sweet cookie.
- Try cinnamon graham crackers: They add another cozy layer of flavor.
- Want a cleaner look? Keep marshmallows mostly tucked into the dough and only add a few on top.
Nutrition Information
| Nutrient | Per Serving |
|---|---|
| Calories | 312 |
| Carbohydrates | 41g |
| Protein | 3g |
| Fat | 16g |
| Saturated Fat | 9g |
| Sugar | 25g |
| Fiber | 1g |
| Sodium | 168mg |
Nutrition values are approximate and can vary based on ingredient brands, cookie size, and substitutions.
Storage & Make-Ahead Tips
If you somehow have leftovers, store your smores cookies in an airtight container at room temperature for up to 3 days. To keep them soft, I like to place a small piece of bread in the container. It’s an old trick, but it really works.
For longer storage, refrigerate the cookies for up to 5 days, though I think the texture is best at room temperature or gently rewarmed. Just microwave a cookie for 8 to 10 seconds and the marshmallow gets soft and gooey again.
You can also freeze the baked cookies for up to 2 months. Wrap them well and thaw at room temperature before serving. If you want to plan ahead, freeze scooped portions of cookie dough on a tray, then transfer them to a freezer bag. Bake straight from frozen, adding 1 to 2 extra minutes to the bake time. This is one of my favorite make-ahead baking ideas because it means fresh s’mores cookies are always within reach.
FAQ Section
1. Why did my marshmallows melt out of the cookies?
That usually happens when too many marshmallows are left exposed on the outside of the dough. Try tucking most of them into the center and only placing a few on top. Chilling the dough also helps a lot.
2. Can I make these smores cookies without chilling the dough?
You can, but I really don’t recommend it. The chill time helps the cookies hold their shape, stay thick, and bake more evenly. Without it, they may spread too much.
3. What kind of chocolate works best?
I love using a mix of semisweet chocolate chips and chopped milk chocolate bars. The chips add structure, while the chopped bars melt into those gooey pockets that make the cookies feel extra special.
4. Can I use large marshmallows instead of mini marshmallows?
Yes, just cut them into smaller pieces with lightly greased kitchen scissors. Mini marshmallows are easier to work with, but large marshmallows can absolutely work in a pinch.
5. How do I get bakery-style cookies that look like the photo?
Use large dough scoops, save some mix-ins for the top, and press extra chocolate pieces onto the cookies right after baking. That gives you the thick, gooey, picture-perfect finish everyone loves.
Final Thoughts
If you love fun baking ideas that feel both nostalgic and totally crowd-pleasing, these smores cookies deserve a spot at the top of your list. They’re gooey, chocolatey, a little messy in the best possible way, and honestly just plain joyful to make and eat. I love that they bring all the magic of a campfire s’more into a cookie that’s easy enough for any home baker to pull off.
If you try this recipe, I’d love to hear how it turned out for you. Leave a comment with your favorite twist, share it with a friend who loves cookies, and don’t forget to save it to Pinterest so you can come back to it whenever the craving hits. These s’mores cookies are too good to make just once.