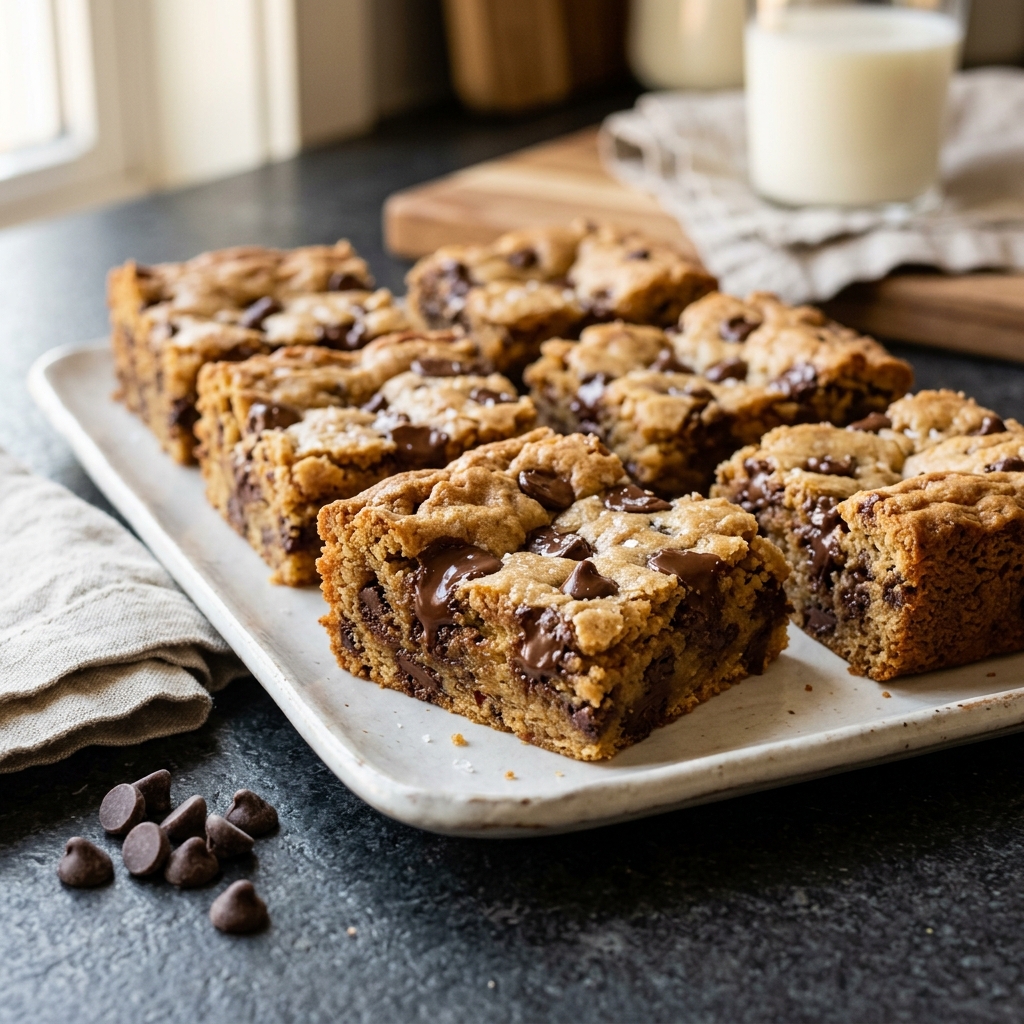
If you’re looking for easy fall treats that feel cozy, nostalgic, and completely dependable, these Chewy Chocolate Chip Cookie Bars are one of my favorite things to bake. They have that soft, golden cookie base, plenty of chocolate in every bite, and the kind of thick, chewy texture that makes it very hard to stop at just one square.
I love cookie bars because they give you everything you want from homemade cookies without the extra step of scooping multiple batches. You simply mix the dough, spread it into a pan, bake, and slice. The result is rich and buttery with lightly crisp edges, a tender center, and chocolate chips scattered all the way through.
These bars are especially perfect when your kitchen starts to feel like fall and you want something simple to share. I make them for casual weekends, after-school snacks, potlucks, and those evenings when you want dessert but do not want anything fussy. If you love classic chocolate chip cookies, I think you’re going to come back to this recipe again and again.
Quick Recipe Info
| Prep Time | 15 minutes |
| Cook Time | 28 minutes |
| Total Time | 43 minutes |
| Servings | 16 bars |
| Difficulty | Easy |
Why You’ll Love It
- You get all the flavor of classic chocolate chip cookies in an easier, one-pan format.
- The texture is soft, thick, and chewy with just a little crispness around the edges.
- No chilling is required, so this recipe comes together quickly.
- These bars slice neatly, making them great for sharing at gatherings or packing into lunchboxes.
- They’re one of those reliable fall treats that work for everything from weeknight dessert to holiday baking trays.
- You can easily customize them with nuts, different chocolate, or a touch of warm spice.
Nutritional Benefits and Adaptable Variations
A simple homemade dessert
These cookie bars are definitely a treat, but one nice thing about baking at home is that you know exactly what goes into them. You’re working with familiar pantry ingredients like flour, butter, eggs, brown sugar, and chocolate chips. That gives you control over portion size, sweetness, and any ingredient swaps you may want to make. As always, the nutrition information below is an estimate and should be treated as general guidance rather than medical advice.
Easy ways to change them up
If you want to make these bars feel even more like fall treats, you can add a small pinch of cinnamon to the dough for warmth. Chopped toasted pecans or walnuts add crunch and balance the sweetness beautifully. You can also swap some of the semi-sweet chocolate chips for dark chocolate chunks or milk chocolate chips, depending on the flavor you like best. For a slightly deeper caramel note, dark brown sugar works well in place of light brown sugar.
Ingredients
Dry ingredients
- 2 1/4 cups all-purpose flour
- 1 teaspoon baking soda
- 1 teaspoon fine salt
Wet ingredients
- 3/4 cup unsalted butter, melted and slightly cooled
- 1 cup packed light brown sugar
- 1/2 cup granulated sugar
- 2 large eggs
- 2 teaspoons vanilla extract
Chocolate
- 1 1/2 cups semi-sweet chocolate chips, plus 1/4 cup extra for topping
Step-by-Step Instructions
[INSERT PROCESS IMAGE HERE]
- Preheat your oven to 350°F. Line a 9×9-inch baking pan with parchment paper, leaving a little overhang so the bars are easy to lift out later.
- In a medium bowl, whisk together the flour, baking soda, and salt. Set that aside while you mix the wet ingredients.
- In a large bowl, whisk the melted butter, brown sugar, and granulated sugar until the mixture looks glossy and well combined. Add the eggs and vanilla, then whisk again until smooth.
- Add the dry ingredients to the wet ingredients and stir just until you no longer see dry streaks of flour. Do not overmix if you want that tender, chewy texture.
- Fold in 1 1/2 cups of the chocolate chips. The dough will be thick, soft, and a little sticky.
- Spread the dough evenly into the prepared pan. Use a spatula or lightly damp fingers to press it into the corners. Sprinkle the remaining 1/4 cup chocolate chips over the top for that bakery-style finish.
- Bake for 26 to 30 minutes, or until the top is golden and the edges are lightly browned. The center should look just set. Be careful not to overbake, because that is the secret to keeping these bars chewy.
- Let the bars cool completely in the pan before lifting them out and slicing into 16 squares. If you cut them too early, they can fall apart while still warm.
Tips, Serving Suggestions & Substitutions
Tips
The most important tip is to pull the bars from the oven when the center looks just set. A slightly underbaked center will firm up as it cools and gives you that soft, chewy bite.
Measure your flour carefully so the bars do not turn out dry. I also like to use parchment paper because it makes cleanup easier and helps you lift the bars out cleanly for slicing.
Serving Suggestions
These are wonderful on their own with coffee, tea, or cold milk. If you want to dress them up for dessert, serve a bar slightly warm with a scoop of vanilla ice cream. For gatherings, I like to cut them into smaller bite-size squares and arrange them on a simple platter.
Substitutions
You can use dark chocolate chips for a richer flavor or milk chocolate chips for a sweeter bar. Light brown sugar can be replaced with dark brown sugar for a deeper taste. If you want a little texture, stir in up to 3/4 cup chopped toasted nuts along with the chocolate chips.
Nutrition Information
| Serving Size | 1 bar |
| Calories | 245 |
| Carbohydrates | 33 g |
| Protein | 3 g |
| Fat | 12 g |
| Fiber | 1 g |
| Sugar | 21 g |
| Sodium | 170 mg |
Nutrition values are approximate estimates per serving and can vary based on specific ingredients used.
Storage & Make-Ahead Tips
Room temperature: Store the cooled bars in an airtight container for up to 4 days. I like to keep a sheet of parchment between layers if I’m stacking them.
Refrigerator: You can refrigerate them for a slightly longer shelf life, but I prefer bringing them back to room temperature before serving so the texture softens again.
Freezer: Wrap individual bars or the whole slab tightly and freeze for up to 2 months. Thaw at room temperature before eating.
Make-ahead tip: These bars are a great bake-a-day-ahead dessert. In fact, I think the chewy texture gets even better after they have fully cooled and rested for a few hours.
FAQ
Why are my cookie bars dry?
Dry bars usually come from too much flour or too much baking time. Measure the flour carefully and remove the pan from the oven when the center is just set.
Can I use a 9×13-inch pan instead?
Yes, but the bars will be thinner and will bake faster. Start checking a few minutes early so they do not overbake.
Can I add nuts or other mix-ins?
Absolutely. Chopped pecans or walnuts work especially well. Just keep the total add-ins moderate so the bars still hold together nicely.
Do I need to chill the dough?
No, this recipe is designed to be baked right away. That is one reason I love it for quick fall treats and last-minute dessert cravings.
How do I know when they are done baking?
Look for golden edges and a top that appears set. The center should not look wet, but it should still be a little soft for the best chewy texture.
Final Thoughts
These Chewy Chocolate Chip Cookie Bars are the kind of recipe I reach for when I want something comforting, simple, and guaranteed to disappear fast. They’re unfussy, deeply satisfying, and perfect for sharing all season long. If you make them, I’d love for you to leave a comment, share the recipe with a friend, and save it to Pinterest for your next batch of fall treats.
Chewy Chocolate Chip Cookie Bars
Equipment
- 1 9x9-inch baking pan lined with parchment paper
- 1 mixing bowl medium
- 1 mixing bowl large
- 1 Whisk
- 1 spatula
Ingredients
Dry ingredients
- 2 1/4 cups all-purpose flour
- 1 teaspoon baking soda
- 1 teaspoon fine salt
Wet ingredients
- 3/4 cup unsalted butter melted and slightly cooled
- 1 cup light brown sugar packed
- 1/2 cup granulated sugar
- 2 large eggs
- 2 teaspoons vanilla extract
Chocolate
- 1 1/2 cups semi-sweet chocolate chips
- 1/4 cup semi-sweet chocolate chips for topping
Instructions
- Preheat the oven to 350°F. Line a 9x9-inch baking pan with parchment paper.
- In a medium bowl, whisk together the flour, baking soda, and salt.
- In a large bowl, whisk the melted butter, brown sugar, and granulated sugar until glossy and combined.
- Add the eggs and vanilla to the butter mixture and whisk until smooth.
- Add the dry ingredients to the wet ingredients and stir just until combined.
- Fold in 1 1/2 cups of the chocolate chips.
- Spread the dough evenly into the prepared pan and top with the remaining 1/4 cup chocolate chips.
- Bake for 26 to 30 minutes, until the top is golden, the edges are lightly browned, and the center is just set.
- Cool completely in the pan, then lift out and cut into 16 bars.