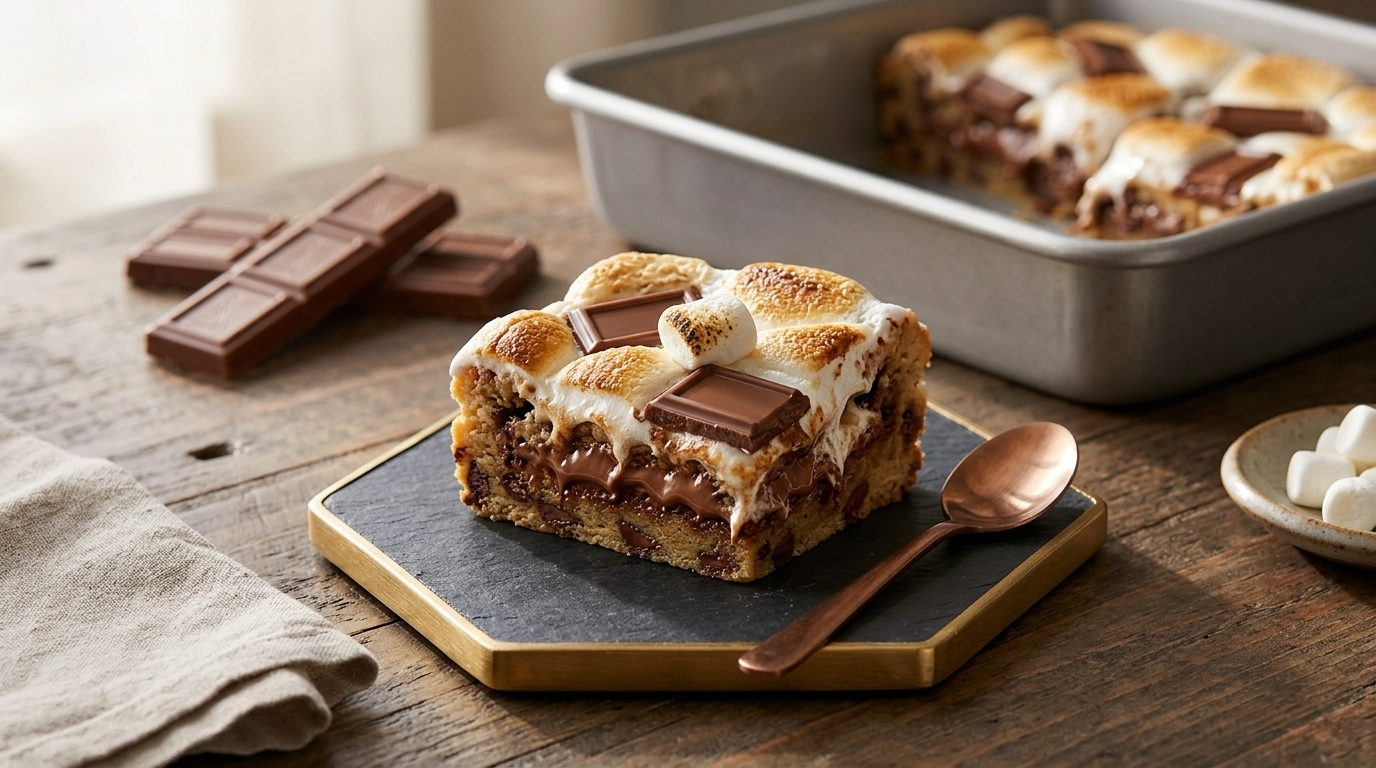
If you’ve been looking for easy chocolate desserts that impress everyone, I have a recipe you’re going to want to save immediately. These gooey s’mores chocolate chip cookie bars are rich, soft, melty, and just dramatic enough to make people think you spent way more time in the kitchen than you actually did. With a buttery cookie-bar base, pockets of melted chocolate, and a golden toasted marshmallow topping, they’re the kind of dessert that makes everyone pause after the first bite and ask, “Wait… did you make these?”
I love recipes like this because they strike that perfect balance between simple and unforgettable. You mix everything in a few bowls, press it into one pan, bake, top, and slice. That’s it. And visually, they’re a total showstopper too. Imagine a thick square bar on a rustic board, glossy melted chocolate tucked into the center, and marshmallows toasted right on top until they’re beautifully golden and slightly gooey. It’s cozy, nostalgic, and completely irresistible.
Whether you’re baking for a casual family movie night, a birthday table, a holiday dessert spread, or just because your chocolate cravings are very real today, this is one of those easy chocolate desserts that truly delivers. I make these when I want something crowd-pleasing, low-stress, and absolutely guaranteed to disappear fast.
Quick Recipe Info Card
Prep Time: 15 minutes
Cook Time: 25 minutes
Total Time: 40 minutes
Servings: 12 bars
Difficulty: Easy
Why You’ll Love It
- It’s a one-pan dessert, which means less mess and easier cleanup.
- You get three favorite treats in one bite: cookie bars, melted chocolate, and toasted marshmallows.
- The texture is incredible: soft in the center, lightly crisp at the edges, and gooey on top.
- It looks bakery-worthy, making it ideal when you want easy chocolate desserts that impress everyone without a complicated recipe.
- You can make it for parties, potlucks, sleepovers, or holiday dessert trays.
- The ingredients are basic, approachable, and easy to find at any grocery store.
Nutritional Benefits and Adaptable Variations
- While this is definitely a treat, using dark or semi-sweet chocolate adds a richer flavor and a small boost of antioxidants compared to overly sweet candy-style chocolate.
- Because these bars are rich and satisfying, a single square usually feels like a very generous portion.
- You can swap part of the all-purpose flour for whole wheat pastry flour for a slightly nuttier flavor and a bit more fiber.
- If you need a gluten-free version, use a trusted 1:1 gluten-free baking flour and gluten-free graham-style crumbs.
- For a deeper chocolate flavor, use chopped dark chocolate instead of milk chocolate on top.
- If you love salty-sweet desserts, add a light sprinkle of flaky sea salt right before serving.
- You can also stir in chopped pecans, walnuts, or even a swirl of peanut butter if you want to customize the bars for different occasions.
Ingredients
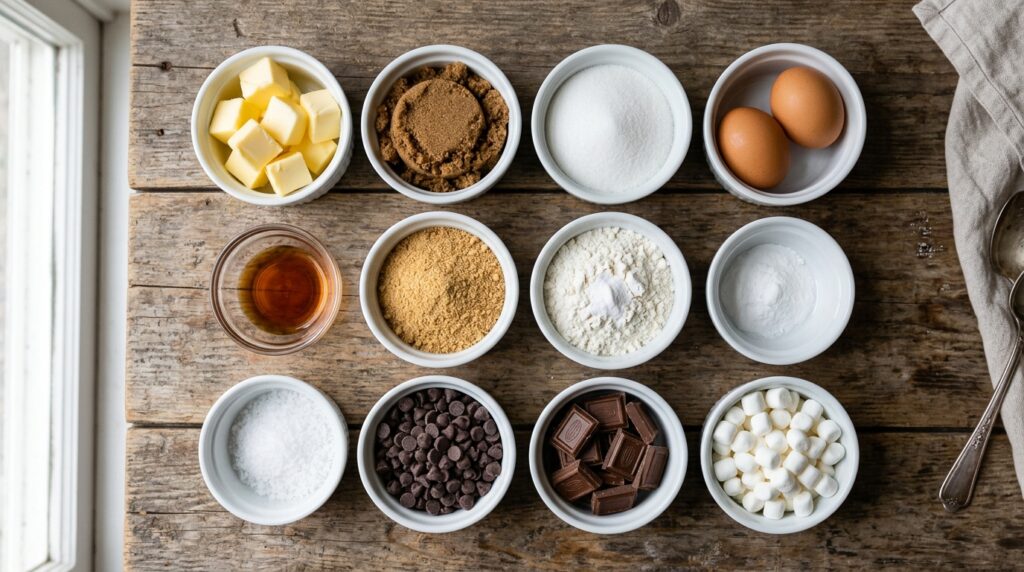
For the Cookie Bar Base
- 1 cup unsalted butter, melted and slightly cooled
- 1 cup packed light brown sugar
- 1/2 cup granulated sugar
- 2 large eggs, room temperature
- 2 teaspoons vanilla extract
- 2 cups all-purpose flour
- 1 cup graham cracker crumbs
- 1 teaspoon baking soda
- 1/2 teaspoon fine sea salt
- 1 1/2 cups semi-sweet chocolate chips
For the Topping
- 2 cups mini marshmallows
- 2 milk chocolate bars, broken into squares
Optional Finishing Touch
- Flaky sea salt for sprinkling
Step-by-Step Instructions
- Preheat and prep the pan. Preheat your oven to 350°F. Line a 9×13-inch baking pan with parchment paper, leaving a little overhang on the sides so you can lift the bars out easily later.
- Mix the wet ingredients. In a large bowl, whisk together the melted butter, brown sugar, and granulated sugar until smooth and glossy. Add the eggs and vanilla extract, then whisk again until fully combined.
- Combine the dry ingredients. In a separate bowl, stir together the flour, graham cracker crumbs, baking soda, and sea salt. This little step helps everything bake evenly and keeps you from overmixing later.
- Make the dough. Add the dry ingredients to the wet ingredients and stir just until no dry streaks remain. Fold in the semi-sweet chocolate chips. The dough will be thick, soft, and a little sticky.
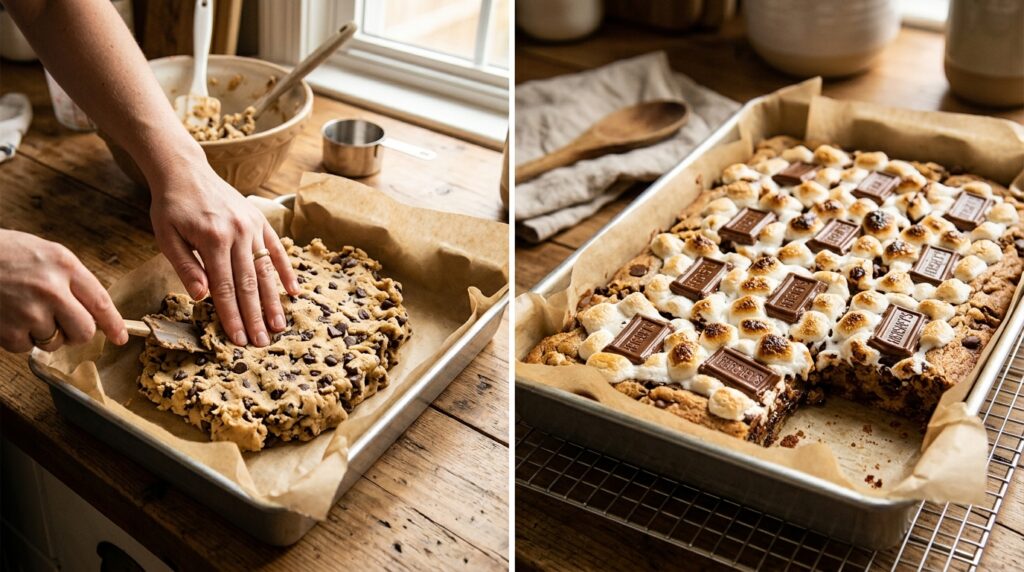
- Press into the pan. Transfer the dough to your prepared pan and press it into an even layer. I like to lightly dampen my fingertips or use an offset spatula to make this easier.
- Bake the base. Bake for 18 to 20 minutes, or until the edges are lightly golden and the center looks almost set. You do not want to overbake here because the bars will go back into the oven with the topping.
- Add the topping. Remove the pan from the oven and quickly scatter the mini marshmallows over the top. Tuck the chocolate bar squares across the surface so every slice gets some melty chocolate. Return the pan to the oven for 5 to 7 more minutes, until the marshmallows puff up and turn golden. If you want a more toasted top, broil for 20 to 30 seconds very carefully.
- Cool and slice. Let the bars cool in the pan for at least 20 minutes before lifting them out. Slice into 12 bars and, if you like, finish with a tiny sprinkle of flaky sea salt. Serve warm for maximum gooeyness, or let them cool completely for cleaner slices.
Tips, Serving Suggestions & Substitutions
- Don’t overbake the base: The secret to soft, bakery-style bars is pulling them from the oven when the center is just barely set.
- Use chopped chocolate for extra melt: Chocolate bars create those gorgeous puddles on top, but chopped chocolate also works beautifully if that’s what you have.
- Want thicker bars? Bake the recipe in a slightly smaller pan and add a few extra minutes to the baking time.
- Serving idea: These are amazing slightly warm with a scoop of vanilla ice cream or a drizzle of chocolate sauce.
- For a campfire-inspired finish: Add a dusting of crushed graham crackers over the marshmallows right after baking.
- Substitute option: Swap semi-sweet chips for dark chocolate chips, peanut butter chips, or chunks of your favorite candy bar.
- Need a nut-free party dessert? This recipe is naturally easy to keep nut-free as long as your chocolate and graham ingredients are certified nut-free.
- For a more grown-up version: Use dark chocolate and flaky salt for a richer, less sweet flavor profile.
Nutrition Information
| Nutrition | Per Serving |
|---|---|
| Calories | 368 |
| Carbohydrates | 49g |
| Protein | 4g |
| Fat | 18g |
| Saturated Fat | 10g |
| Fiber | 2g |
| Sugar | 31g |
| Sodium | 210mg |
Nutrition values are approximate and can vary depending on the exact brands and substitutions you use.
Storage & Make-Ahead Tips
These bars store really well, which makes them perfect for parties and planning ahead. Keep them in an airtight container at room temperature for up to 3 days. If your kitchen runs warm, you can refrigerate them for up to 5 days, though I recommend bringing them back to room temperature or warming them for a few seconds before serving so the chocolate softens again.
If you want to make them ahead, bake the cookie bar base earlier in the day, then add the marshmallows and chocolate topping shortly before serving and pop the pan back into the oven. You can also freeze fully baked bars. Wrap individual squares tightly and freeze for up to 2 months. Thaw at room temperature, then warm gently for that fresh-baked texture.
FAQ Section
1. Can I make these bars ahead for a party?
Yes, absolutely. These are one of my favorite easy chocolate desserts for entertaining because you can make them several hours ahead or even the day before. If you want the prettiest marshmallow topping, add that final layer shortly before serving.
2. What if I don’t have graham cracker crumbs?
You can crush whole graham crackers in a food processor or in a zip-top bag with a rolling pin. If you need a substitute, digestive biscuits or vanilla wafer crumbs work well too, though the flavor will be a little different.
3. How do I keep the marshmallows from burning?
Watch the bars closely during the final bake, especially if you broil them for extra color. Marshmallows go from golden to too dark very quickly, so stay near the oven and check after 20 seconds if using the broiler.
4. Can I use store-bought cookie dough?
You can, especially if you’re in a hurry. Press the dough into the pan, add a layer of graham cracker crumbs if you want that s’mores flavor, then finish with marshmallows and chocolate near the end of baking. Homemade gives the best texture, but the shortcut works.
5. Are these bars good for holiday dessert trays and bake sales?
They’re fantastic for both. They slice neatly once cooled, travel well, and look extra special with the toasted marshmallow top. If you want easy chocolate desserts that impress everyone at a gathering, this recipe is a reliable winner.
Final Thoughts
I truly love having recipes like this in my back pocket because they feel fun, comforting, and a little bit special without requiring a ton of effort. If you try these s’mores cookie bars, I’d love to hear how they turned out for you. Leave a comment, share the recipe with a fellow chocolate lover, and save it to Pinterest so you always have one of those easy chocolate desserts that impress everyone ready to go.