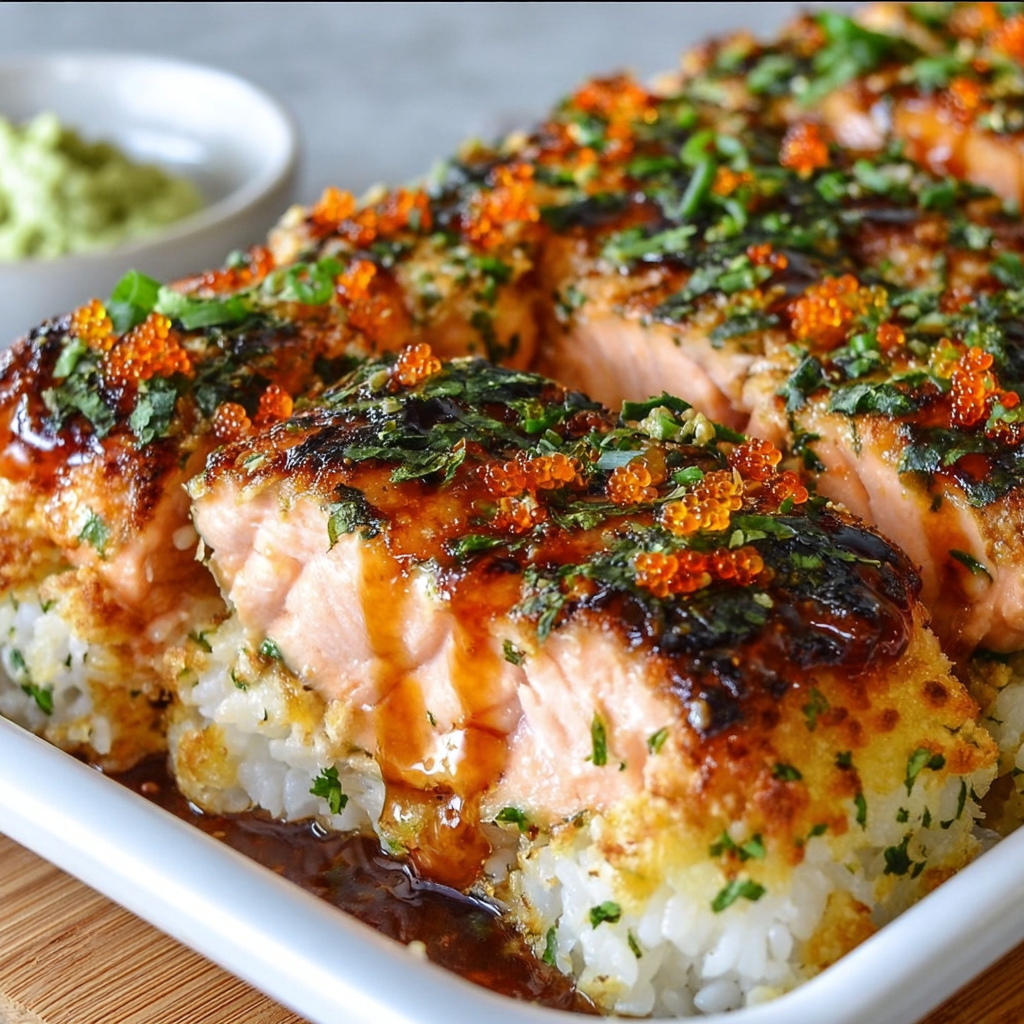
Welcome to Your New Favorite Comfort Dish: Sushi Bake!
Hey there, sushi lovers! If you’re anything like me, the idea of sushi might have always felt a bit intimidating—those beautiful rolls can seem tricky to master. But guess what? Today, I’m sharing an incredible dish that brings all the amazing flavors of sushi right to your oven: Sushi Bake! It’s a warm, comforting, and totally shareable version that really hits the spot and is much easier to prepare than rolling individual pieces. So roll up your sleeves, and let’s dive in!
Nutritional Benefits of Sushi Bake
Let’s chat about some of the lovely benefits of our Sushi Bake. First up, we’re using salmon—a real heart-healthy option packed with omega-3 fatty acids. These fats are great for your brain and may help keep your heart in tip-top shape! Plus, the sushi rice gives you that carb fix to fuel your energy, and with the addition of veggies like scallions and cilantro, you’re sneaking in some vitamins too! By making this at home, you also get to control the amount of mayo and sauces you use, keeping it as healthy as you want!
Adaptable Variations to Consider
- Swap the Protein: Not a fan of salmon? No problem! You can easily switch it up with shrimp, crab, or even tofu for a delicious vegetarian version.
- For a Japanese Twist: Incorporate other toppings like avocado, cucumber, or even some pickled ginger to make it more authentic!
- Gluten-Free Needs: Check the sauces you’re using; some teriyaki and eel sauces can have gluten. Opt for gluten-free versions to keep it safe.
- Spice it Up: Adjust the Sriracha depending on your spice tolerance. You can also add some sliced jalapeños for an extra kick if you’re feeling brave!
Easy Step-by-Step Sushi Bake Recipe
What You’ll Need
- 2 cups sushi rice (short grain rice)
- 3 tablespoons rice vinegar
- 1 tablespoon sugar
- 1 teaspoon salt
- 12 oz fresh salmon fillet, skin removed and cut into chunks
- 1/2 cup mayonnaise
- 2-3 tablespoons Sriracha sauce (adjust to preferred spice level)
- 1/4 cup eel sauce (unagi sauce) or teriyaki sauce
- 2 tablespoons tobiko or masago (fish roe)
- 3 scallions (green onions), finely chopped
- 1 tablespoon toasted sesame seeds
- 2 tablespoons fresh cilantro or parsley, chopped
- Optional: Nori sheets or furikake seasoning
- Soy sauce (for serving)
Instructions
- Start by rinsing the sushi rice under cold water until the water runs clear. This helps get rid of excess starch, so your rice turns out perfectly!
- Cook the rice according to the package instructions or, if you’re lucky enough to have a rice cooker, use that—it makes everything easier!
- While the rice is cooking, let’s make the sushi seasoning. In a small bowl, combine the rice vinegar, sugar, and salt. Stir until everything’s dissolved. It’s super simple!
- Once your rice is done, transfer it to a large bowl and gently fold in the sushi seasoning. Allow this wonderful mixture to cool to room temperature.
- Preheat your oven to 375°F (190°C) while you prepare the next steps.
- Lightly oil or line a rectangular baking dish and evenly spread the seasoned sushi rice into the dish, pressing firmly to create a compact layer. If you want a little extra flavor, now’s the time to sprinkle some furikake or lay down nori sheets between rice layers.
- In a medium bowl, mix together the mayonnaise and Sriracha until you’ve got a deliciously spicy mayo ready!
- Gently toss the salmon chunks in about half of your spicy mayo until they’re well coated, then spread the salmon mixture evenly over the rice layer in your baking dish. Drizzle the remaining spicy mayo on top for that extra creamy goodness!
- Pop the dish into your preheated oven and bake for about 12-15 minutes, until the salmon is cooked and everything is nicely bubbly.
- Once it’s done, take it out of the oven and sprinkle the chopped scallions, sesame seeds, fish roe, and chopped cilantro on top to make it look super inviting.
- Drizzle some eel sauce over the entire dish and on the serving plate for extra flavor and a tasty presentation.
- Cut into squares and serve immediately with soy sauce on the side. Enjoy every velvety bite!
Practical and Valuable Tips
- Storing leftovers? You can keep any extra sushi bake in an airtight container in the fridge for up to 3 days—just reheat in the oven or microwave for the best results!
- If you have leftover sushi rice, you can also use it for making onigiri or sushi rolls for a fun twist!
- When cutting into squares, let it sit for a minute out of the oven so it firms up a bit—makes slicing easier!
Equipment Needed
Here’s what you’ll want to have on hand before starting your sushi bake adventure:
- A large mixing bowl (for your rice)
- A small bowl (for the sushi seasoning and spicy mayo)
- A rectangular baking dish (9×13 is perfect!)
- A rice cooker or pot (for cooking the rice)
- A spatula or large spoon (for mixing and spreading)
- A sharp knife (for slicing after baking)
- Oven mitts (safety first!)
Frequently Asked Questions
- Can I use brown rice instead of sushi rice? While it’s possible, the texture and taste won’t be quite the same since sushi rice is stickier and shorter grain.
- What if I’m allergic to seafood? You can make this with shredded chicken, cooked tofu, or even roasted veggies instead for a delicious alternative!
- How spicy is the spicy mayo? You can adjust the Sriracha according to your taste. Start with a little, add more as needed, and taste as you go!
- Can I prepare this ahead of time? Yes! You can prepare everything ahead—just assemble it and pop it in the oven right before you’re ready to serve.
- Is it okay to freeze leftovers? While it’s best enjoyed fresh, you can freeze leftovers wrapped tightly; just be mindful that the texture may change upon reheating.
Ready to Dig In?
Now that you have the ultimate guide to making a mouthwatering Sushi Bake, I can’t wait to hear how yours turns out! Don’t forget to share your creation with friends on social media, or even follow me on Pinterest for more comfort food ideas that will make your kitchen the place to be. Enjoy!