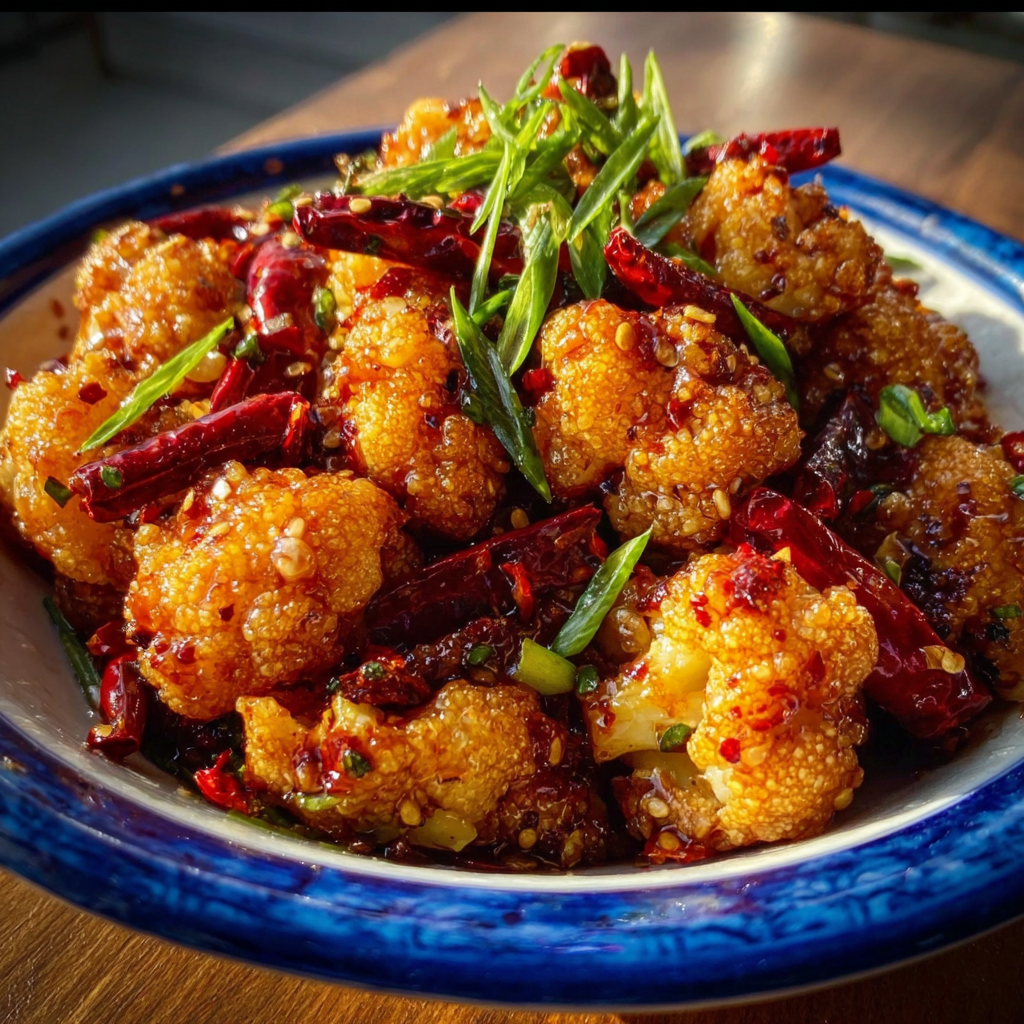
Discover the Joy of Making Crispy Spicy Cauliflower at Home
Hey there! If you’re anything like me, you love a dish that’s crunchy, flavorful, and packs just the right amount of heat. I recently tried making this crispy, spicy cauliflower recipe, and it quickly became one of my favorites. It’s perfect as a snack, appetizer, or even a side dish to your meal. I’m excited to share the easy steps and little secrets that make this dish stand out in your kitchen!
Nutritional Benefits of Cauliflower
Cauliflower isn’t just delicious—it’s also super healthy! It’s packed with vitamins C and K, which help support your immune system and bone health. Plus, cauliflower is high in fiber, so it keeps your digestion happy. What I love most is that it’s low in calories but gives you a satisfying crunch when cooked right. When you fry it crispy, like in this recipe, pairing it with nutritious peanuts and fresh chilies makes for a tasty yet nourishing bite.
Adaptable Variations You’ll Enjoy
- Make it Gluten-Free: Use rice flour for coating to keep this recipe naturally gluten-free.
- Swap the Heat: Not a big fan of spicy? Cut the fresh red chilies or skip the Sichuan peppercorns. You can add a bit of honey or extra hoisin sauce for a touch of sweetness.
- Add More Veggies: Toss in some sliced bell peppers or snap peas in the stir-fry step for added crunch and color.
- Vegan Friendly: This recipe is naturally vegan, just watch for the type of hoisin sauce—most are vegan, but it’s good to double-check.
Step-by-Step Crispy Spicy Cauliflower Recipe
Ingredients
- 1 medium head cauliflower, cut into florets
- 1/2 cup rice flour or cornstarch (for coating)
- Vegetable oil or peanut oil for frying
- 8-10 dried red chilies
- 1-2 fresh red chilies, thinly sliced
- 4-5 scallions (green onions), sliced (white and green parts separated)
- 1/4 cup roasted peanuts
- 3 cloves garlic, minced
- 1-inch piece fresh ginger, minced
- 2 tbsp soy sauce (light soy sauce preferred)
- 1 tbsp Chinese black vinegar or rice vinegar
- 1 tbsp hoisin sauce or chili paste (optional)
- 1-2 tsp sugar
- 1/4 tsp Sichuan peppercorns (optional)
- 1 tbsp sesame seeds (for garnish)
- 1/4 cup water or vegetable broth
- 1 tbsp cornstarch mixed with 2 tbsp water (slurry for sauce thickening)
Instructions
- Wash your cauliflower and cut it into bite-sized florets. Make sure to pat them dry really well—that helps keep the coating nice and crispy.
- Toss the cauliflower florets in rice flour or cornstarch until they’re evenly coated. This will give that crunchy outer layer we’re aiming for.
- Heat your oil in a deep pan or wok to about 350°F (175°C). Fry the cauliflower in small batches for about 3-4 minutes until golden brown and crispy. Take them out and drain on some paper towels to remove excess oil.
- In a dry pan, lightly toast the dried red chilies and Sichuan peppercorns (if using) over medium heat for 1-2 minutes until aromatic. This step brings out amazing flavors—don’t skip it!
- Mix soy sauce, black vinegar, hoisin sauce or chili paste (if you’re using), sugar, and water or vegetable broth in a small bowl. Stir it all together and set aside.
- Heat 1-2 tablespoons of oil in a wok or skillet over medium-high heat. Add minced garlic, ginger, and the white parts of the scallions. Stir-fry for about 30 seconds until everything smells so good.
- Add the toasted dried chilies and stir briefly to mix.
- Pour in your sauce mixture and bring it to a simmer. Slowly add the cornstarch slurry bit by bit while stirring constantly. You’ll notice the sauce thickens and becomes shiny and sticky.
- Toss the fried cauliflower florets into the sauce gently, making sure every piece gets that beautiful spicy glaze.
- Add the roasted peanuts and sliced fresh red chilies, stirring one last time to combine everything.
- Turn off the heat and garnish with the green parts of the scallions and a sprinkle of sesame seeds for a fresh, nutty crunch.
- Serve immediately, ideally with steamed rice or simple noodles. Trust me, the combination is unbeatable!
Valuable Tips from My Kitchen
- Patting Dry is Key: Always dry your cauliflower well before coating; moisture will make the batter soggy instead of crispy.
- Oil Temperature Matters: Use a thermometer if you can. Too hot and the cauliflower will burn; too cool and it will soak up too much oil.
- Make Ahead Sauce: You can prepare the sauce a day before and store it in the fridge to save time later.
- Try Air Frying: Want a healthier version? Air fry the coated cauliflower at 400°F for about 15 minutes, shaking halfway through. Then continue with the sauce as usual.
- Leftovers Storage: Keep leftovers in an airtight container in the fridge for up to 2 days. Reheat in a hot pan to keep that crispy texture.
Equipment You’ll Need
- Medium-sized deep pan or wok (for frying and stir-frying)
- Mixing bowls
- Slotted spoon or spider strainer (to lift fried cauliflower from oil)
- Cooking thermometer (helpful but optional, for oil temperature)
- Measuring spoons and cups
- Wooden spoon or spatula for stir-frying
- Paper towels (for oil draining)
Frequently Asked Questions
- Can I bake the cauliflower instead of frying? Yes! Coat as usual and bake at 425°F for 20-25 minutes, turning halfway through, until golden and crispy.
- What can substitute dried red chilies? You can use chili flakes or fresh chilies, but dried chilies give a unique smoky flavor.
- Is it necessary to use Sichuan peppercorns? Not at all! They add a tingling spice, but if you don’t have them, you can skip or replace with black pepper.
- How spicy is this dish really? It can be adjusted easily! Remove the fresh chilies or reduce the chili paste if you prefer milder flavors.
- Can I prepare this ahead for a party? Yes, fry the cauliflower and prepare the sauce, but toss together just before serving to keep it crispy.
Give This Crispy Spicy Cauliflower a Try!
I truly hope you’ll enjoy making and sharing this recipe as much as I do. It’s a fun dish that brings a tasty kick and a satisfying crispiness to your table. If you try it out, don’t forget to save this recipe on Pinterest and share your photos or tips—I’d love to see your spins and hear how it turned out!