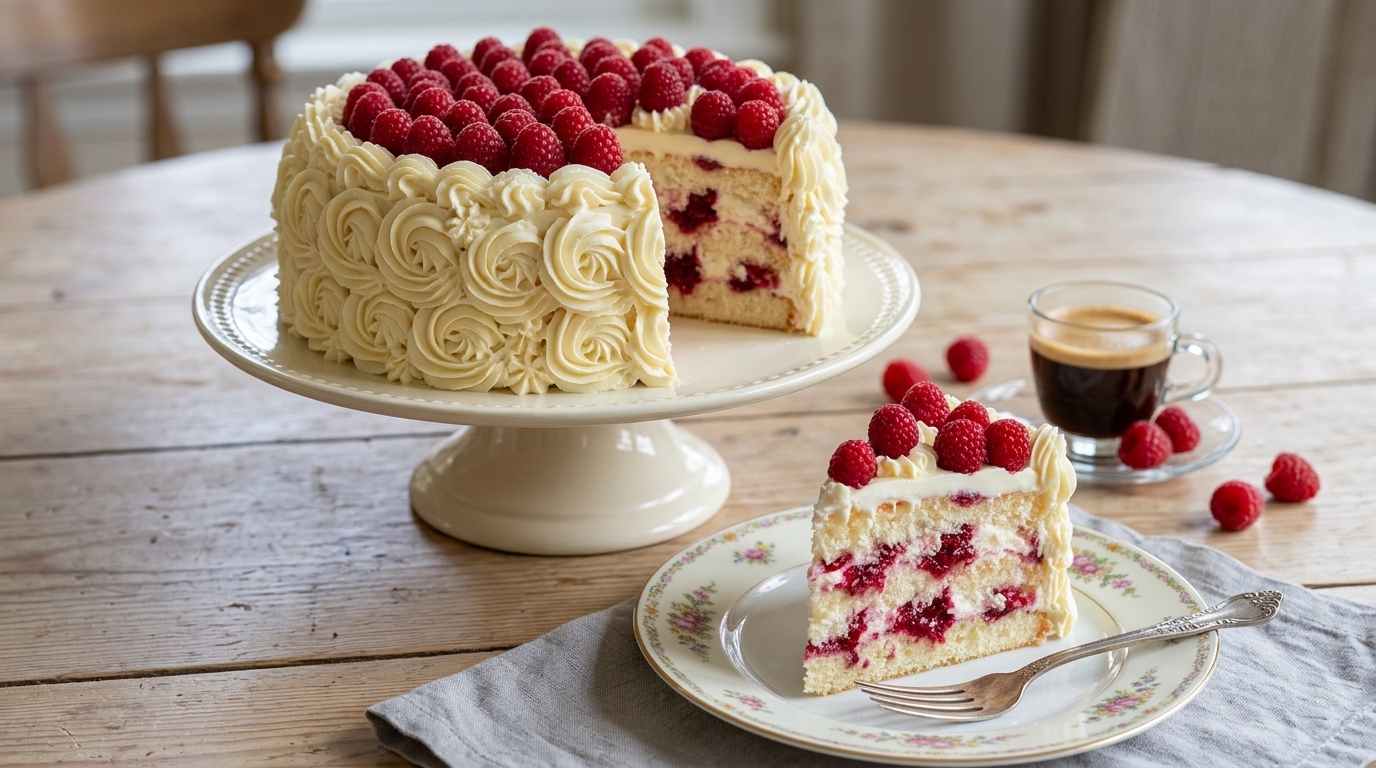
If you’ve been looking for a bakery-worthy White Chocolate Raspberry Dream Cake that feels special but is still absolutely doable in your own kitchen, you’re in the right place. This cake is soft, elegant, and full of that irresistible pairing of creamy white chocolate and bright, tangy raspberries. Every bite tastes a little fancy, but I promise the process is much more approachable than it looks.
What I love most about this recipe is how beautifully it balances flavors. The cake layers are tender and buttery, the raspberry filling adds a fresh pop of color and tartness, and the white chocolate frosting brings everything together with a smooth, sweet finish. It’s the kind of dessert that looks stunning on a cake stand, especially with fresh raspberries piled on top and swirls of frosting all around the sides.
If you’re planning a birthday, bridal shower, Valentine’s dessert, Easter table centerpiece, or just want a layer cake that makes everyone pause before that first slice, this White Chocolate Raspberry Dream Cake is such a lovely choice. Picture a tall cream-colored cake topped with jewel-like raspberries, with a slice showing off those gorgeous ruby streaks inside. It’s dramatic in the best way, and once you make it, I have a feeling it’ll become one of your signature desserts too.
Quick Recipe Info Card
Prep Time: 40 minutes
Cook Time: 28 minutes
Total Time: 2 hours 30 minutes (including cooling and assembly)
Servings: 12 slices
Difficulty: Intermediate
Why You’ll Love It
- It has a beautiful balance of sweet white chocolate and tart raspberry flavor.
- The soft, tender crumb feels like something from a high-end bakery.
- It’s perfect for birthdays, showers, holidays, and special weekend baking projects.
- The frosting pipes beautifully, so you can create an elegant finish without complicated decorating skills.
- Fresh raspberries on top make it naturally eye-catching and Pinterest-worthy.
- You can make parts of the recipe ahead, which makes assembly much less stressful.
- This White Chocolate Raspberry Dream Cake slices cleanly and looks gorgeous on a dessert table.
Nutritional Benefits and Adaptable Variations
- Raspberries add fiber, vitamin C, and a fresh fruity contrast to the richness of the cake.
- Using real raspberries for the filling gives you bright flavor without relying on artificial syrups.
- White chocolate adds creamy sweetness and a luxurious texture that makes a little slice feel satisfying.
- You can use frozen raspberries for the filling when fresh berries aren’t in season.
- For a slightly brighter flavor, add 1 to 2 teaspoons of lemon zest to the cake batter or frosting.
- If you prefer a tangier finish, swap part of the butter in the frosting for cream cheese.
- You can bake this recipe as cupcakes; just reduce the baking time to about 18 to 20 minutes.
- For a simpler version, bake it in two 9-inch pans instead of three 8-inch pans.
Ingredients
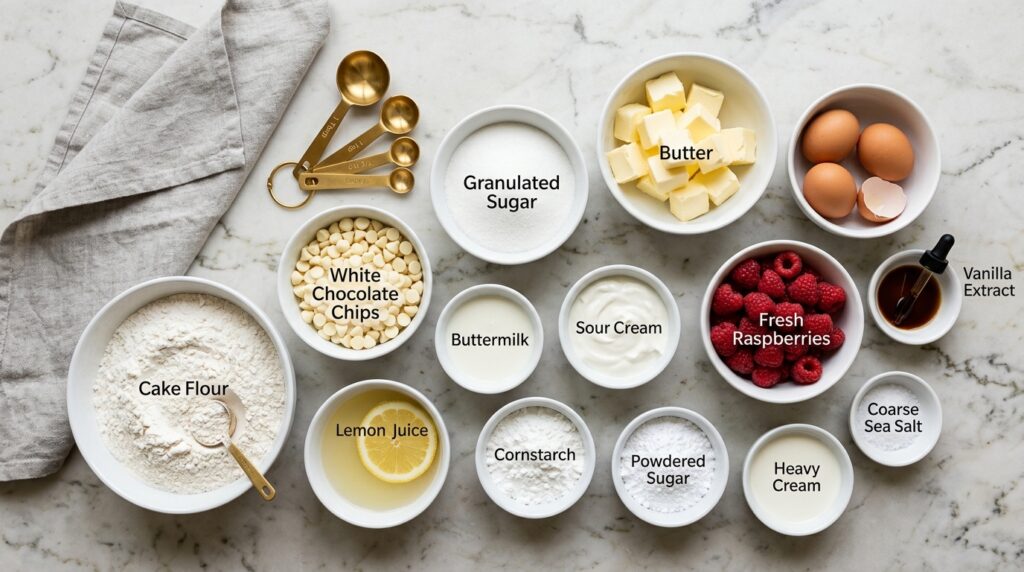
For the Cake Layers
- 2 3/4 cups cake flour
- 2 teaspoons baking powder
- 1/2 teaspoon baking soda
- 1/2 teaspoon fine sea salt
- 3/4 cup unsalted butter, softened
- 1 3/4 cups granulated sugar
- 4 large eggs, room temperature
- 2 teaspoons pure vanilla extract
- 4 ounces white chocolate, melted and cooled slightly
- 1 cup buttermilk, room temperature
- 1/3 cup sour cream, room temperature
For the Raspberry Filling
- 2 1/2 cups fresh or frozen raspberries
- 1/3 cup granulated sugar
- 1 tablespoon lemon juice
- 2 teaspoons cornstarch
- 2 tablespoons water
For the White Chocolate Frosting
- 1 1/2 cups unsalted butter, softened
- 6 ounces white chocolate, melted and cooled
- 4 1/2 to 5 cups powdered sugar
- 3 to 4 tablespoons heavy cream
- 2 teaspoons vanilla extract
- Pinch of salt
For Decorating
- 1 to 1 1/2 cups fresh raspberries
- White chocolate curls or shavings, optional
Step-by-Step Instructions
- Prep your pans and oven. Preheat your oven to 350°F. Grease and line three 8-inch round cake pans with parchment circles. This extra step makes releasing the cakes so much easier and helps keep the layers neat.
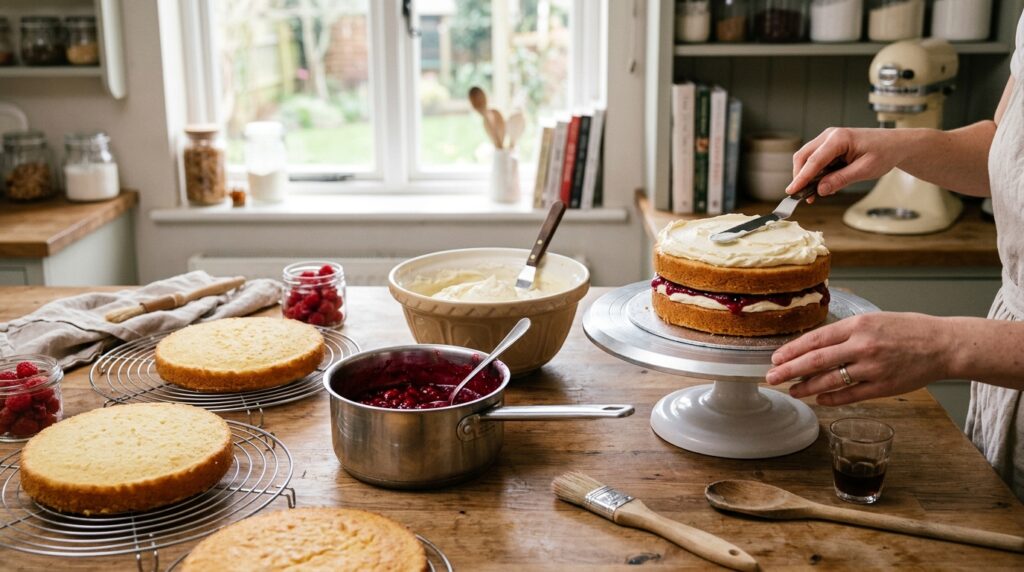
- Make the raspberry filling. In a small saucepan, combine the raspberries, sugar, and lemon juice over medium heat. Cook until the berries break down and release their juices, about 5 minutes. Stir together the cornstarch and water, then add it to the berries. Cook for another 1 to 2 minutes, stirring, until thickened. Transfer to a bowl and cool completely.
- Mix the dry ingredients. In a medium bowl, whisk together the cake flour, baking powder, baking soda, and salt. Set this aside while you make the batter.
- Cream the butter and sugar. In a large bowl, beat the softened butter and sugar until pale and fluffy, about 3 to 4 minutes. Don’t rush this step; it creates the airy base that gives this White Chocolate Raspberry Dream Cake its soft texture.
- Add the eggs and flavorings. Beat in the eggs one at a time, mixing well after each addition. Stir in the vanilla extract and the melted, slightly cooled white chocolate.
- Finish the batter. In a measuring cup, whisk together the buttermilk and sour cream. Add the dry ingredients to the butter mixture in three additions, alternating with the buttermilk mixture, beginning and ending with the dry ingredients. Mix just until combined. Overmixing can make the cake dense, so stop as soon as the batter looks smooth.
- Bake the layers. Divide the batter evenly between the prepared pans and smooth the tops. Bake for 24 to 28 minutes, or until the centers spring back lightly and a toothpick comes out with a few moist crumbs. Cool in the pans for 10 minutes, then turn the layers out onto wire racks to cool completely.
- Make the frosting. Beat the butter until creamy. Add the melted and cooled white chocolate, vanilla, and salt. Gradually beat in the powdered sugar, then add heavy cream a little at a time until the frosting is fluffy and spreadable. If it feels too soft, chill it for 10 to 15 minutes before decorating.
- Assemble the cake. Place one cake layer on your serving plate or cake board. Spread a layer of frosting around the outer edge to create a border, then spoon some cooled raspberry filling into the center. Top with the second layer and repeat. Add the final cake layer, then apply a thin crumb coat of frosting all over the cake. Chill for 15 to 20 minutes.
- Decorate and finish. Frost the cake with the remaining white chocolate frosting, smoothing it or piping decorative swirls around the sides and top. Finish with fresh raspberries and, if you like, white chocolate curls. Chill the cake for about 20 minutes before slicing for the cleanest layers.
Tips, Serving Suggestions & Substitutions
- Use room temperature ingredients: Butter, eggs, buttermilk, and sour cream blend more smoothly and create a finer crumb.
- Cool the white chocolate before adding it: If it’s too warm, it can melt the butter and change the texture of the frosting or batter.
- Strain the raspberry filling if you want: If you prefer a seedless filling, press the cooked berries through a fine-mesh sieve before cooling.
- Pair it with coffee or tea: This cake is incredible with espresso, black tea, or even a glass of sparkling rosé for celebrations.
- Try a lemon twist: Add lemon zest to the filling or frosting for a more citrusy, spring-inspired version.
- Swap the berries: Strawberries or blackberries also work well, though raspberries give the best tart contrast to white chocolate.
- Need a shortcut? Bake the layers one day and frost the next. The whole process feels much easier when broken up.
- For extra stability: Keep the cake chilled if your kitchen is warm, especially after piping decorative frosting swirls.
Nutrition Information
| Nutrient | Per Serving |
|---|---|
| Calories | 610 |
| Carbohydrates | 74g |
| Protein | 6g |
| Fat | 32g |
| Saturated Fat | 20g |
| Sugar | 52g |
| Fiber | 3g |
| Sodium | 210mg |
Nutrition values are estimates and can vary depending on the specific brands and ingredient substitutions you use.
Storage & Make-Ahead Tips
This White Chocolate Raspberry Dream Cake stores beautifully, which is one more reason I love making it for parties. Keep the finished cake covered in the refrigerator for up to 4 days. Because of the fruit filling and butter-based frosting, chilled storage is best. Before serving, let slices sit at room temperature for about 20 to 30 minutes so the frosting softens and the flavors really shine.
If you want to work ahead, bake the cake layers up to 2 days in advance. Wrap them tightly in plastic wrap once fully cooled, then store them in the refrigerator. You can also make the raspberry filling 3 days ahead and keep it chilled in an airtight container. The frosting can be made 1 day in advance; just bring it back to room temperature and re-whip before using.
For longer storage, freeze the unfrosted cake layers for up to 2 months. Wrap each layer well in plastic wrap and then foil. Thaw overnight in the refrigerator before assembling. This is such a helpful trick when you want the beauty of a celebration cake without doing everything in one day.
FAQ Section
1. Can I use frozen raspberries in this cake?
Yes, absolutely. Frozen raspberries work very well for the filling. You don’t even need to thaw them first; just cook them a minute or two longer until the mixture thickens properly.
2. Can I make this White Chocolate Raspberry Dream Cake the day before serving?
Yes. In fact, it’s a great make-ahead dessert. Assemble and frost the cake the day before, then store it covered in the refrigerator. Add the fresh raspberry topping closer to serving time for the prettiest finish.
3. Why is my white chocolate frosting too soft?
This usually happens if the melted white chocolate was too warm or if the kitchen is hot. Chill the frosting for 10 to 15 minutes, then beat it again. You can also add a little more powdered sugar if needed.
4. Can I use all-purpose flour instead of cake flour?
You can, but the texture will be slightly less delicate. If needed, use all-purpose flour and replace 2 tablespoons of flour per cup with cornstarch for a closer cake flour substitute.
5. How do I keep the raspberry filling from making the layers slide?
The trick is to cook the filling until thick, cool it completely, and pipe a frosting border around each layer before adding the filling. Chilling the cake after the crumb coat also helps everything stay in place.
Final Thoughts
I truly think this White Chocolate Raspberry Dream Cake is one of those recipes that makes people feel loved the moment it lands on the table. It’s elegant without being fussy, rich without being heavy, and every slice has that gorgeous contrast of creamy sweetness and bright berry flavor that keeps you going back for one more bite.
If you make it, I’d love to hear how it turned out for you. Leave a comment with your favorite variation, share it with a friend who loves beautiful layer cakes, and don’t forget to save it to Pinterest so you can come back to it for your next celebration. This is definitely the kind of cake worth making again and again.